> ## Documentation Index
> Fetch the complete documentation index at: https://docs.onyx.app/llms.txt
> Use this file to discover all available pages before exploring further.
# Cloudflare R2
> Access files from Cloudflare R2 buckets
## How it works
The R2 connector pulls in all documents from the specified Cloudflare R2 bucket.
It supports various file formats including PDF, DOC, DOCX, TXT, and more.
Documents are updated every **1** day.
## Setting up
### Authorization
Log into your Cloudflare dashboard. Navigate to "R2" in the sidebar and click on "Manage R2 API Tokens".
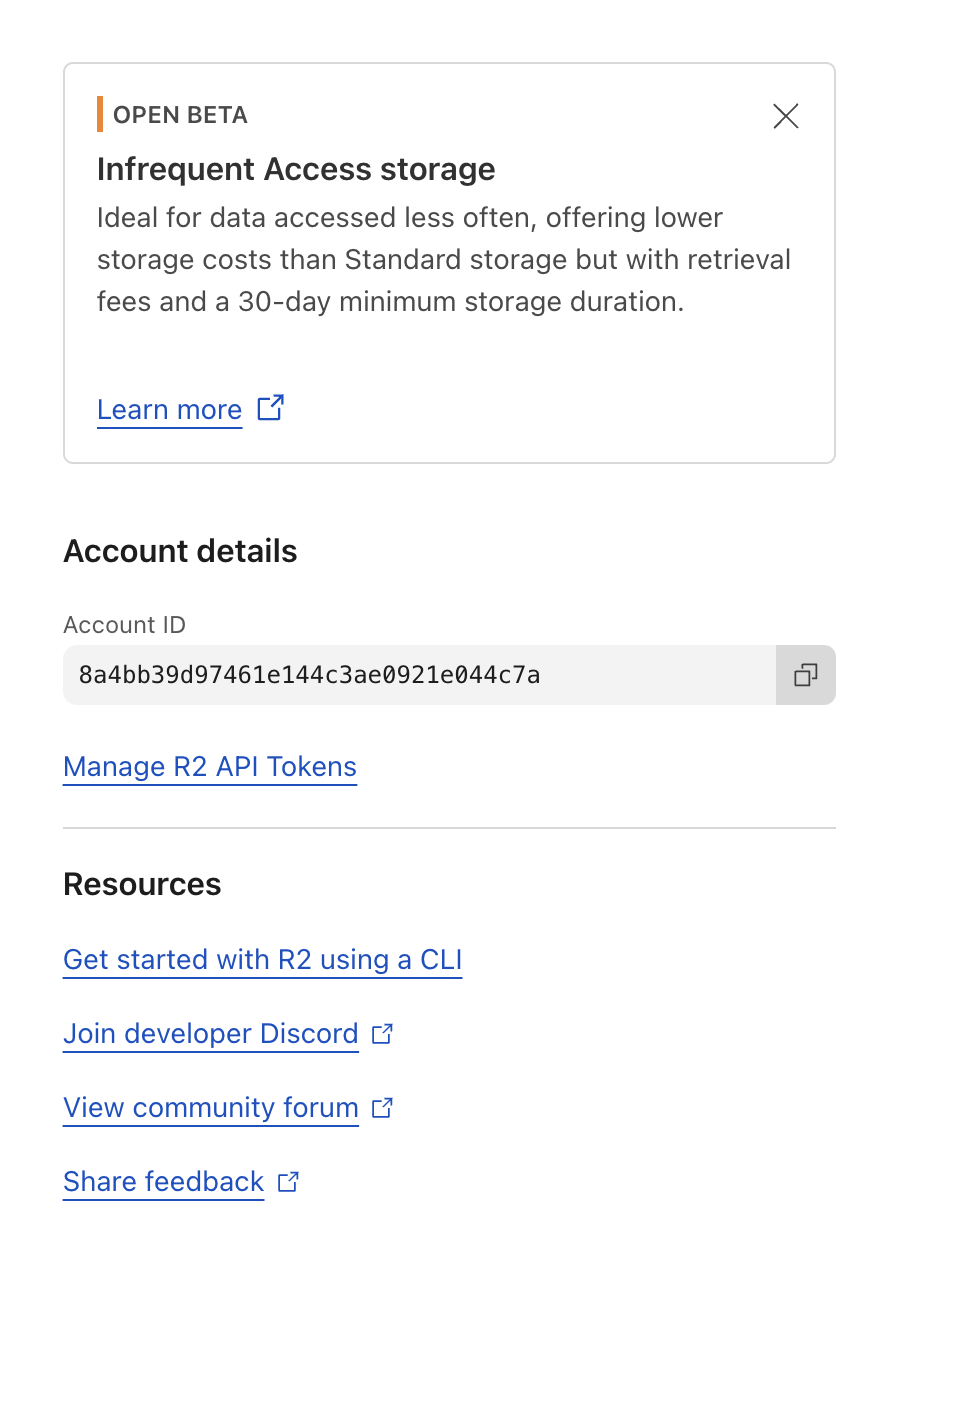 Click "Create API token".
 Give your token a name (e.g., "OnyxR2Connector") and select the appropriate permissions (Object Read only).
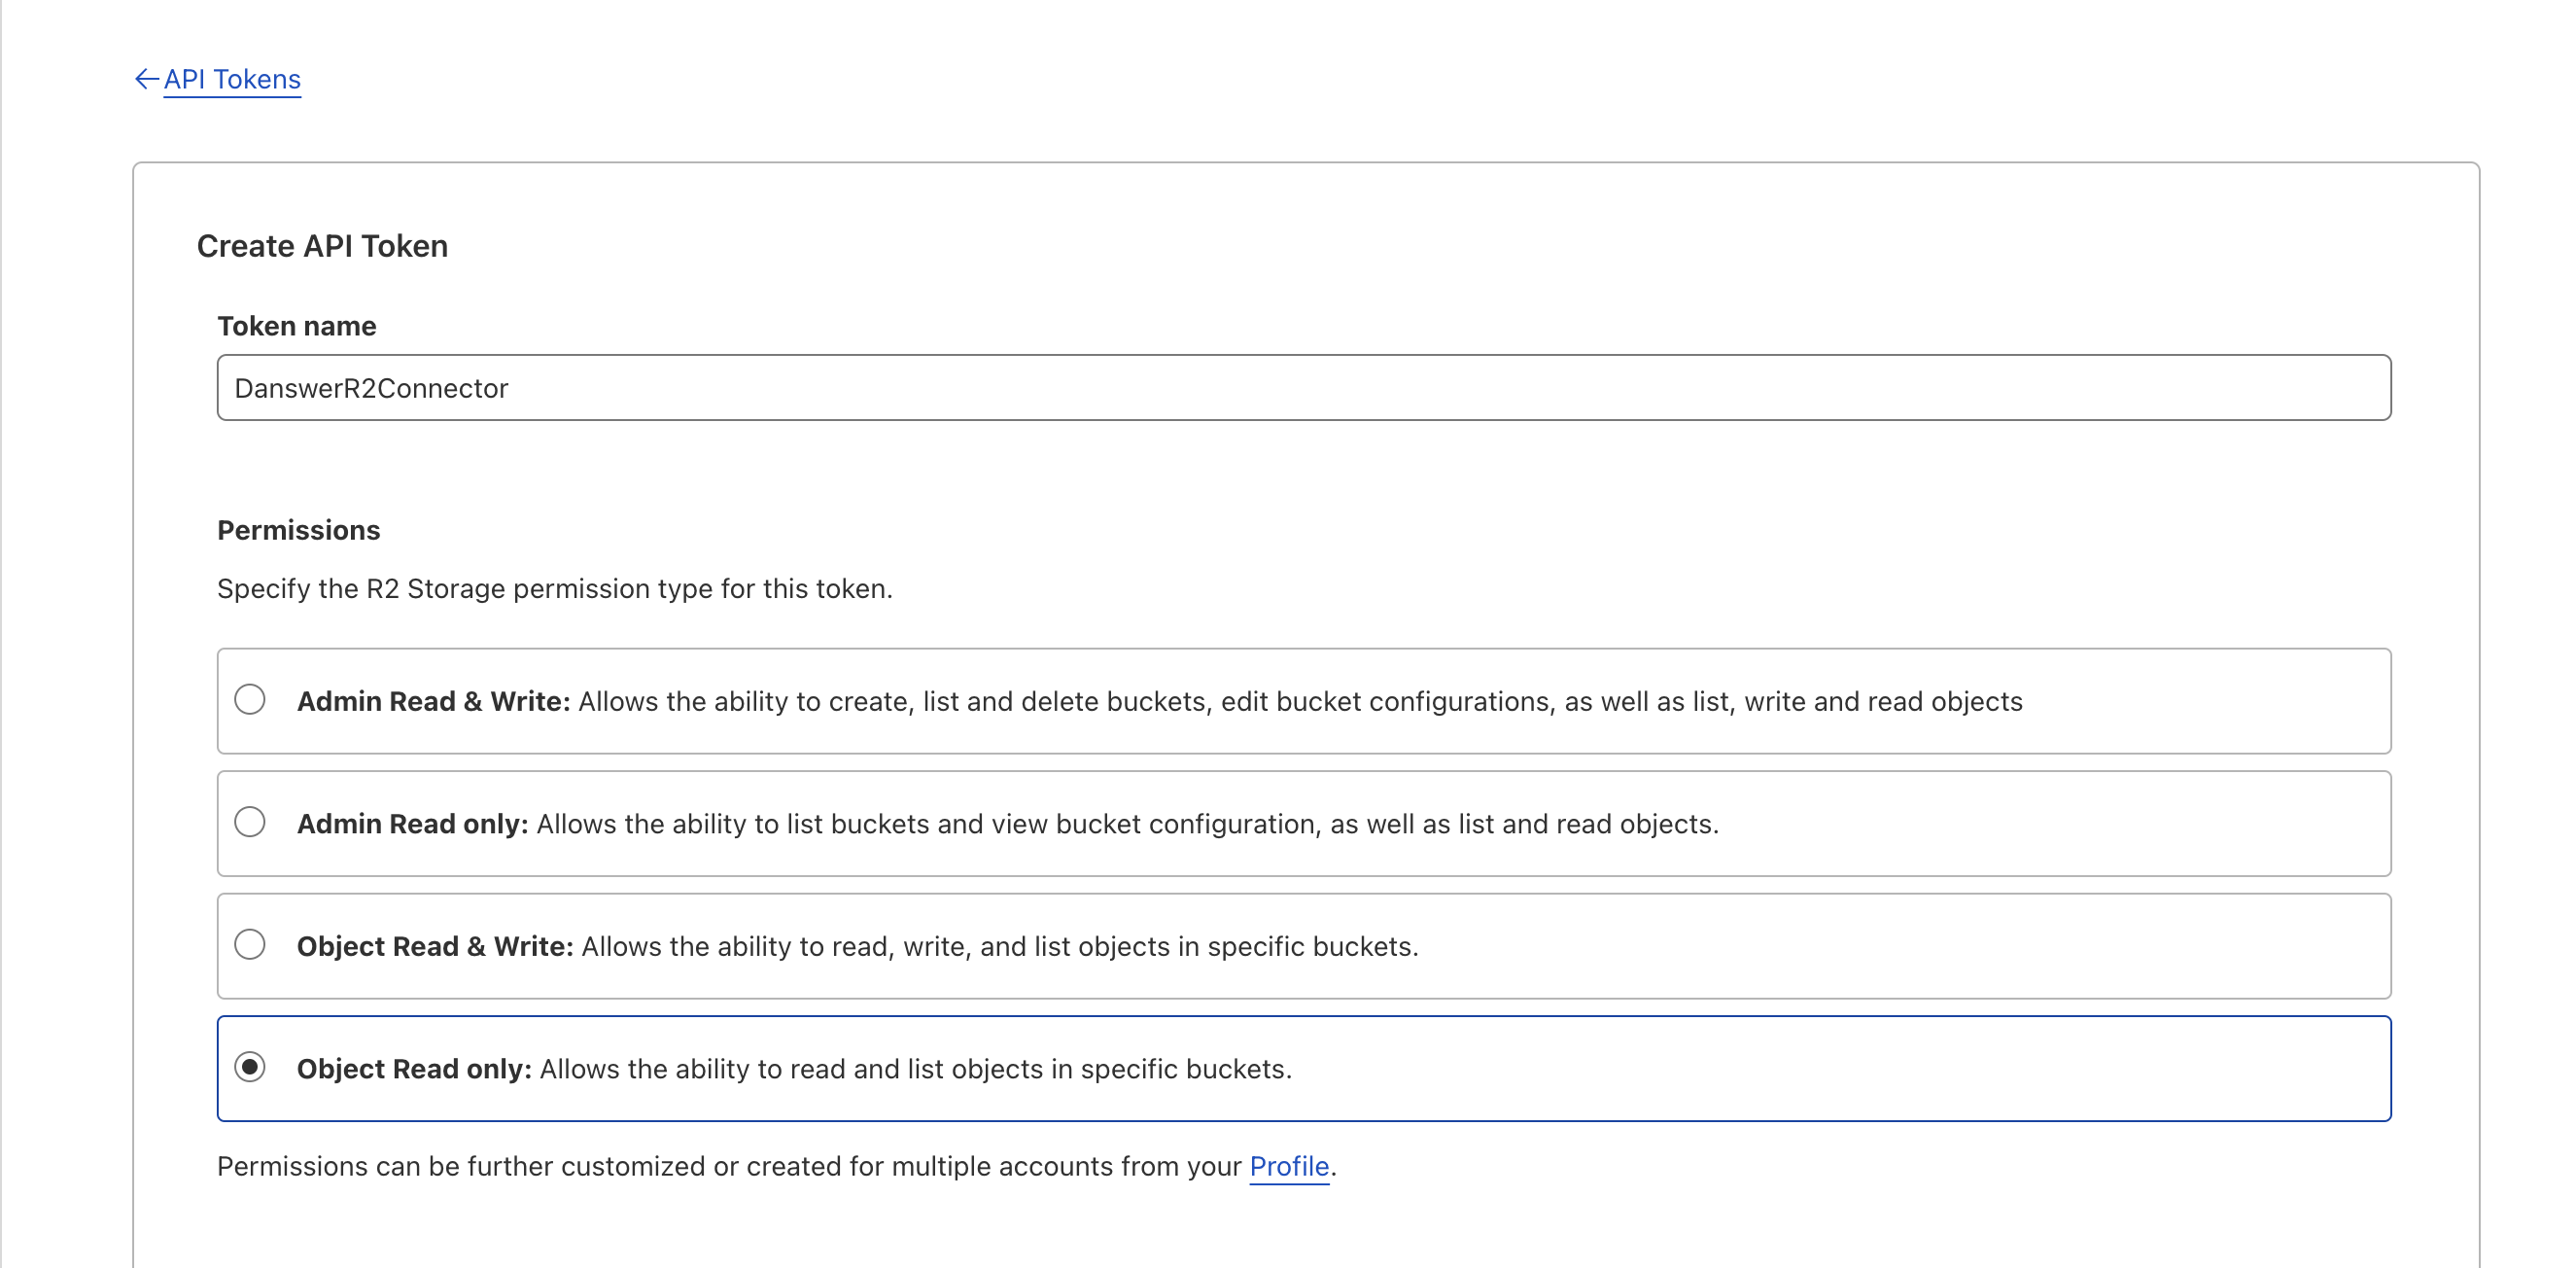 Click "Create API Token". On the next screen, copy your Access Key ID and Secret Access Key immediately. Then,
to find your Account ID, go to the Overview page; the Account ID is listed in the URL as the final substring.
Click "Create API Token". On the next screen, copy your Access Key ID and Secret Access Key immediately. Then,
to find your Account ID, go to the Overview page; the Account ID is listed in the URL as the final substring.
 ### Indexing
Navigate to the Admin Panel and select the **R2** Connector.
In **Step 1**, provide your R2 credentials (Access Key ID, Secret Access Key, and Account ID).
### Indexing
Navigate to the Admin Panel and select the **R2** Connector.
In **Step 1**, provide your R2 credentials (Access Key ID, Secret Access Key, and Account ID).
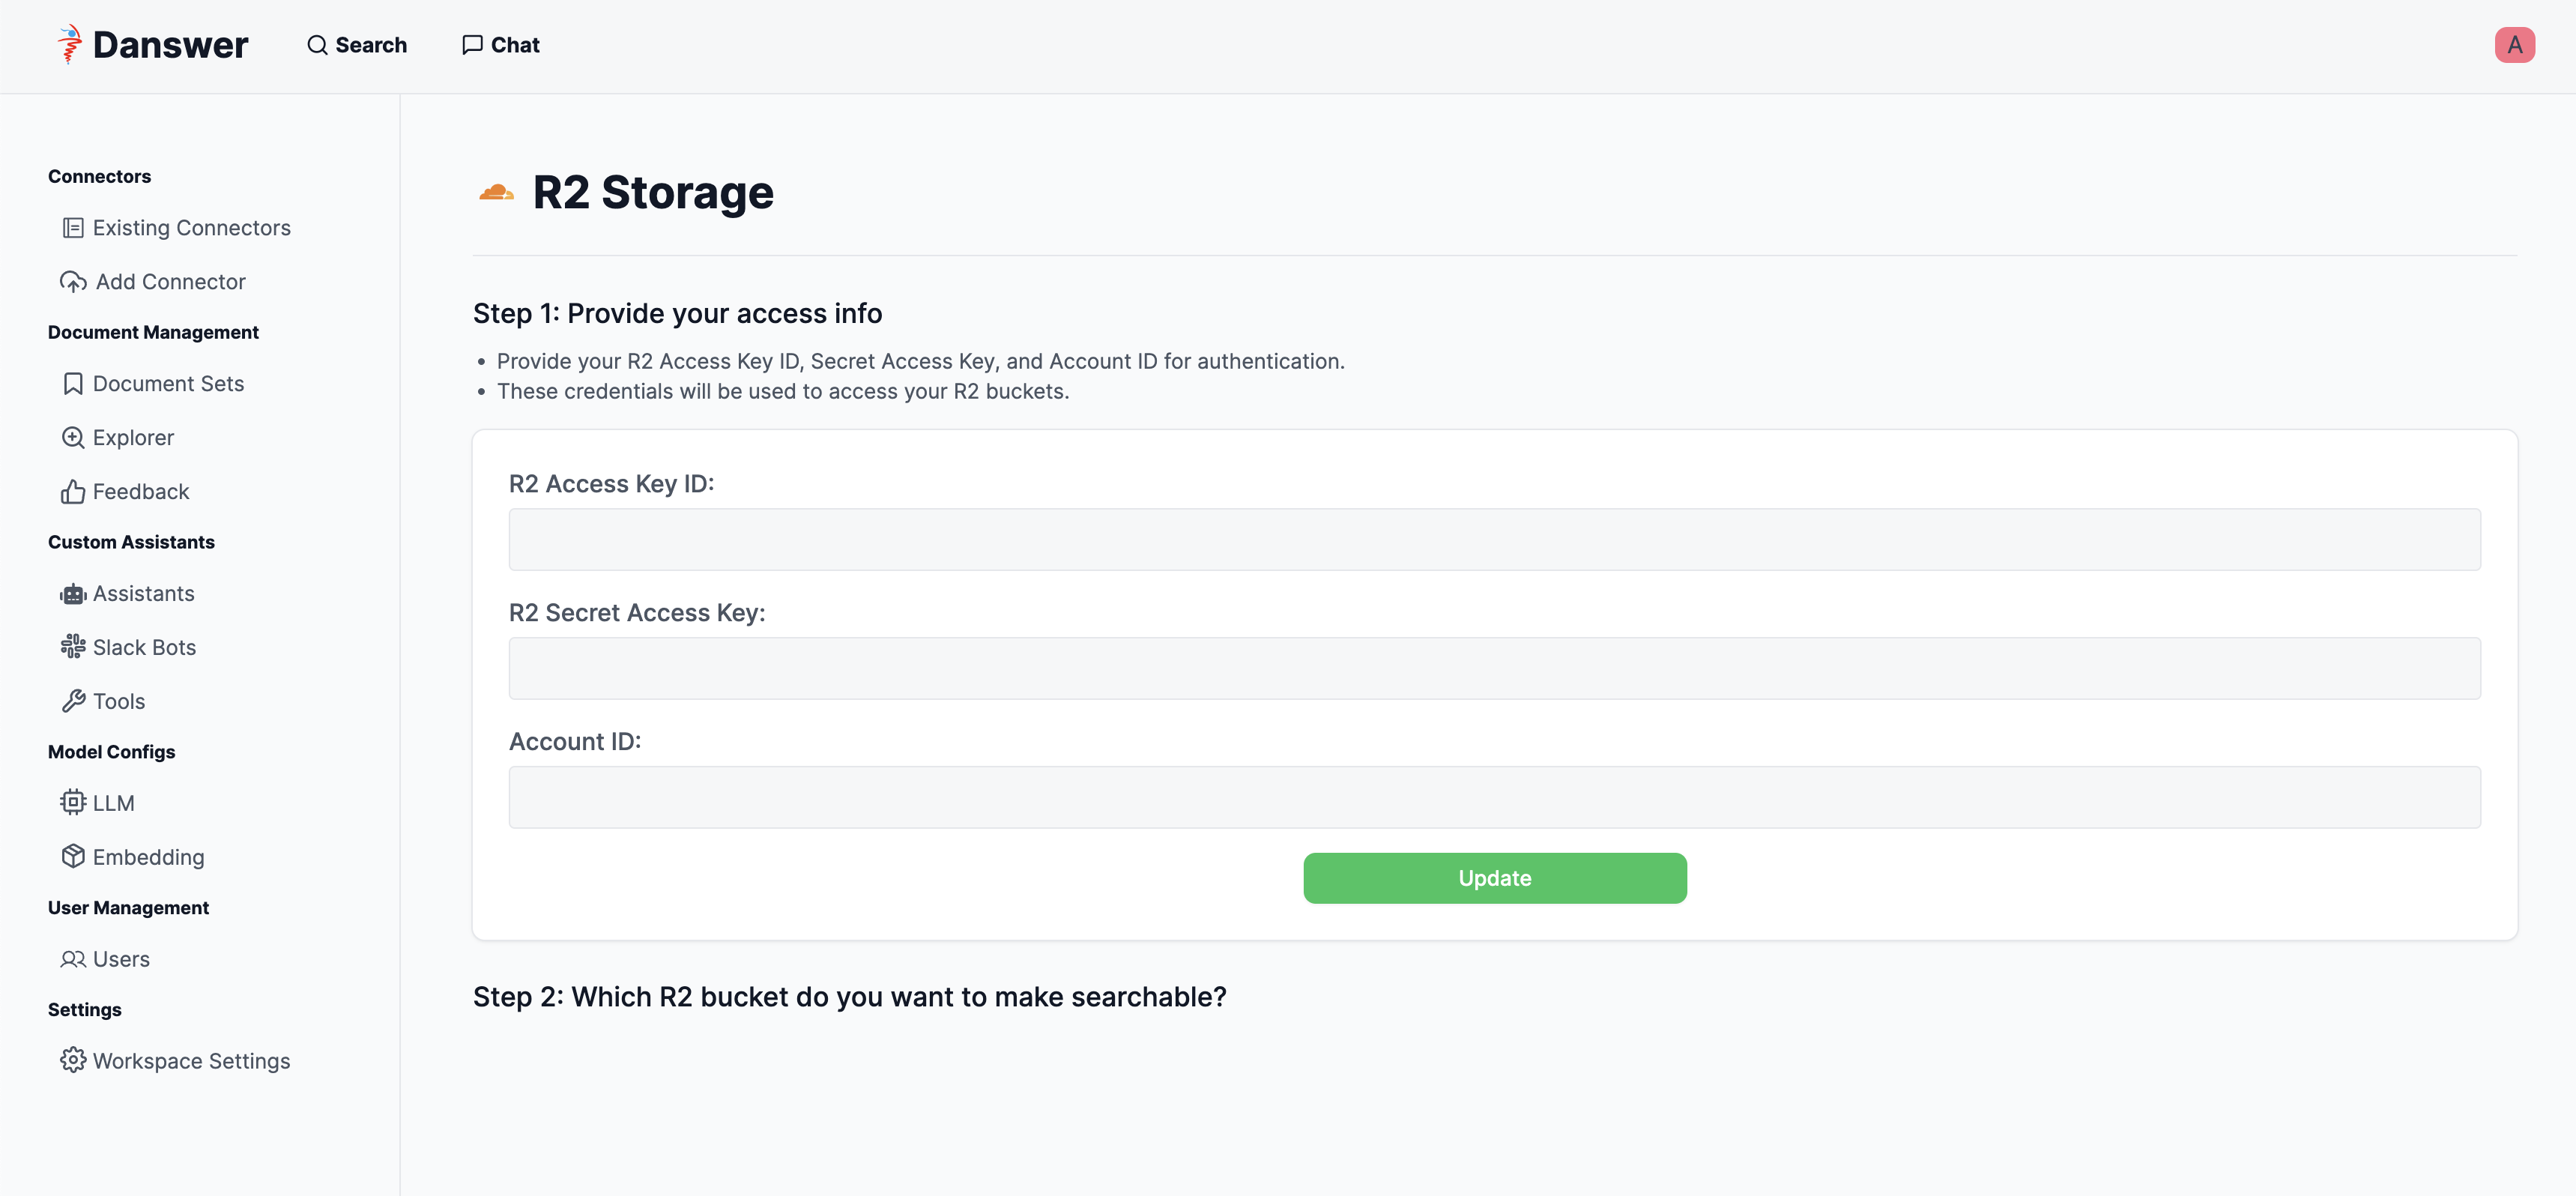 Click "Update" to save your credentials.
In **Step 2**, specify which R2 bucket you want to make searchable.
Click "Update" to save your credentials.
In **Step 2**, specify which R2 bucket you want to make searchable.
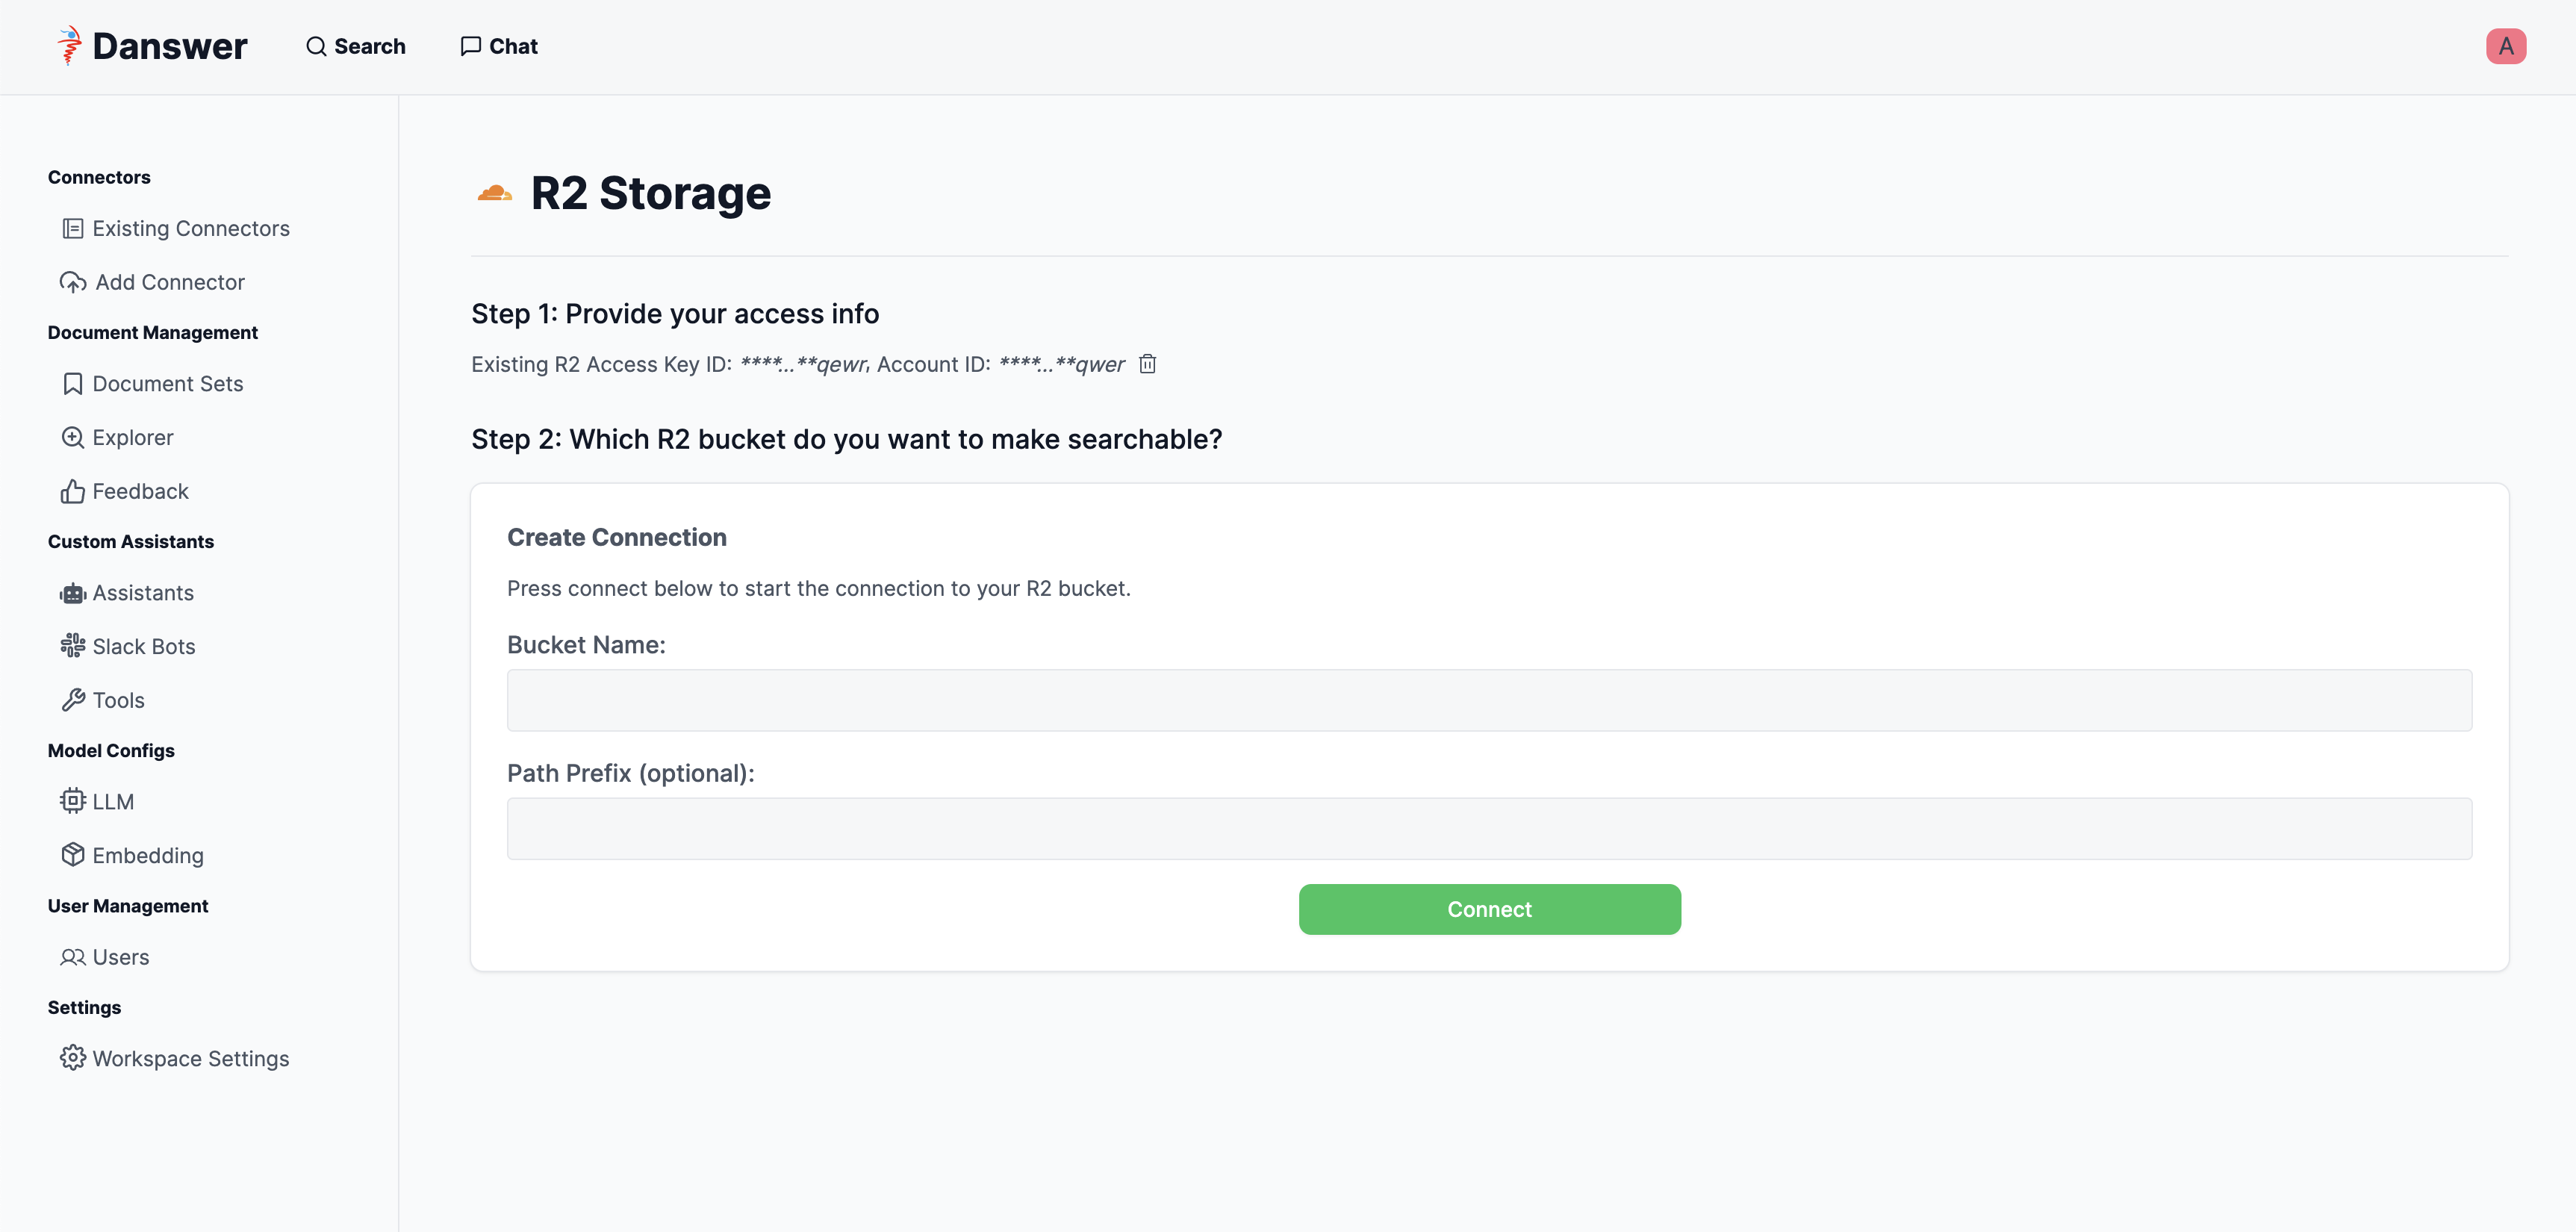 Click "Connect" to begin indexing.
## Understanding R2 Structure
Cloudflare R2 organizes data into buckets, similar to Amazon S3.
Each bucket can contain an unlimited number of objects (files). You can think of a bucket as a root directory,
and the objects as files within that directory.
For more information on R2 structure, visit the [Cloudflare R2 documentation](https://developers.cloudflare.com/r2/).
Click "Connect" to begin indexing.
## Understanding R2 Structure
Cloudflare R2 organizes data into buckets, similar to Amazon S3.
Each bucket can contain an unlimited number of objects (files). You can think of a bucket as a root directory,
and the objects as files within that directory.
For more information on R2 structure, visit the [Cloudflare R2 documentation](https://developers.cloudflare.com/r2/).