> ## Documentation Index
> Fetch the complete documentation index at: https://docs.onyx.app/llms.txt
> Use this file to discover all available pages before exploring further.
# S3 IAM Role
> Authorize the S3 connector using an AWS IAM Role with assume role policy.
### When to use this method
* When you need to segregate permissions, granting specific S3 access without modifying your EC2
instance's main role
* When you require temporary, frequently rotated credentials for S3 access, without managing
long-lived access keys
* When working in multi-account AWS environments, enabling cross-account S3 access through role
assumption
### Setting up the IAM Role
* In AWS Console, go to **IAM › Roles** and click **Create role**
* For **Trusted entity type**, select **Custom trust policy**
* In the Custom trust policy JSON editor, configure who can assume this role.
You can choose from:
* **IAM Role**: `"AWS": "arn:aws:iam::YOUR_AWS_ACCOUNT_ID:role/YourExistingEC2Role"`
* **AWS Service**: `"Service": "ec2.amazonaws.com"` (for EC2 instances)
Example for EC2 role (replace `YOUR_AWS_ACCOUNT_ID` and `YourExistingEC2Role`):
```json theme={null}
{
"Version": "2012-10-17",
"Statement": [
{
"Effect": "Allow",
"Principal": {
"AWS": "arn:aws:iam::YOUR_AWS_ACCOUNT_ID:role/YourExistingEC2Role"
},
"Action": "sts:AssumeRole"
}
]
}
```
* Click **Next**
* Attach **AmazonS3ReadOnlyAccess** policy or create a custom policy for specific buckets:
```json theme={null}
{
"Version": "2012-10-17",
"Statement": [
{
"Effect": "Allow",
"Action": [
"s3:GetObject",
"s3:ListBucket"
],
"Resource": [
"arn:aws:s3:::your-source-bucket-name",
"arn:aws:s3:::your-source-bucket-name/*"
]
}
]
}
```
* Name it (e.g., `OnyxS3AccessRole`) and click **Create role**
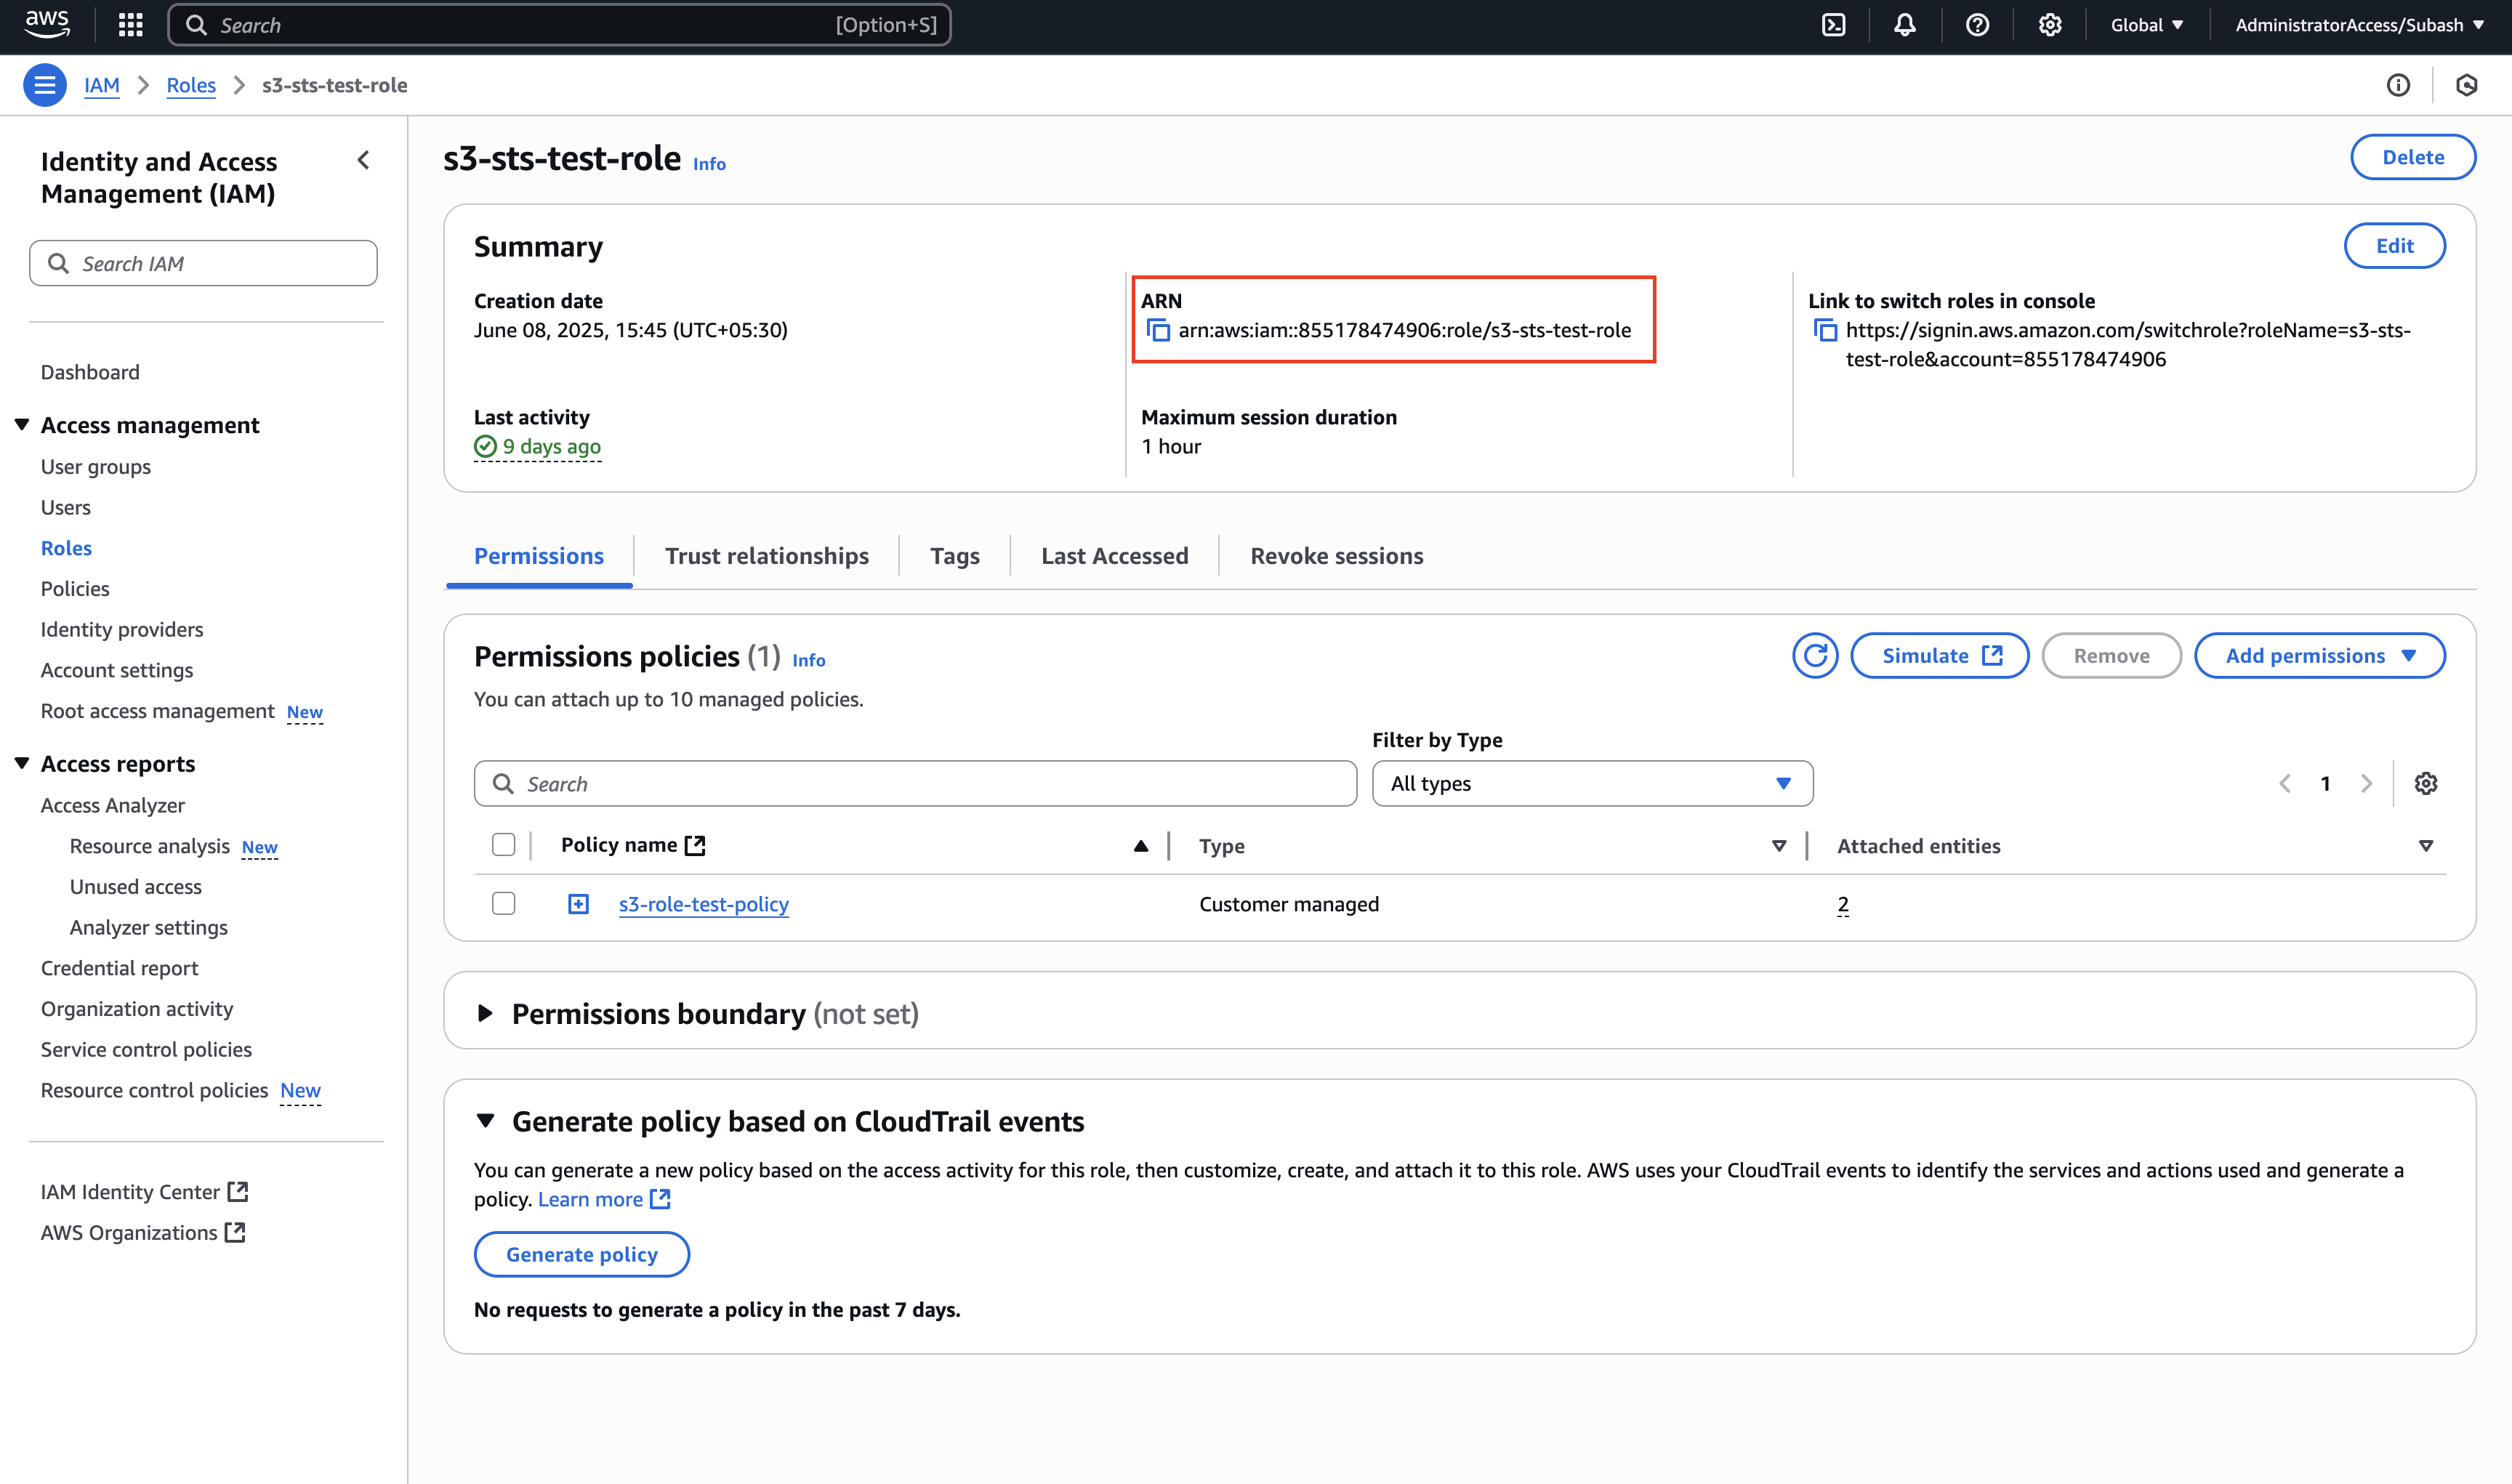
* Copy the **Role ARN** from the role summary page (e.g., `arn:aws:iam::YOUR_AWS_ACCOUNT_ID:role/YOUR_CREATED_ROLE_NAME`)
 * Go back to **IAM > Roles** and find your EC2 instance's existing role
* Click on the role and go to the **Permissions** tab
* Click **Add permissions > Create inline policy**
* Switch to JSON and add this policy (replace with your actual account ID and role name):
```json theme={null}
{
"Version": "2012-10-17",
"Statement": [
{
"Effect": "Allow",
"Action": "sts:AssumeRole",
"Resource": "arn:aws:iam::YOUR_AWS_ACCOUNT_ID:role/YOUR_CREATED_ROLE_NAME"
}
]
}
```
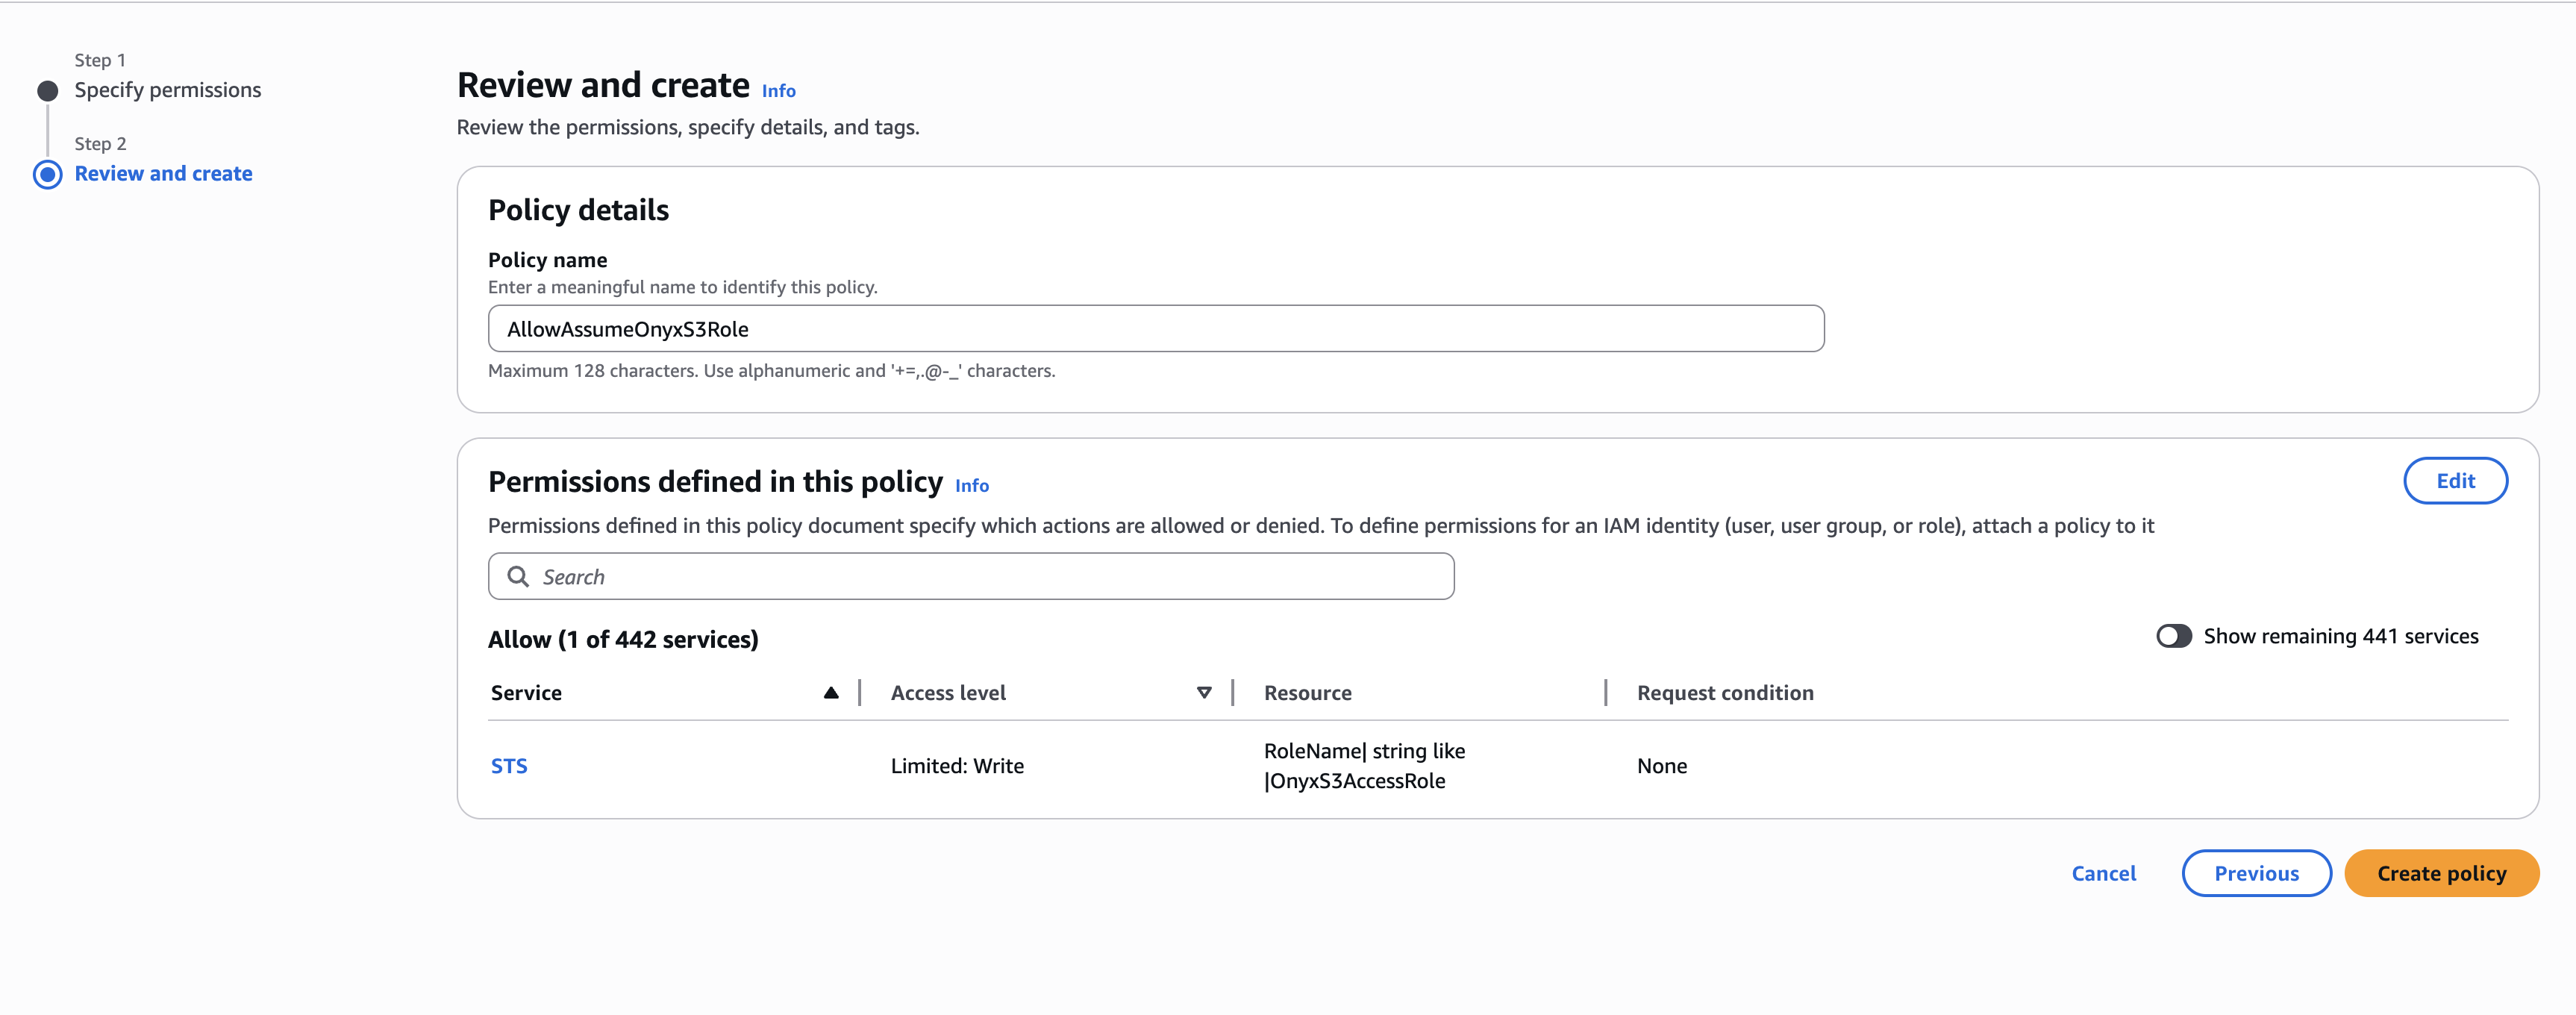
* Name the policy (e.g., `AllowAssumeOnyxS3Role`) and click **Create policy**
* Go back to **IAM > Roles** and find your EC2 instance's existing role
* Click on the role and go to the **Permissions** tab
* Click **Add permissions > Create inline policy**
* Switch to JSON and add this policy (replace with your actual account ID and role name):
```json theme={null}
{
"Version": "2012-10-17",
"Statement": [
{
"Effect": "Allow",
"Action": "sts:AssumeRole",
"Resource": "arn:aws:iam::YOUR_AWS_ACCOUNT_ID:role/YOUR_CREATED_ROLE_NAME"
}
]
}
```
* Name the policy (e.g., `AllowAssumeOnyxS3Role`) and click **Create policy**
 Your EC2 instance now uses its existing instance profile to obtain temporary credentials for the OnyxS3AccessRole,
which can then securely interact with your designated S3 buckets.
### Credential Entry in Onyx
When configuring the S3 connector in Onyx, you'll need to:
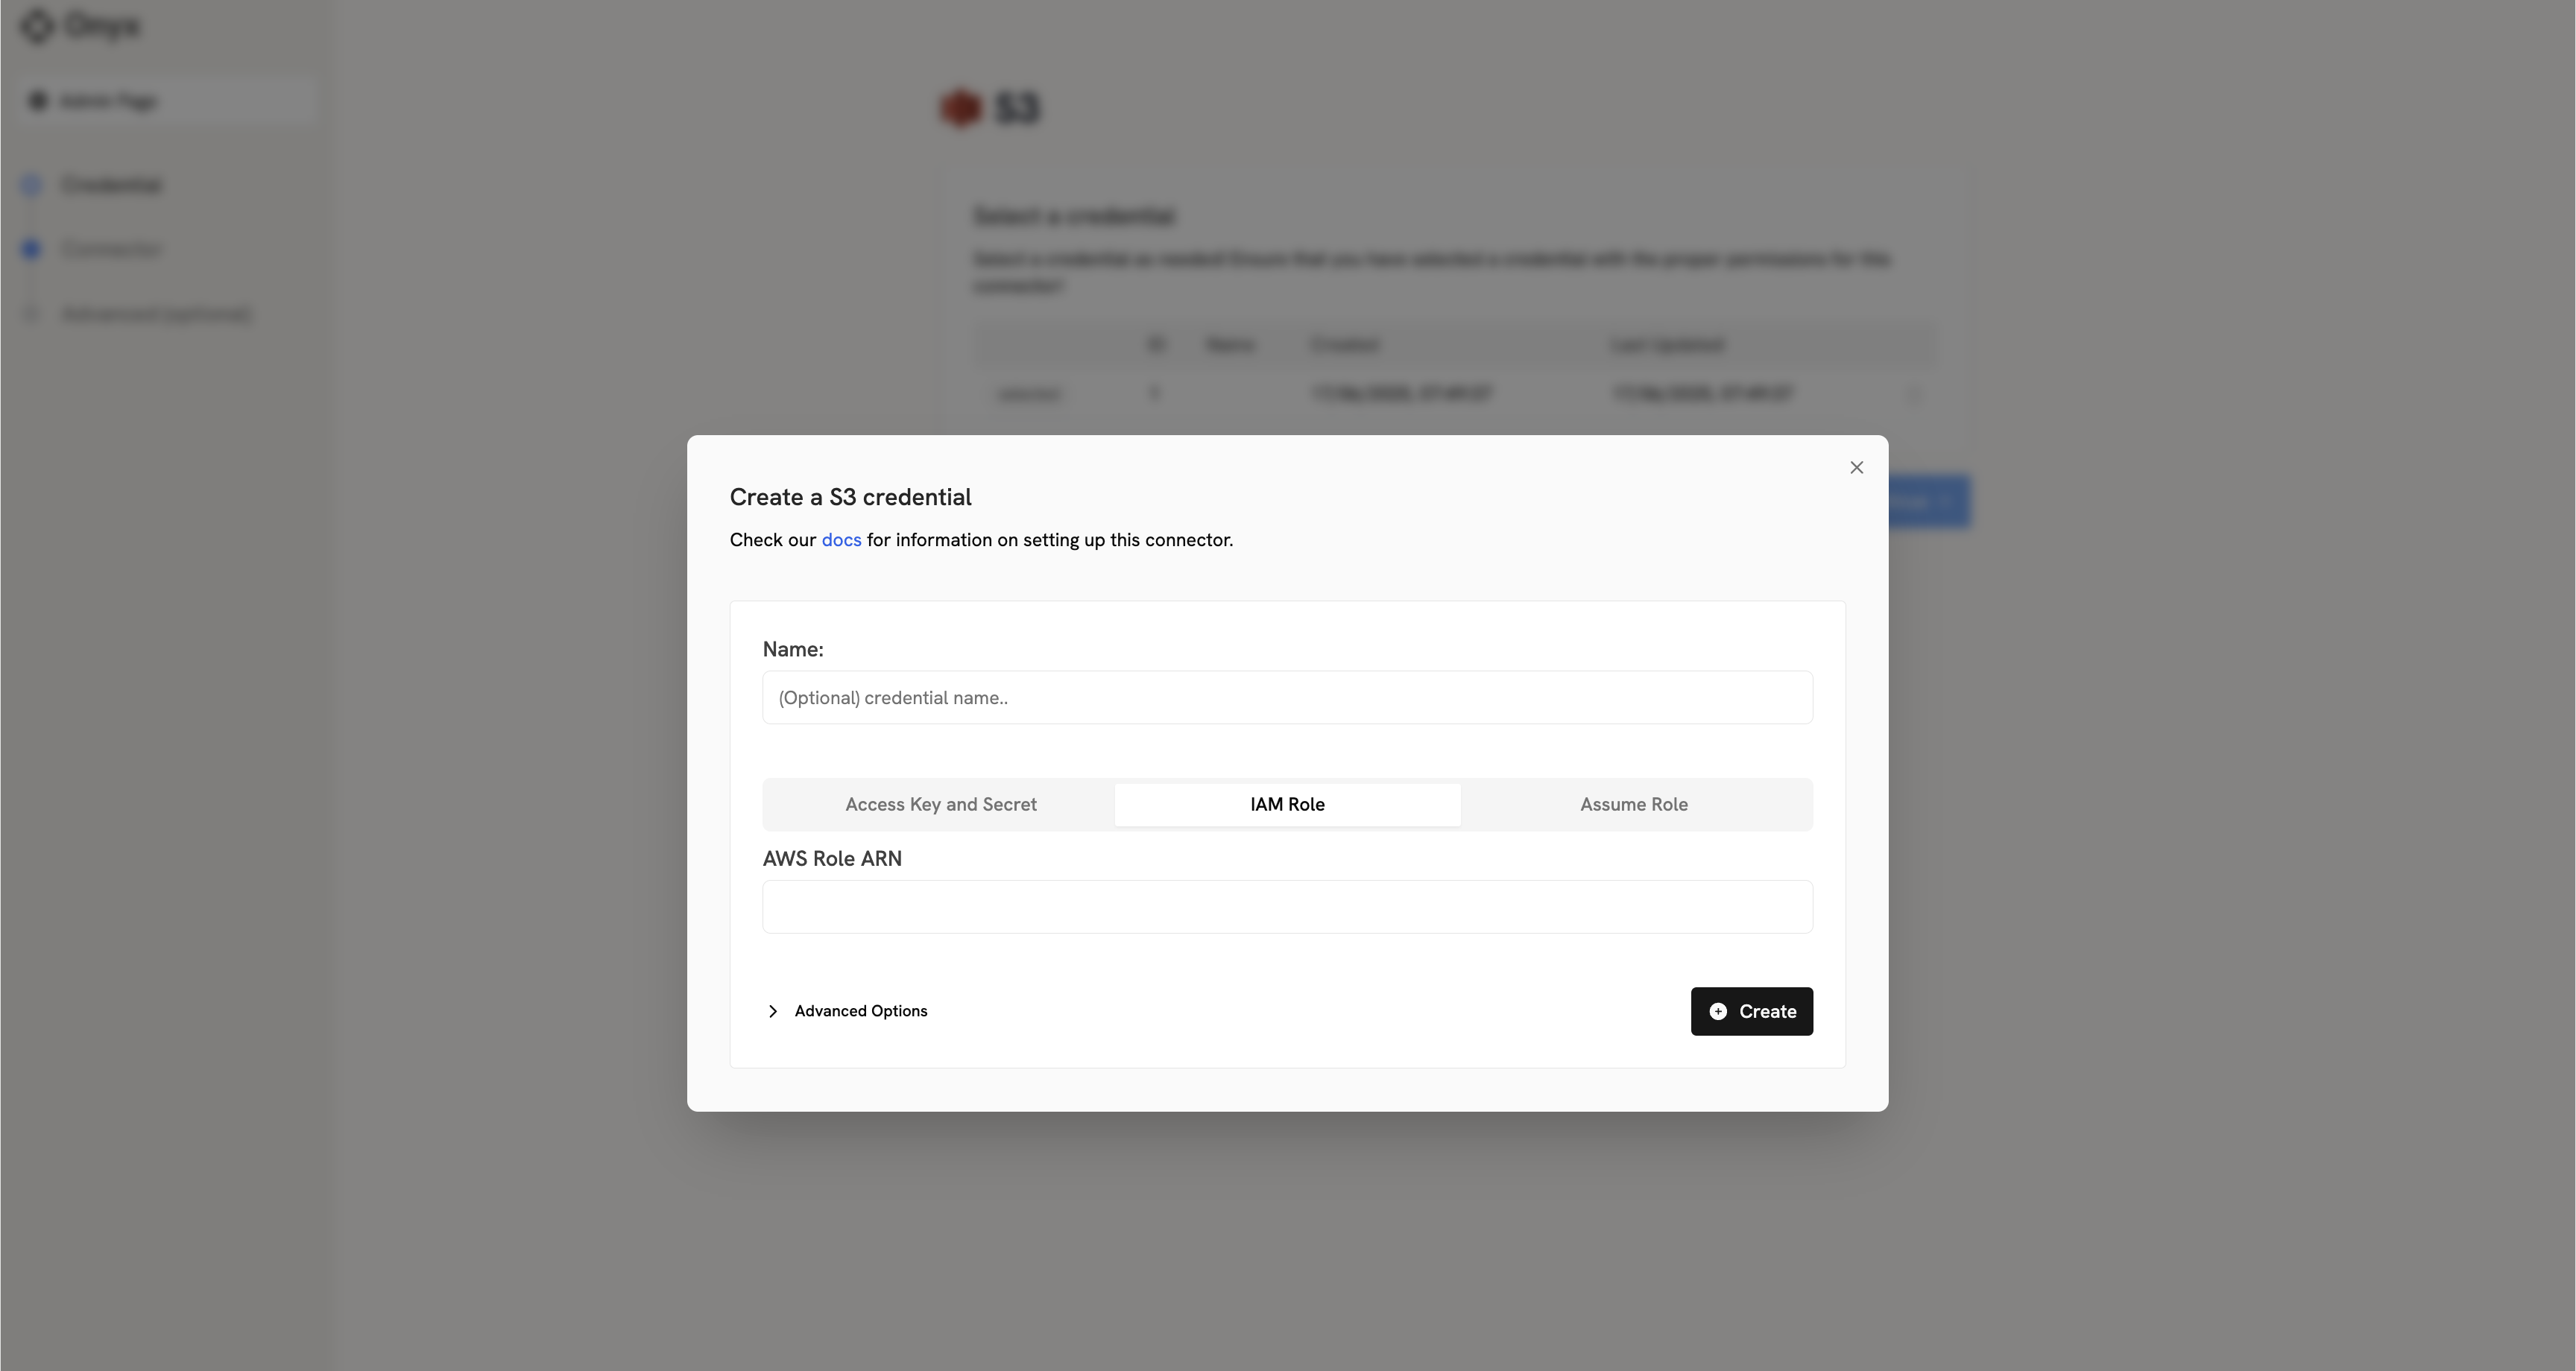
Click on the **IAM Role** tab
Enter the **Role ARN** you copied earlier (e.g., `arn:aws:iam::YOUR_AWS_ACCOUNT_ID:role/YOUR_CREATED_ROLE_NAME`)
Your EC2 instance now uses its existing instance profile to obtain temporary credentials for the OnyxS3AccessRole,
which can then securely interact with your designated S3 buckets.
### Credential Entry in Onyx
When configuring the S3 connector in Onyx, you'll need to:
Click on the **IAM Role** tab
Enter the **Role ARN** you copied earlier (e.g., `arn:aws:iam::YOUR_AWS_ACCOUNT_ID:role/YOUR_CREATED_ROLE_NAME`)
 Once you have your IAM Role ARN, proceed to the [indexing steps in the overview](./overview#indexing)
to configure your S3 connector.
Once you have your IAM Role ARN, proceed to the [indexing steps in the overview](./overview#indexing)
to configure your S3 connector.