> ## Documentation Index
> Fetch the complete documentation index at: https://docs.onyx.app/llms.txt
> Use this file to discover all available pages before exploring further.
# Zendesk
> Access tickets and conversations from Zendesk
## How it works
The Zendesk Connector can sync content from your Zendesk instance, supporting two content types:
* **Articles**: Syncs all published Articles from your company's Help Center
* **Tickets**: Syncs Support Tickets with their comments and metadata
The connector supports incremental updates and maintains author information, content tags, and other metadata.
## Content Types
### Articles
* Syncs all published articles from Zendesk Help Center
* Includes article content, labels, and content tags
* Tracks author information and update timestamps
* Skips draft articles and articles with specific skip labels (configurable)
### Tickets
* Syncs support tickets with full comment threads
* Includes ticket metadata (status, priority, tags, type)
* Tracks submitter and commenter information
* Excludes deleted tickets
* **Note**: Requires active Zendesk Support Product
## Current Limitations
* Articles: Does not allow filtering by specific categories or sections
* Tickets: Requires Zendesk Support Product to be active
## Setting up
### Authorization
The Zendesk Connector requires 3 things to connect:
* **Subdomain**: Your Zendesk subdomain (e.g., `your-company` from `your-company.zendesk.com`)
* **Email**: Email address of the API token owner
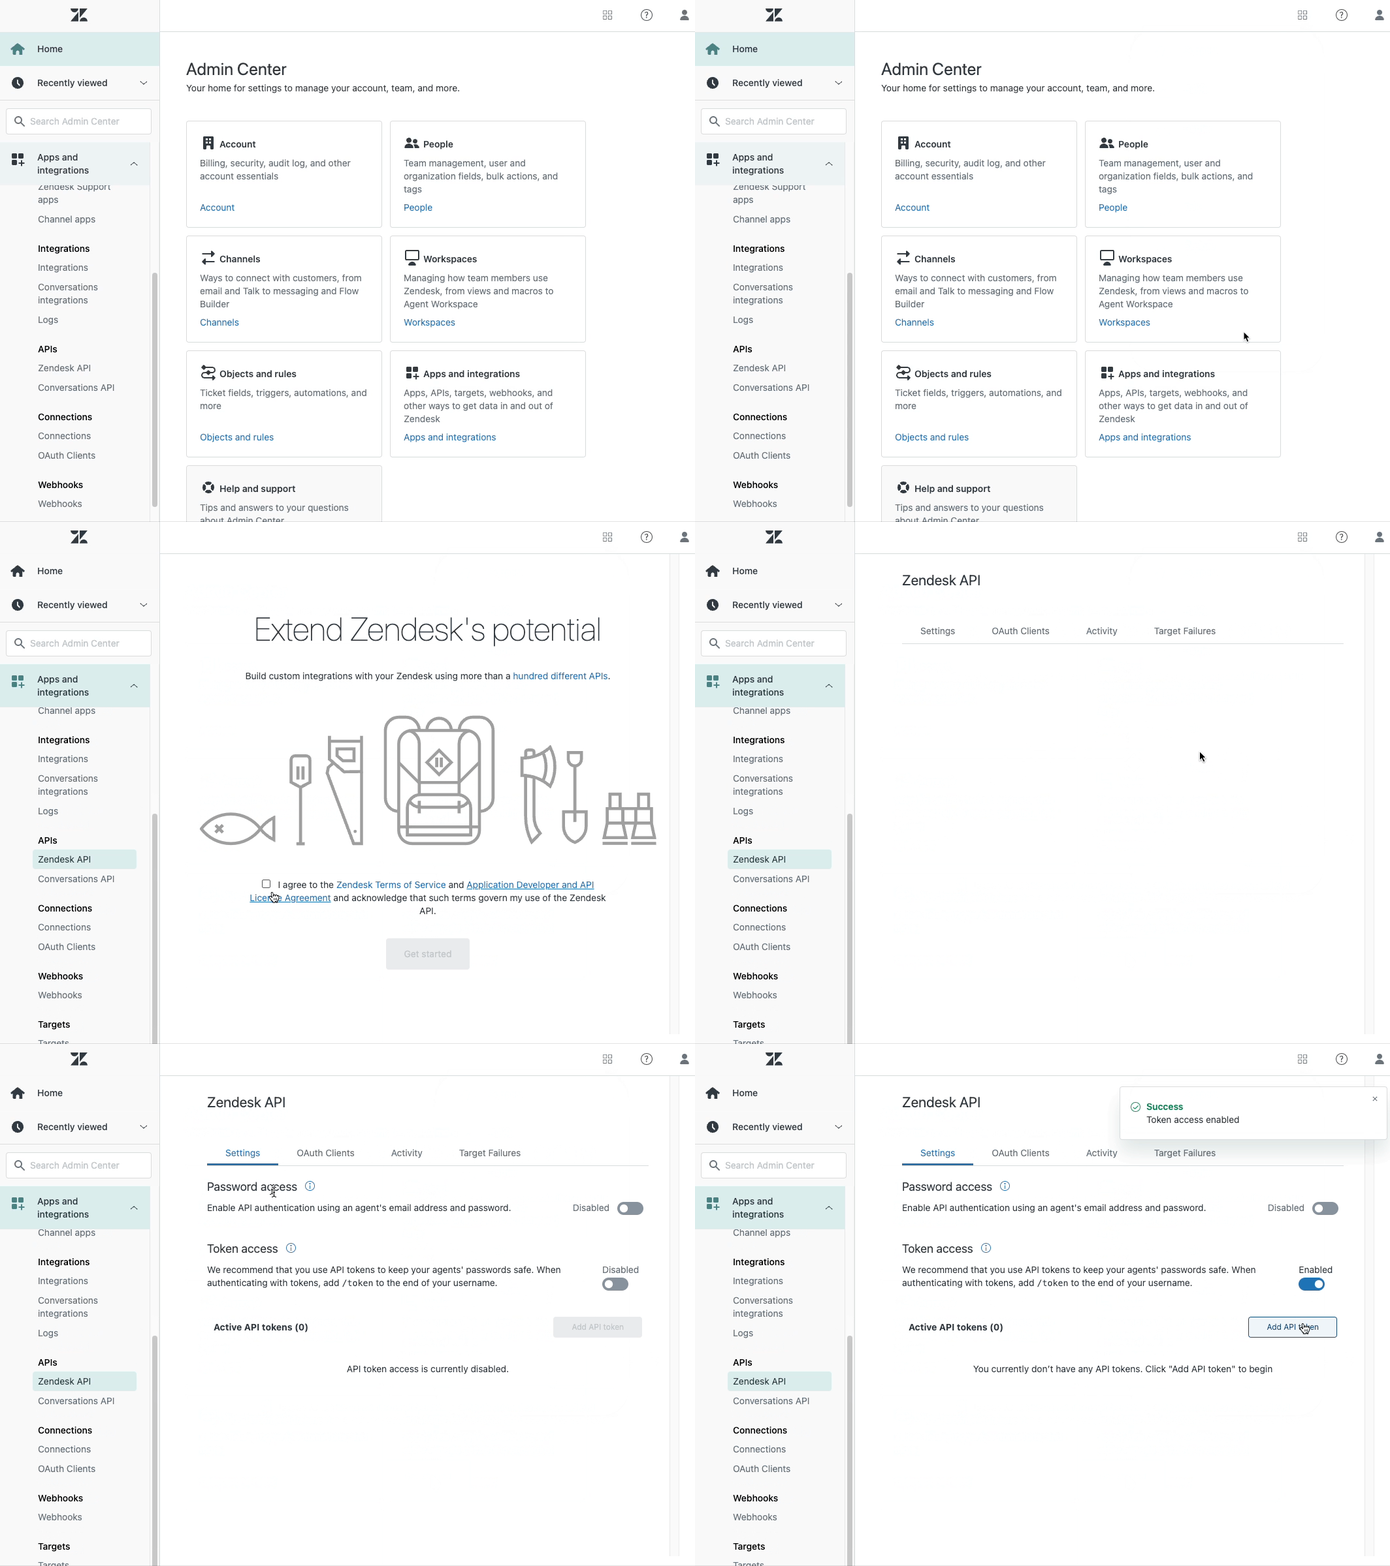
* **API Token**: Zendesk API token for authentication
See below for instructions on getting the API token:
 ### Indexing
Navigate to the **Admin Panel** and select `Add Connector` followed by the Zendesk tile
Choose your content type (Articles or Tickets)
Provide the authentication information from the section above
Click connect to start syncing content from Zendesk
The connector will perform incremental syncs to keep content up to date,
using cursor-based pagination for articles and timestamp-based retrieval for tickets.
## Metadata
The connector extracts and indexes the following metadata:
### Articles
* Labels (article labels)
* Content tags
* Author information
* Update timestamps
### Tickets
* Status (open, pending, solved, etc.)
* Priority level
* Tags
* Ticket type
* Submitter information
* Comment history with authors and timestamps
### Indexing
Navigate to the **Admin Panel** and select `Add Connector` followed by the Zendesk tile
Choose your content type (Articles or Tickets)
Provide the authentication information from the section above
Click connect to start syncing content from Zendesk
The connector will perform incremental syncs to keep content up to date,
using cursor-based pagination for articles and timestamp-based retrieval for tickets.
## Metadata
The connector extracts and indexes the following metadata:
### Articles
* Labels (article labels)
* Content tags
* Author information
* Update timestamps
### Tickets
* Status (open, pending, solved, etc.)
* Priority level
* Tags
* Ticket type
* Submitter information
* Comment history with authors and timestamps