> ## Documentation Index
> Fetch the complete documentation index at: https://docs.onyx.app/llms.txt
> Use this file to discover all available pages before exploring further.
# Discord Bot
> Configure your Discord bot
## Overview
You can access Onyx Cloud or your self-hosted instance through a Discord bot.
If you want to use Onyx Cloud, you must use the official OnyxBot Discord app.
Self-hosted instances must create their own Discord app in the Developer Portal.
## Configuration
### Official OnyxBot
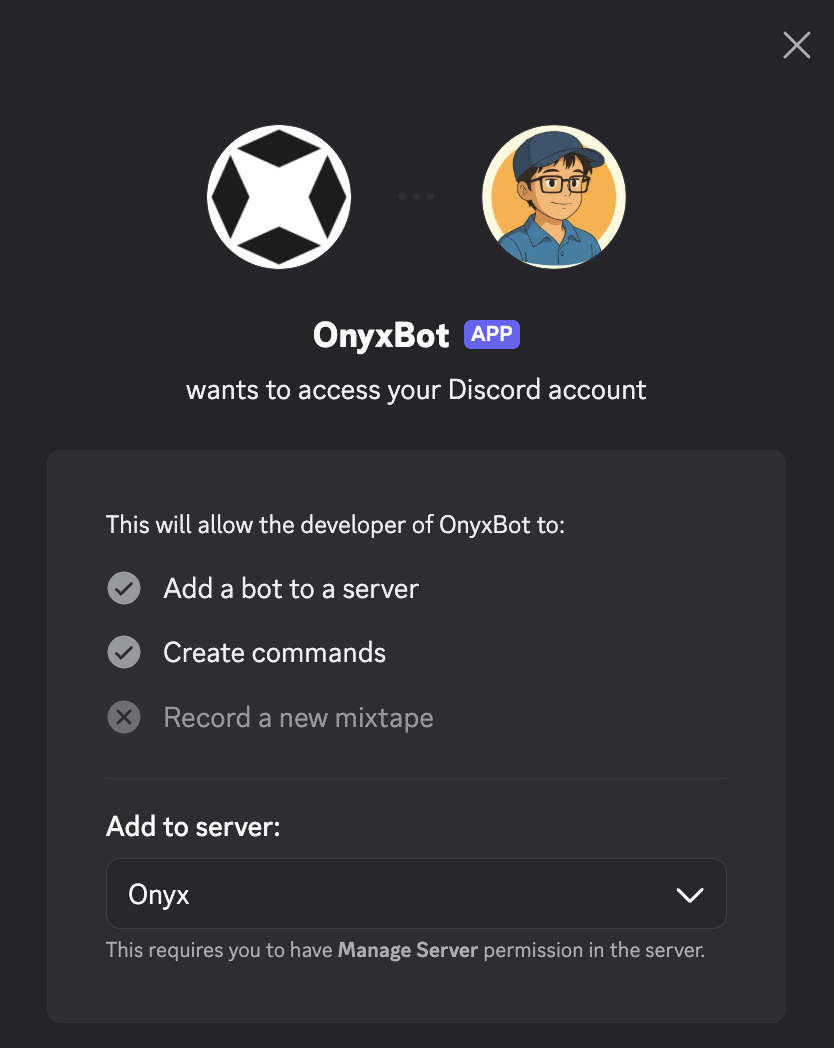
You'll need to be an admin of the Discord server and an admin in your Onyx instance to install and configure OnyxBot.
Click [here](https://discord.com/oauth2/authorize?client_id=1460722463431327804)
to install the official OnyxBot in your Discord server.
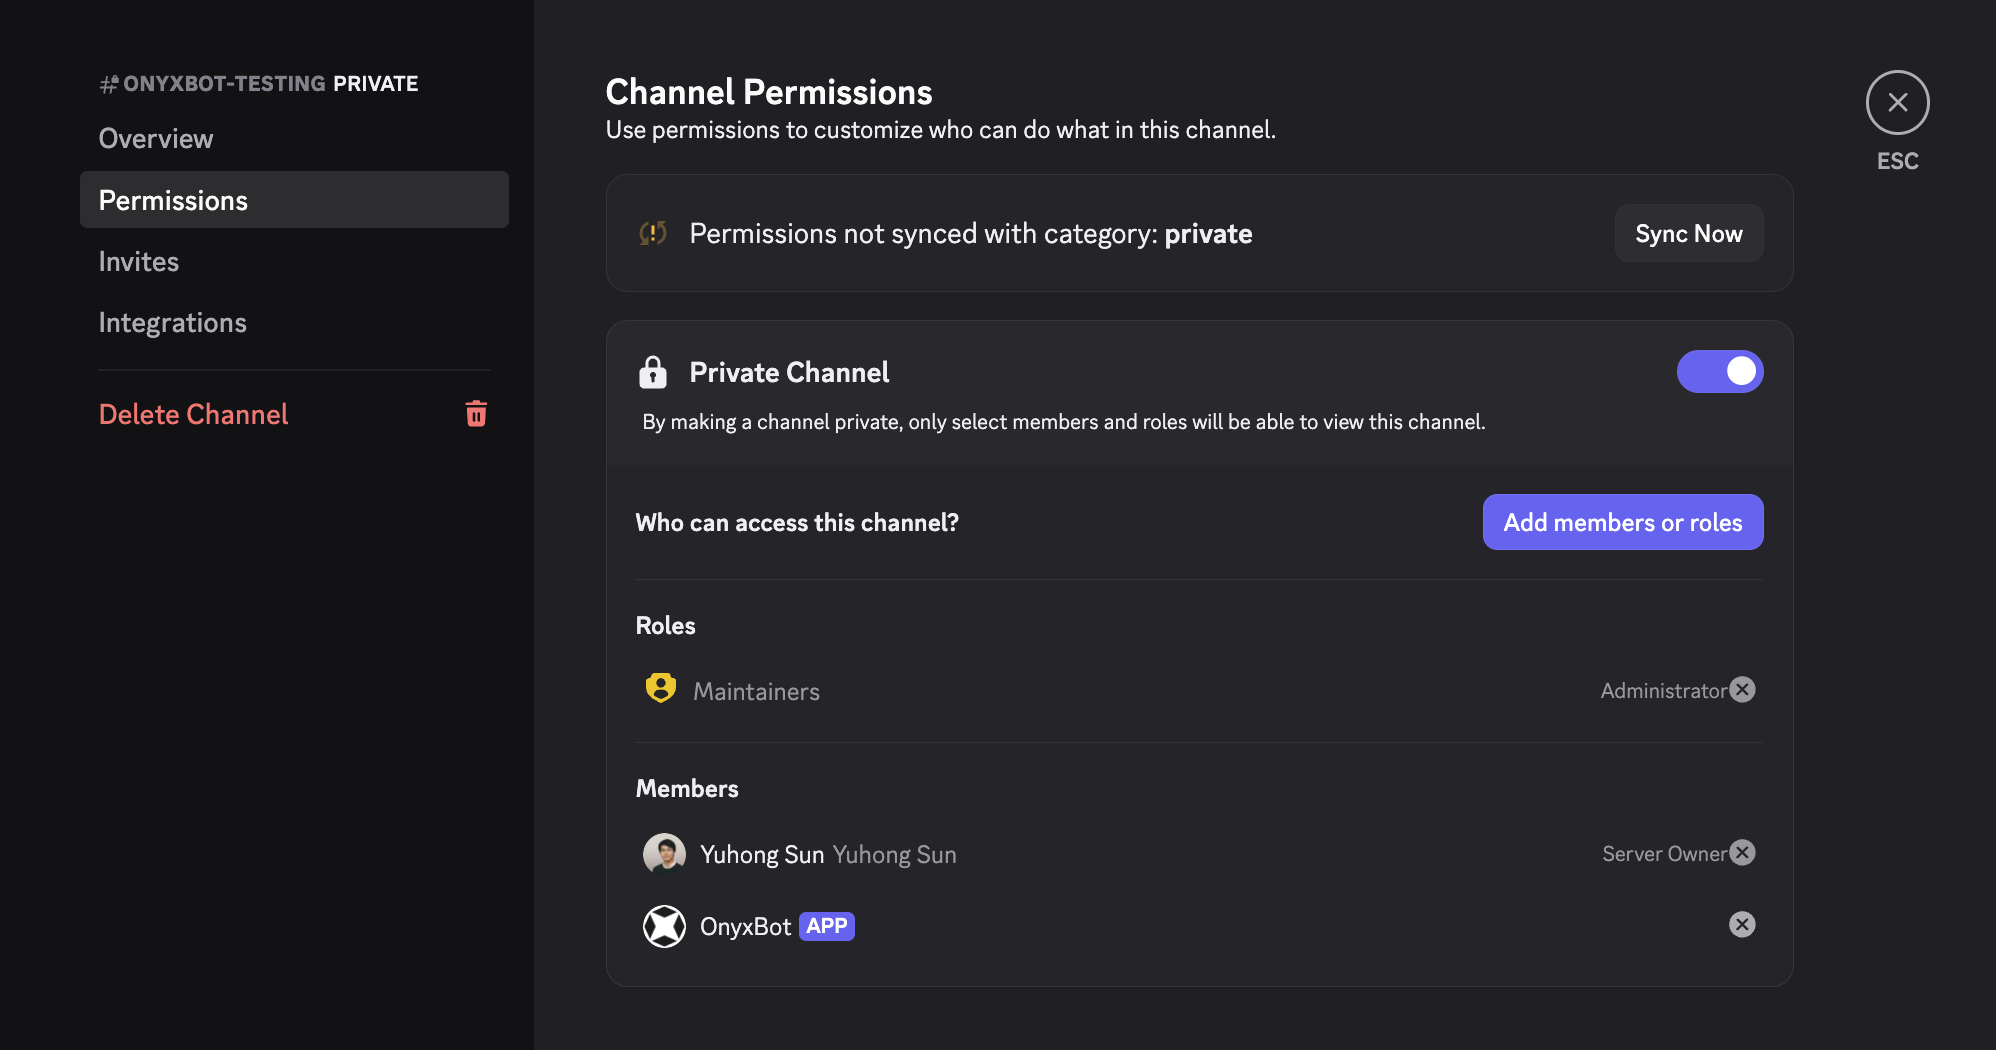
 Go to the channel settings and click on the "Permissions" tab.
Add OnyxBot to the "Allowed Users" list.
Go to the channel settings and click on the "Permissions" tab.
Add OnyxBot to the "Allowed Users" list.
 Create or log in to your account on [Onyx Cloud](https://cloud.onyx.app).
Navigate to the Onyx Admin Panel > Discord Bots and click on the **Add Server** button.
Copy the registration key.
The registration key will only be shown once. If you lose it,
delete the server configuration and create a new one.
The key is invalidated as soon as you use it and does not allow any other access to your Onyx instance.
Send your registration key in the private channel you allowed OnyxBot to access.
OnyxBot should respond with a message confirming the server has been registered.
Create or log in to your account on [Onyx Cloud](https://cloud.onyx.app).
Navigate to the Onyx Admin Panel > Discord Bots and click on the **Add Server** button.
Copy the registration key.
The registration key will only be shown once. If you lose it,
delete the server configuration and create a new one.
The key is invalidated as soon as you use it and does not allow any other access to your Onyx instance.
Send your registration key in the private channel you allowed OnyxBot to access.
OnyxBot should respond with a message confirming the server has been registered.
 In Onyx, you should see the server status **Registered**.
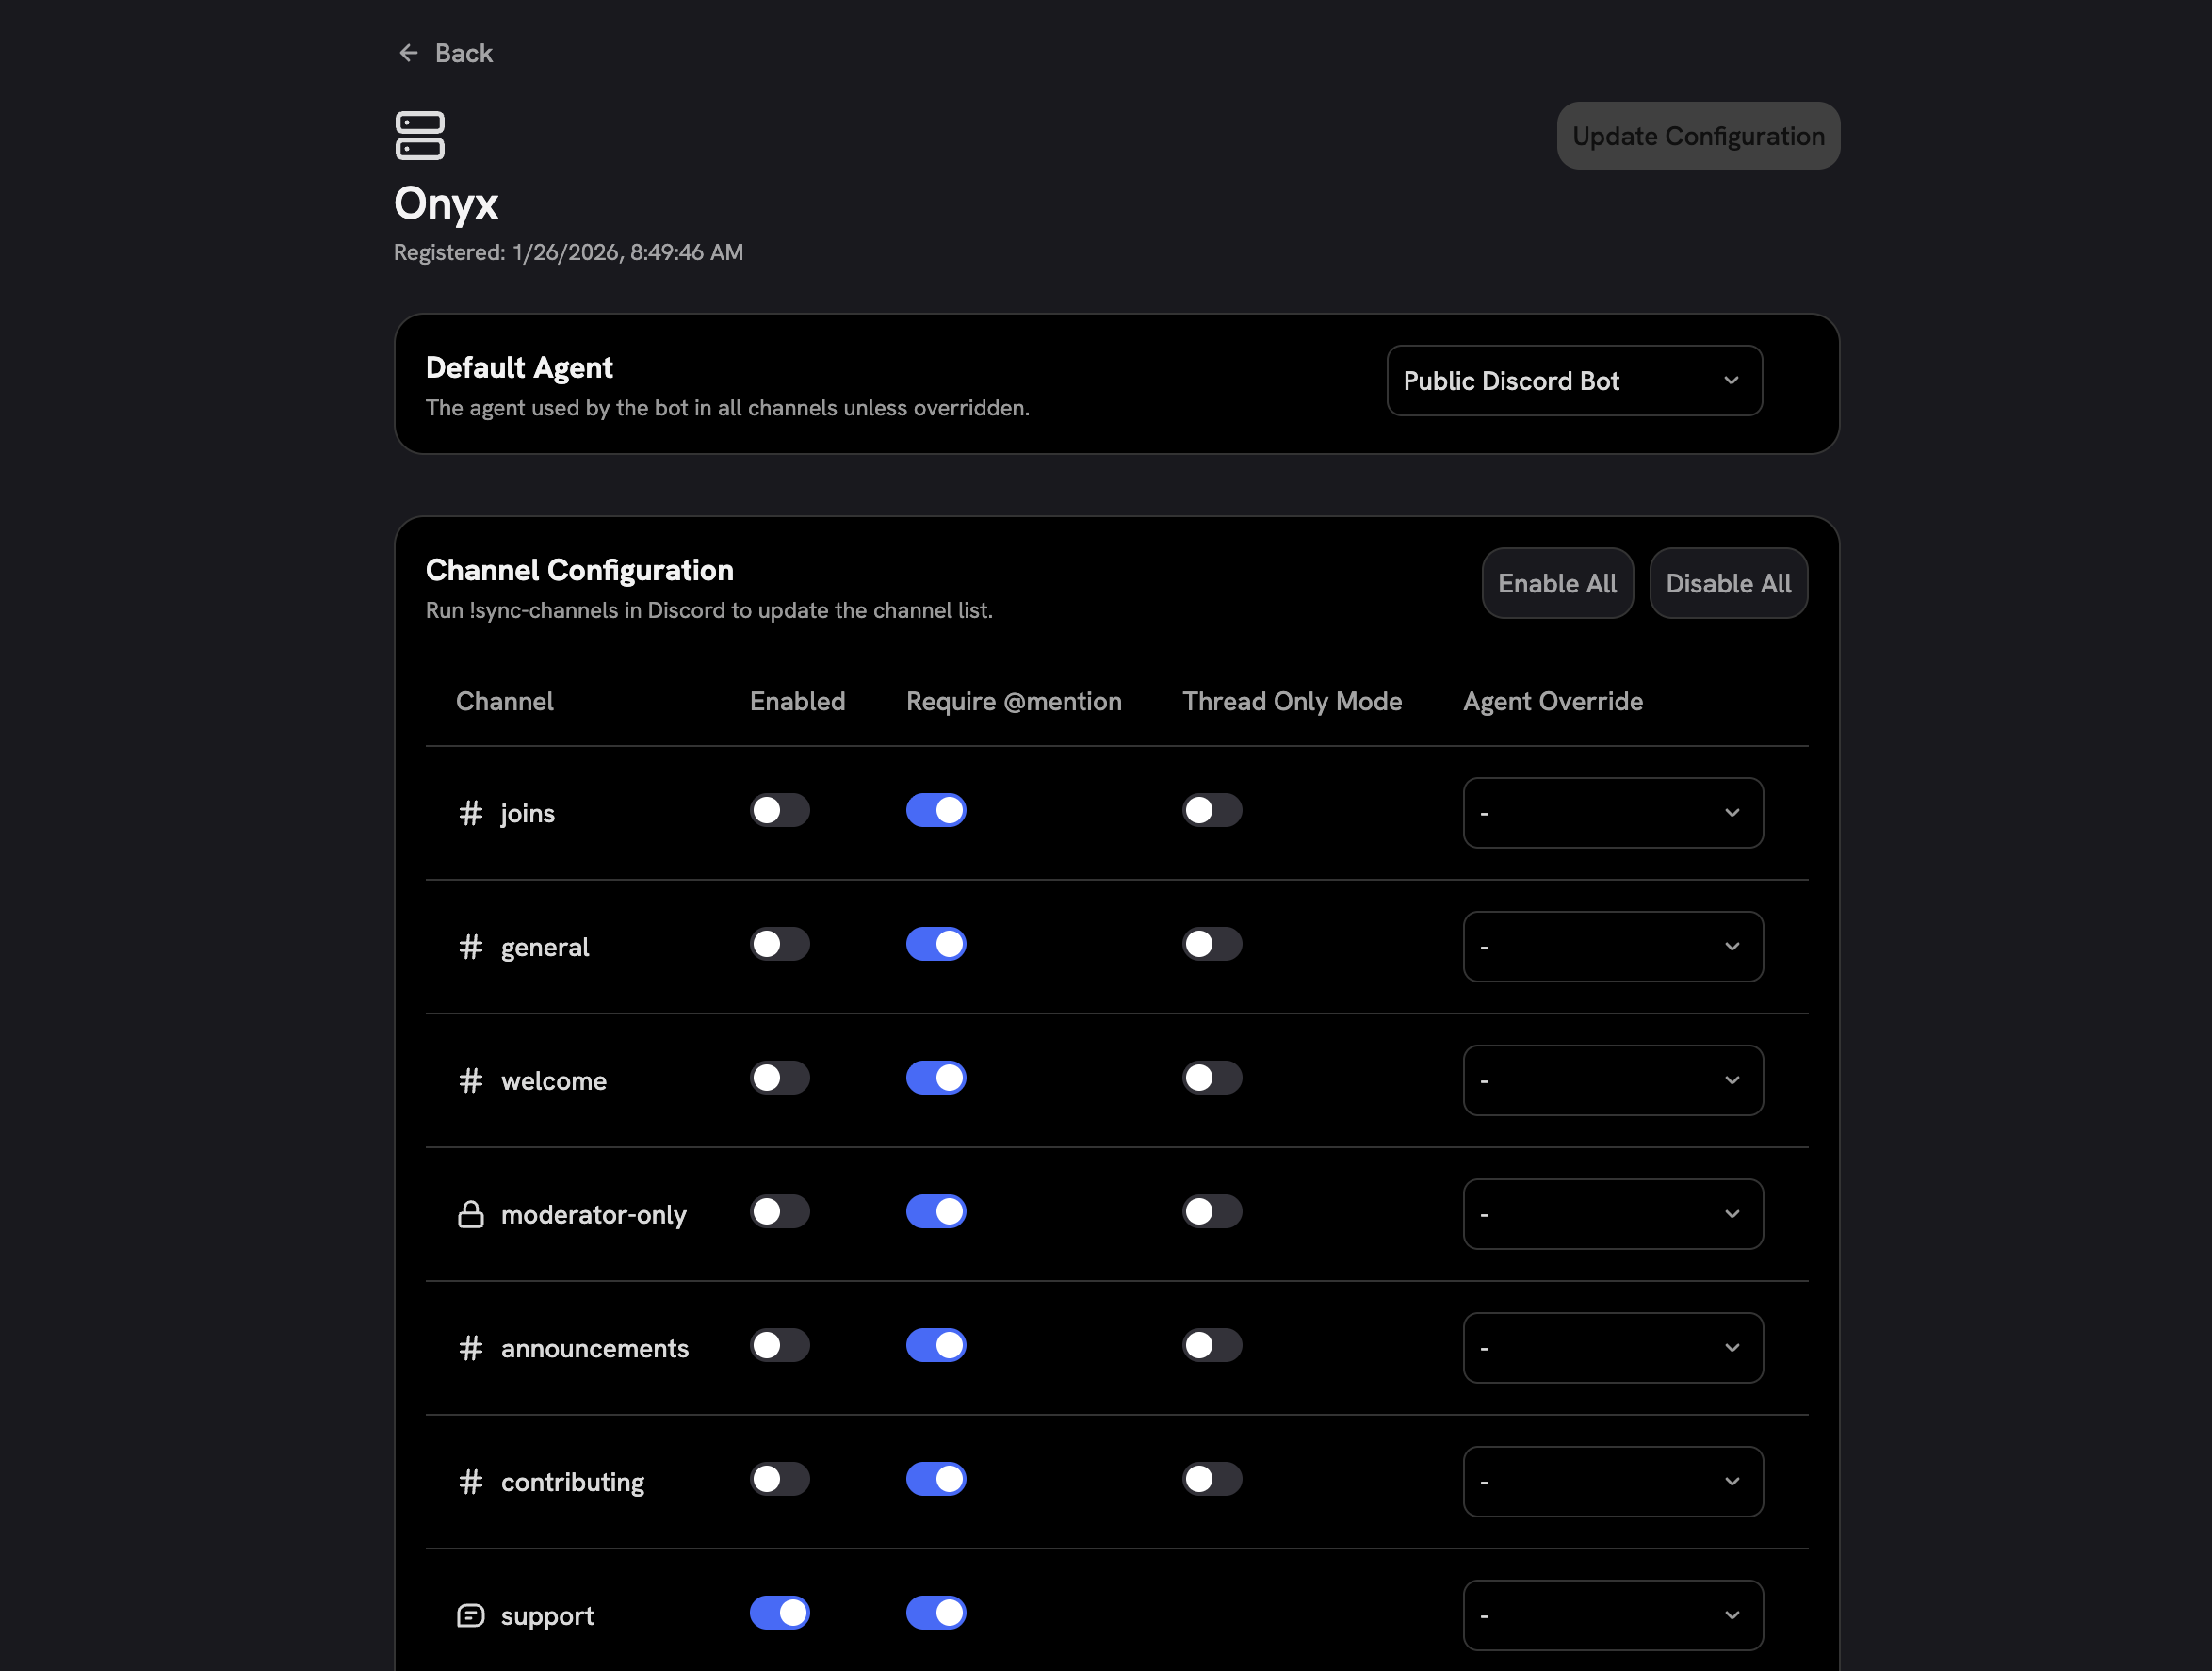
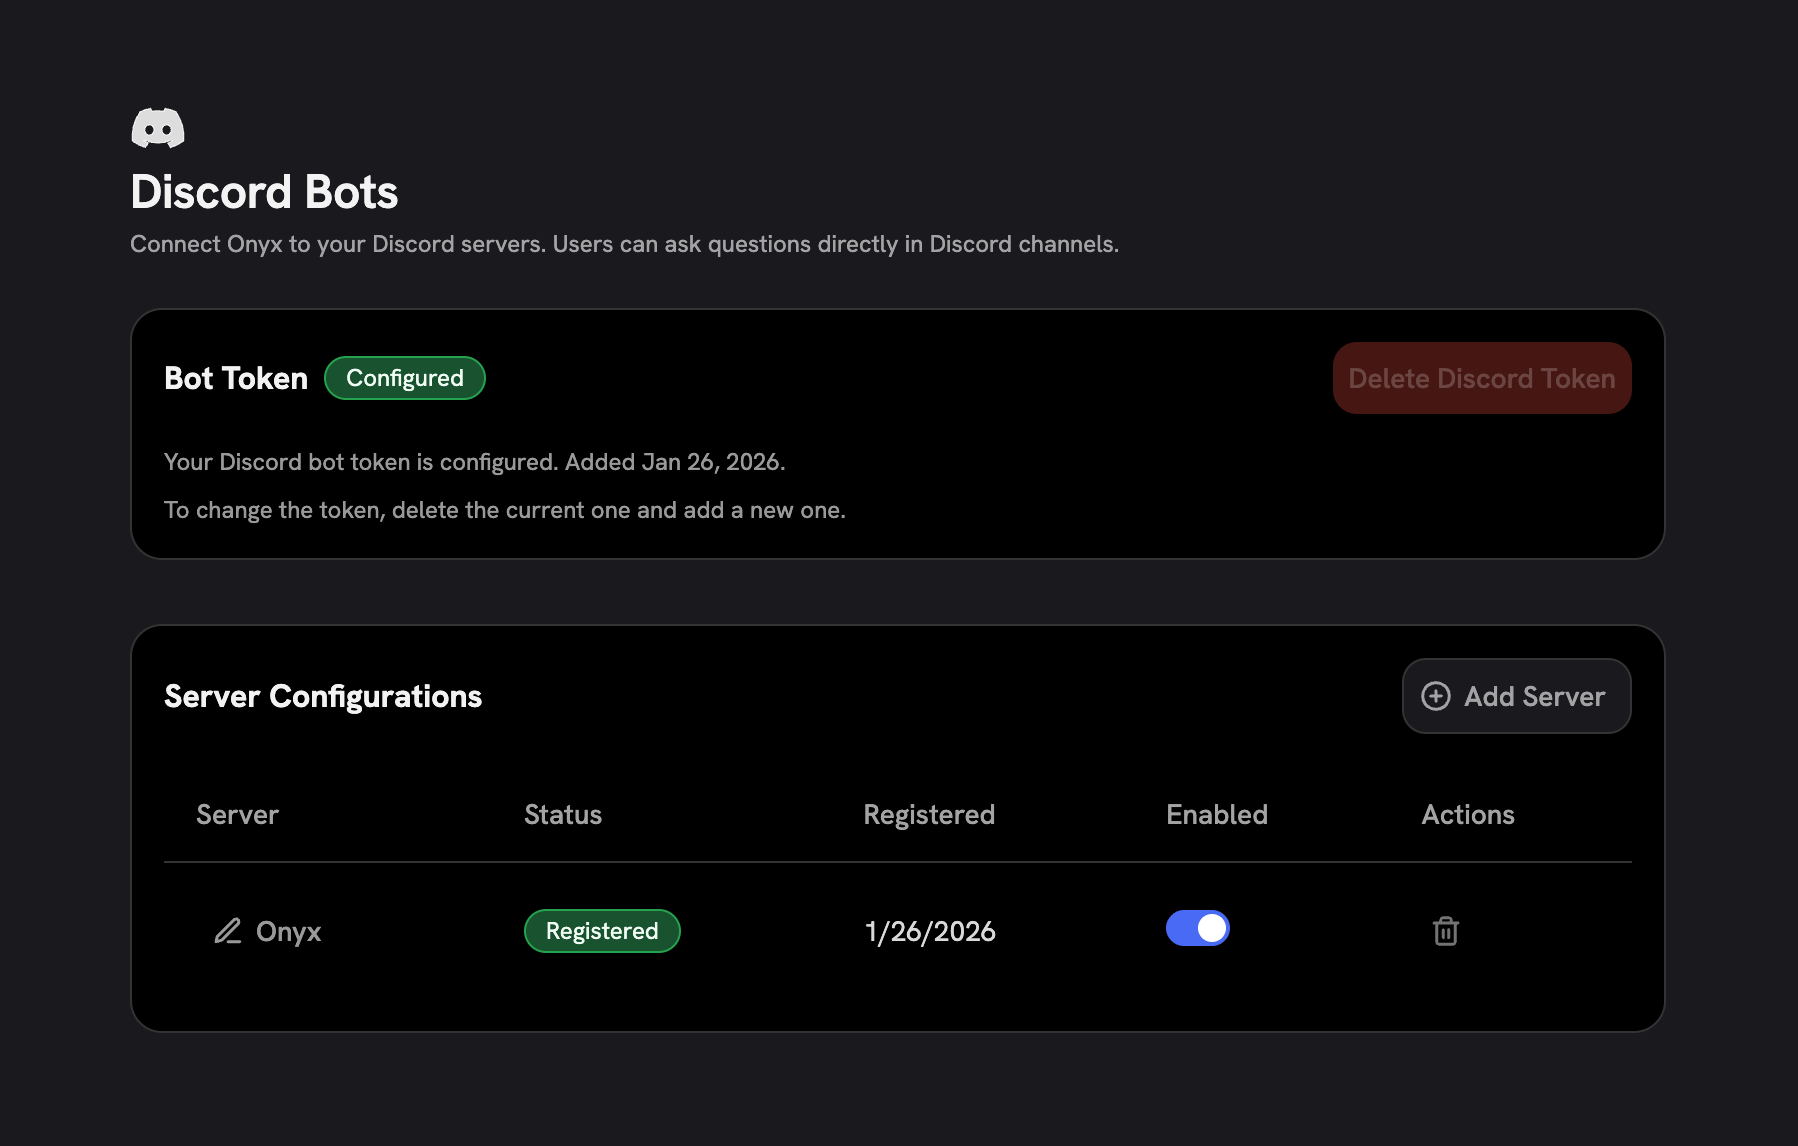 Click the pencil icon next to the server name to configure the bot's behavior.
By default, the bot will not respond in any channels. You must select the channels you want the bot to respond in.
We highly recommend configuring a **custom agent** with specific data access for the bot.
Otherwise it may answer from privately indexed data.
You can customize:
* The default agent that powers the bot's responses
* Agent overrides for specific channels
* Whether the bot should respond to all messages or only to messages tagged with @OnyxBot
* Whether the bot responds in replies or threads
Click the pencil icon next to the server name to configure the bot's behavior.
By default, the bot will not respond in any channels. You must select the channels you want the bot to respond in.
We highly recommend configuring a **custom agent** with specific data access for the bot.
Otherwise it may answer from privately indexed data.
You can customize:
* The default agent that powers the bot's responses
* Agent overrides for specific channels
* Whether the bot should respond to all messages or only to messages tagged with @OnyxBot
* Whether the bot responds in replies or threads
 ### Self-hosted Discord Bot
If you want to deploy your own Discord bot with your self-hosted Onyx instance,
you'll need to set up your own Discord app.
In the Developer Portal, you'll see references to "Guilds." This is Discord's internal term for servers.
Navigate to the [Discord Developer Portal](https://discord.com/developers/applications)
and click **New Application**.
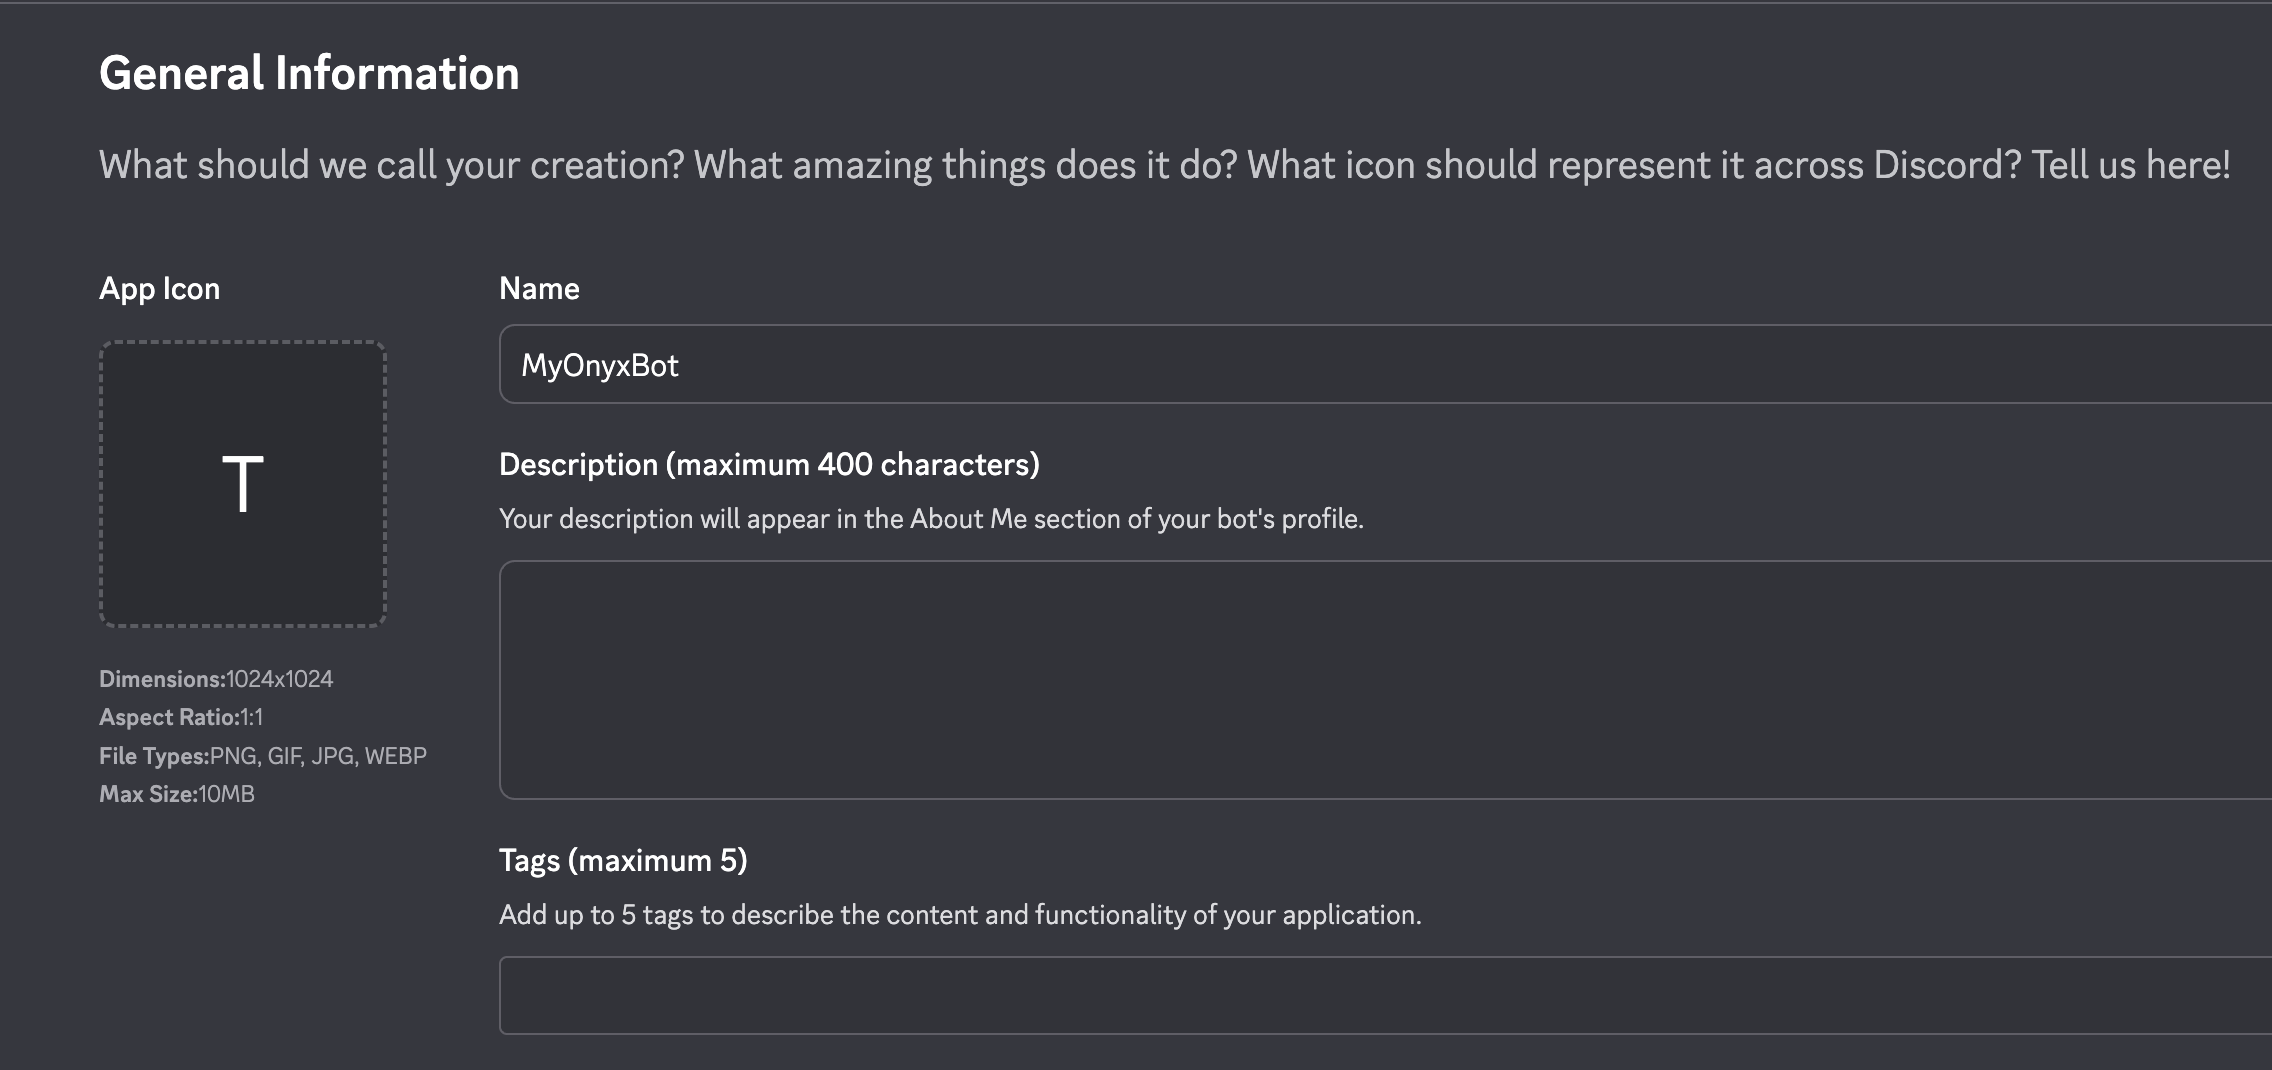
Give your app a name and click **Create**.
### Self-hosted Discord Bot
If you want to deploy your own Discord bot with your self-hosted Onyx instance,
you'll need to set up your own Discord app.
In the Developer Portal, you'll see references to "Guilds." This is Discord's internal term for servers.
Navigate to the [Discord Developer Portal](https://discord.com/developers/applications)
and click **New Application**.
Give your app a name and click **Create**.
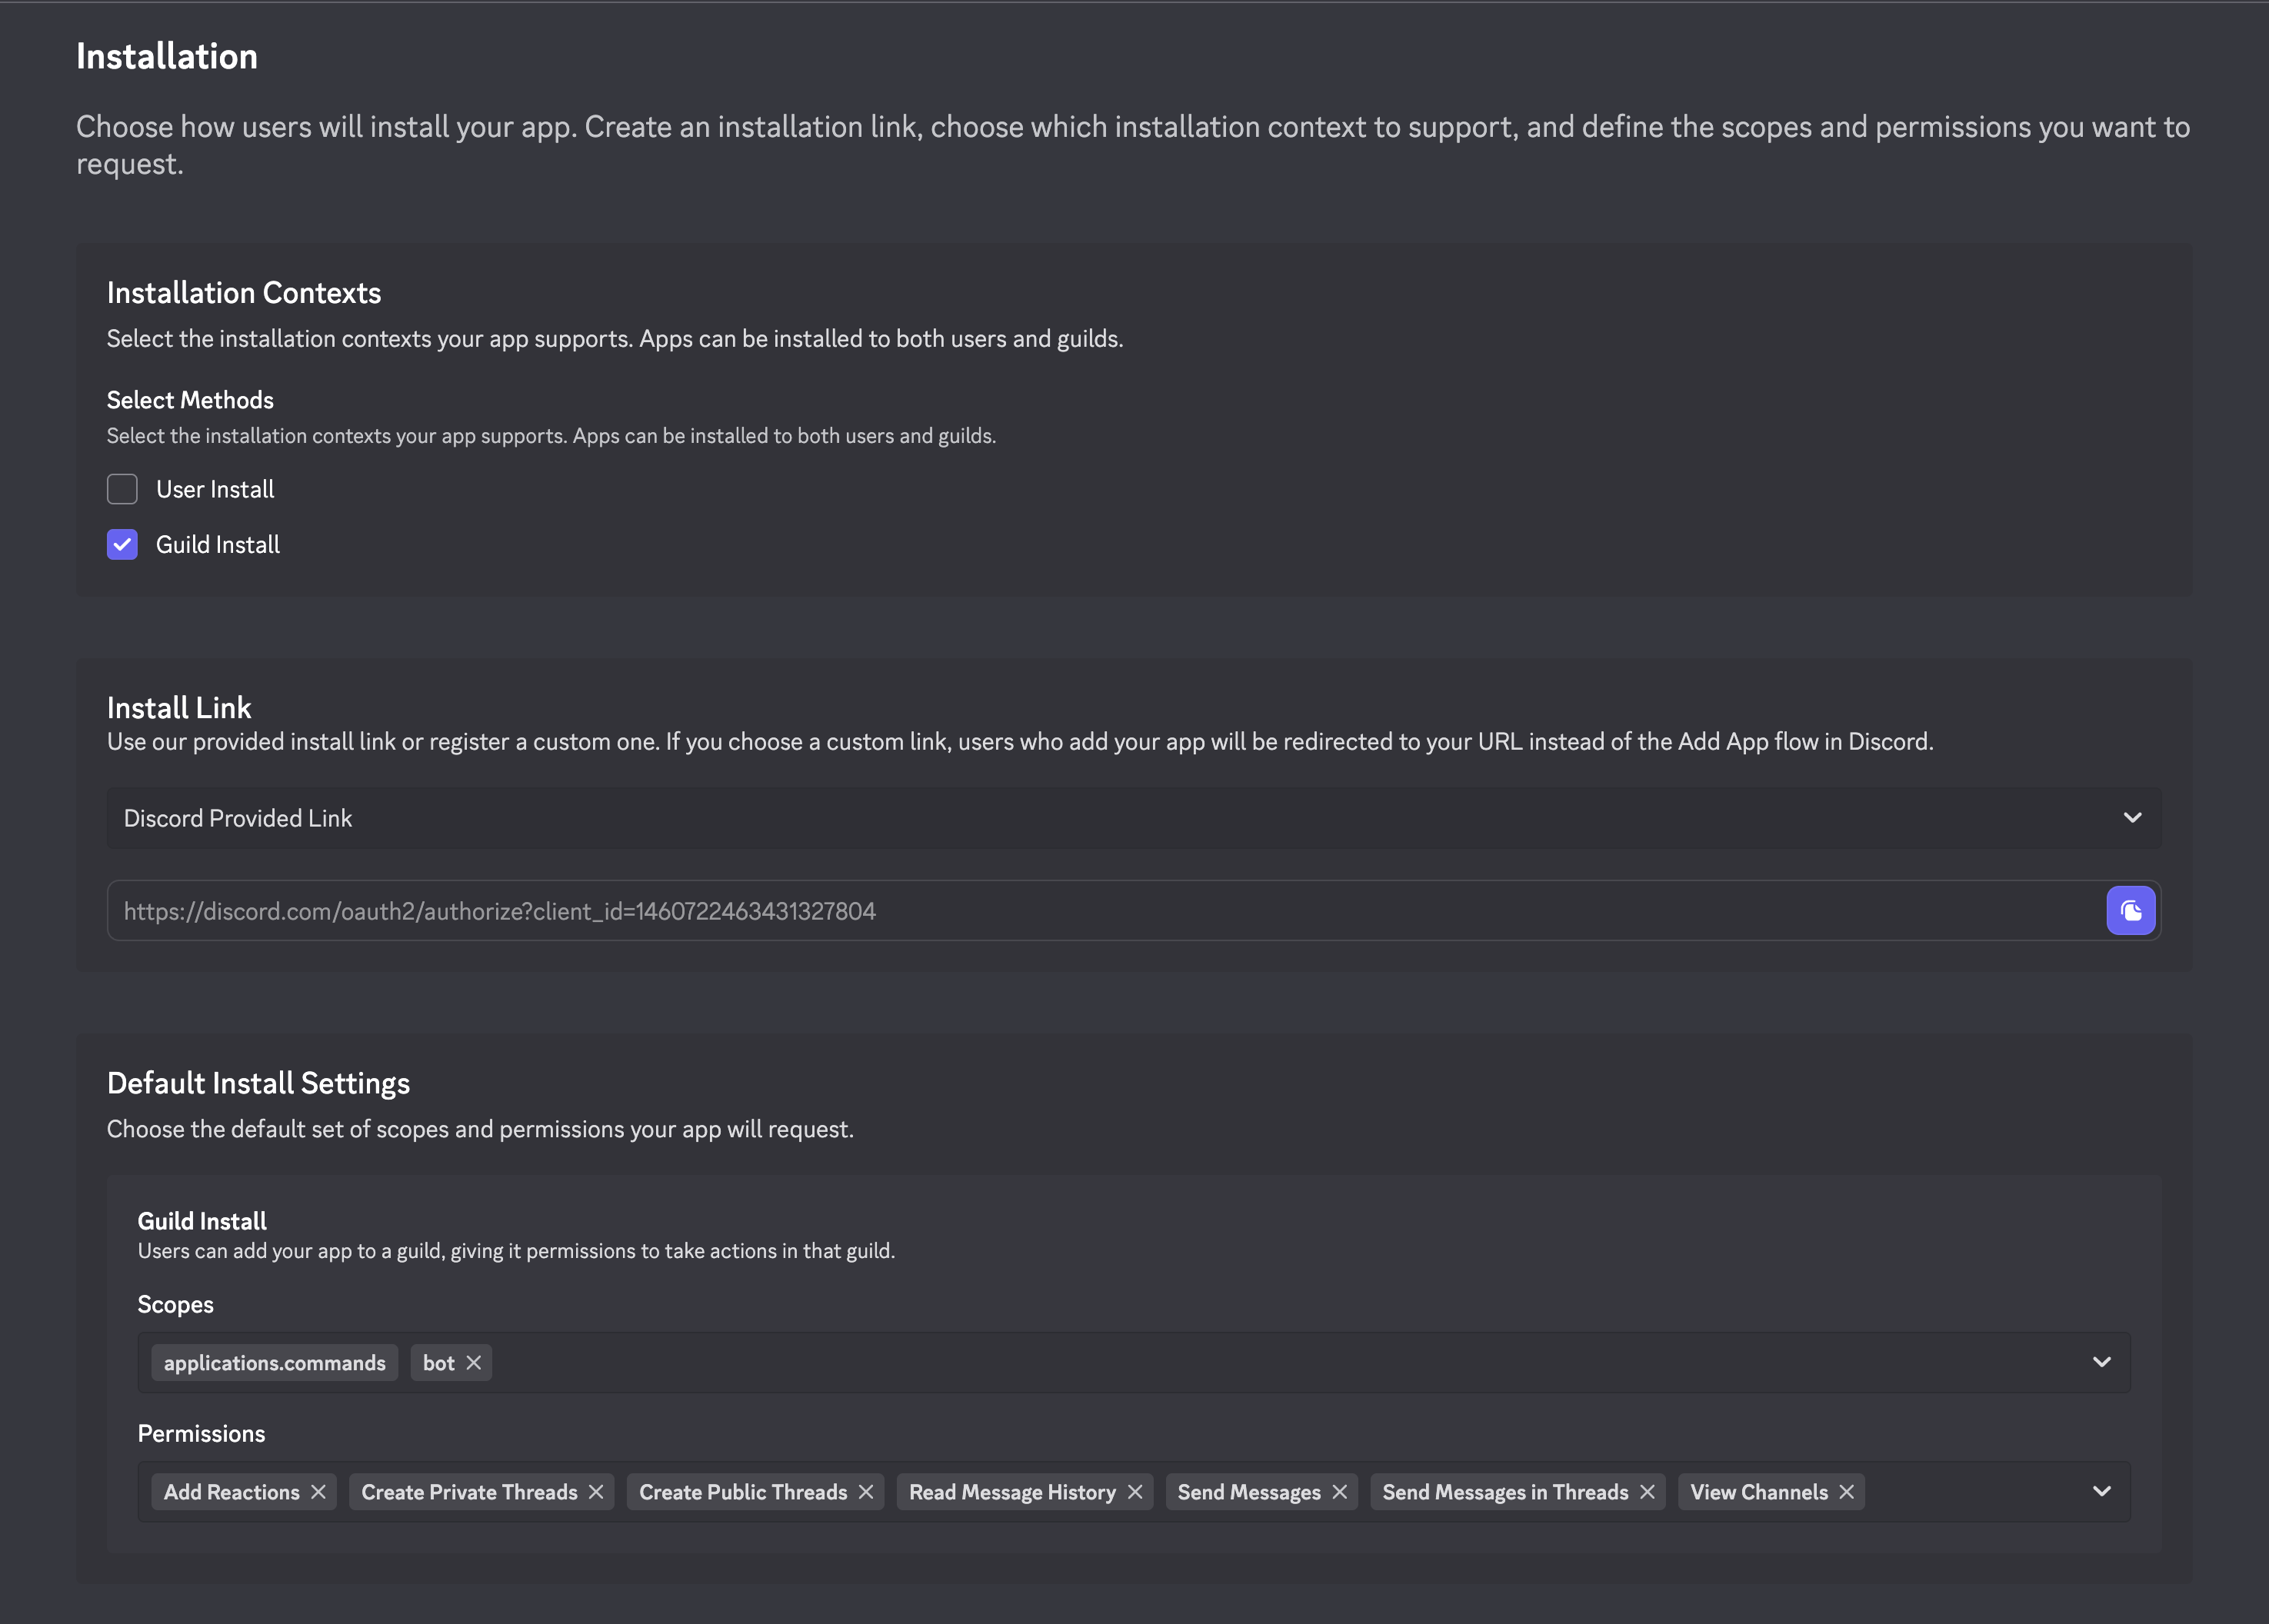
 Navigate to the **Installation** tab.
Uncheck **User Install**. The Discord app cannot be installed for pesronal use.
It must be installed in servers only.
Add the following scopes:
```
- bot
- applications.commands
```
Add the following permissions:
```
- View channels
- Send messages
- Send messages in threads
- Create public threads
- Create private threads
- Read message history
- Add reactions
```
Navigate to the **Installation** tab.
Uncheck **User Install**. The Discord app cannot be installed for pesronal use.
It must be installed in servers only.
Add the following scopes:
```
- bot
- applications.commands
```
Add the following permissions:
```
- View channels
- Send messages
- Send messages in threads
- Create public threads
- Create private threads
- Read message history
- Add reactions
```
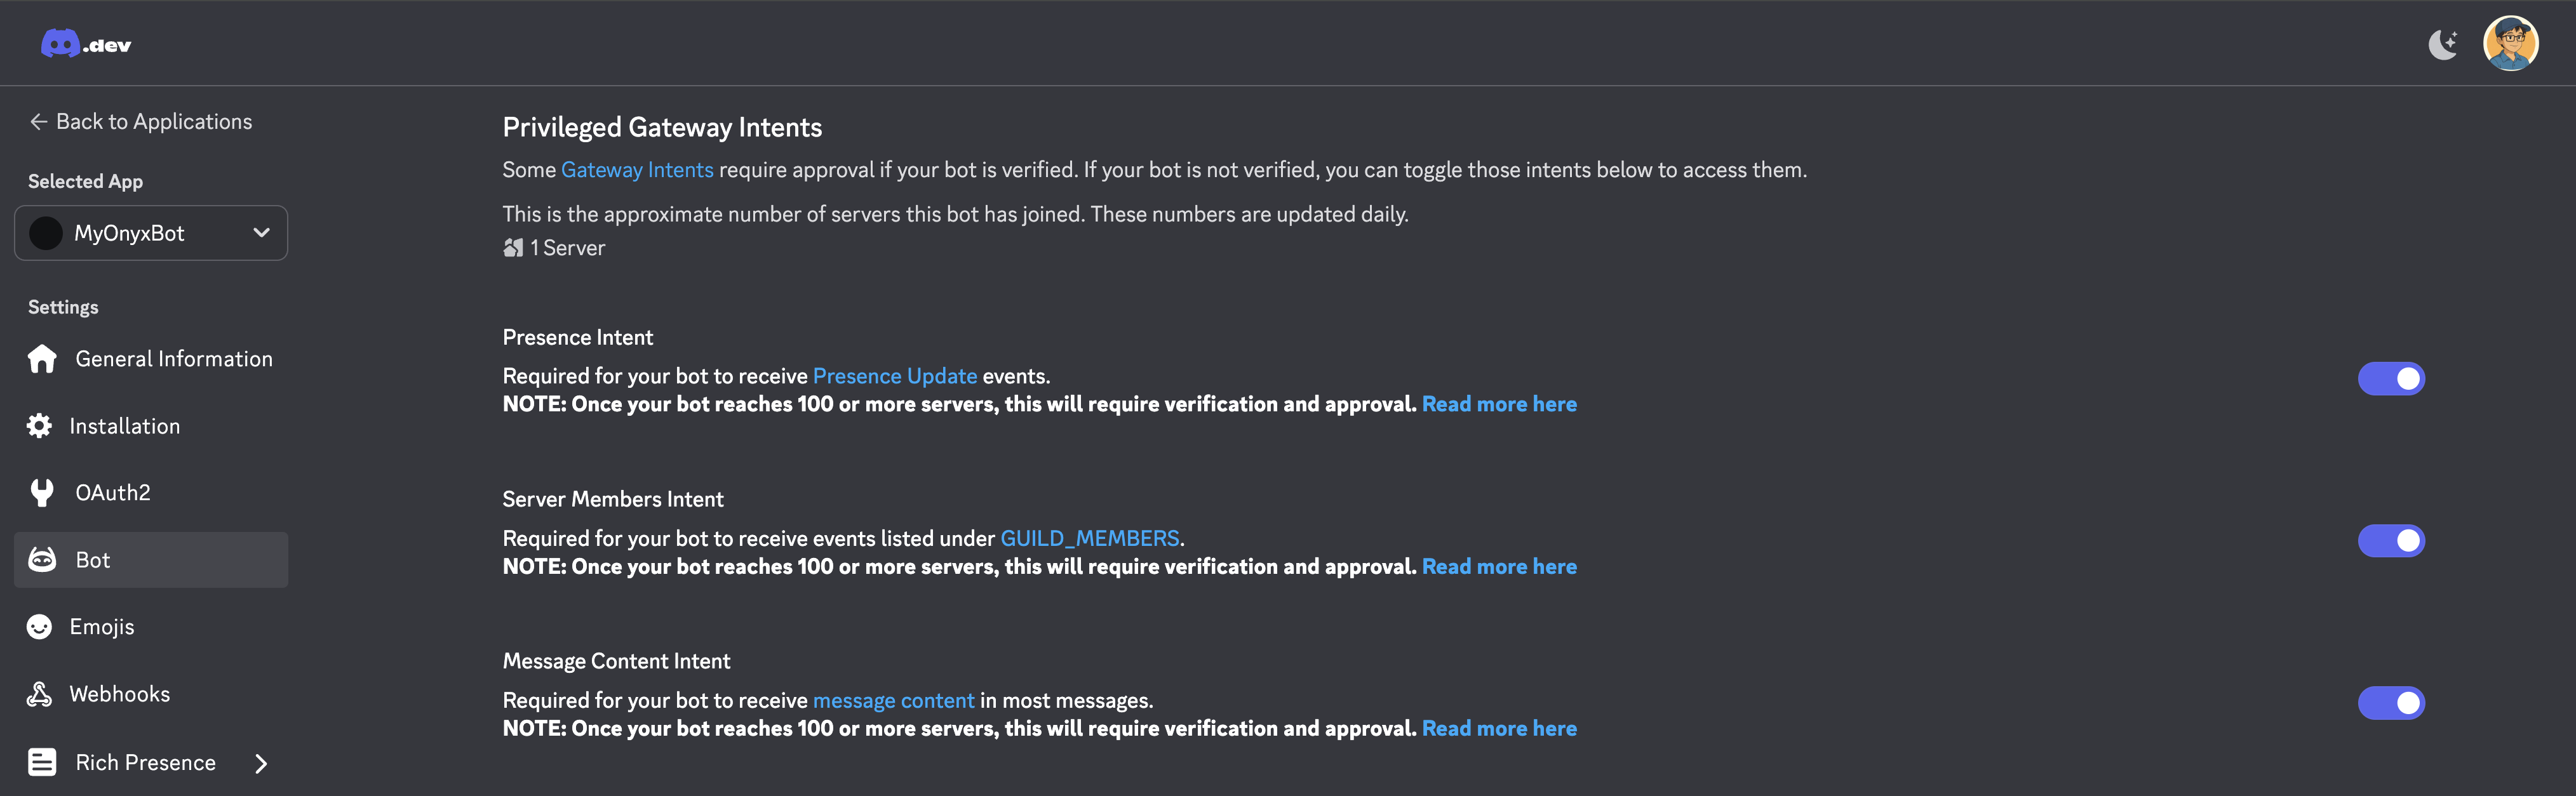
 On the **Bot** tab, scroll to the **Privileged Gateway Intents** section and enable all 3 toggles:
* Presence Intent
* Server Members Intent
* Message Content Intent
On the **Bot** tab, scroll to the **Privileged Gateway Intents** section and enable all 3 toggles:
* Presence Intent
* Server Members Intent
* Message Content Intent
 Use the **Install Link** on the **Installation** tab to install the app in your Discord server.
Go to the channel settings and click on the "Permissions" tab.
Add your app to the "Allowed Users" list.
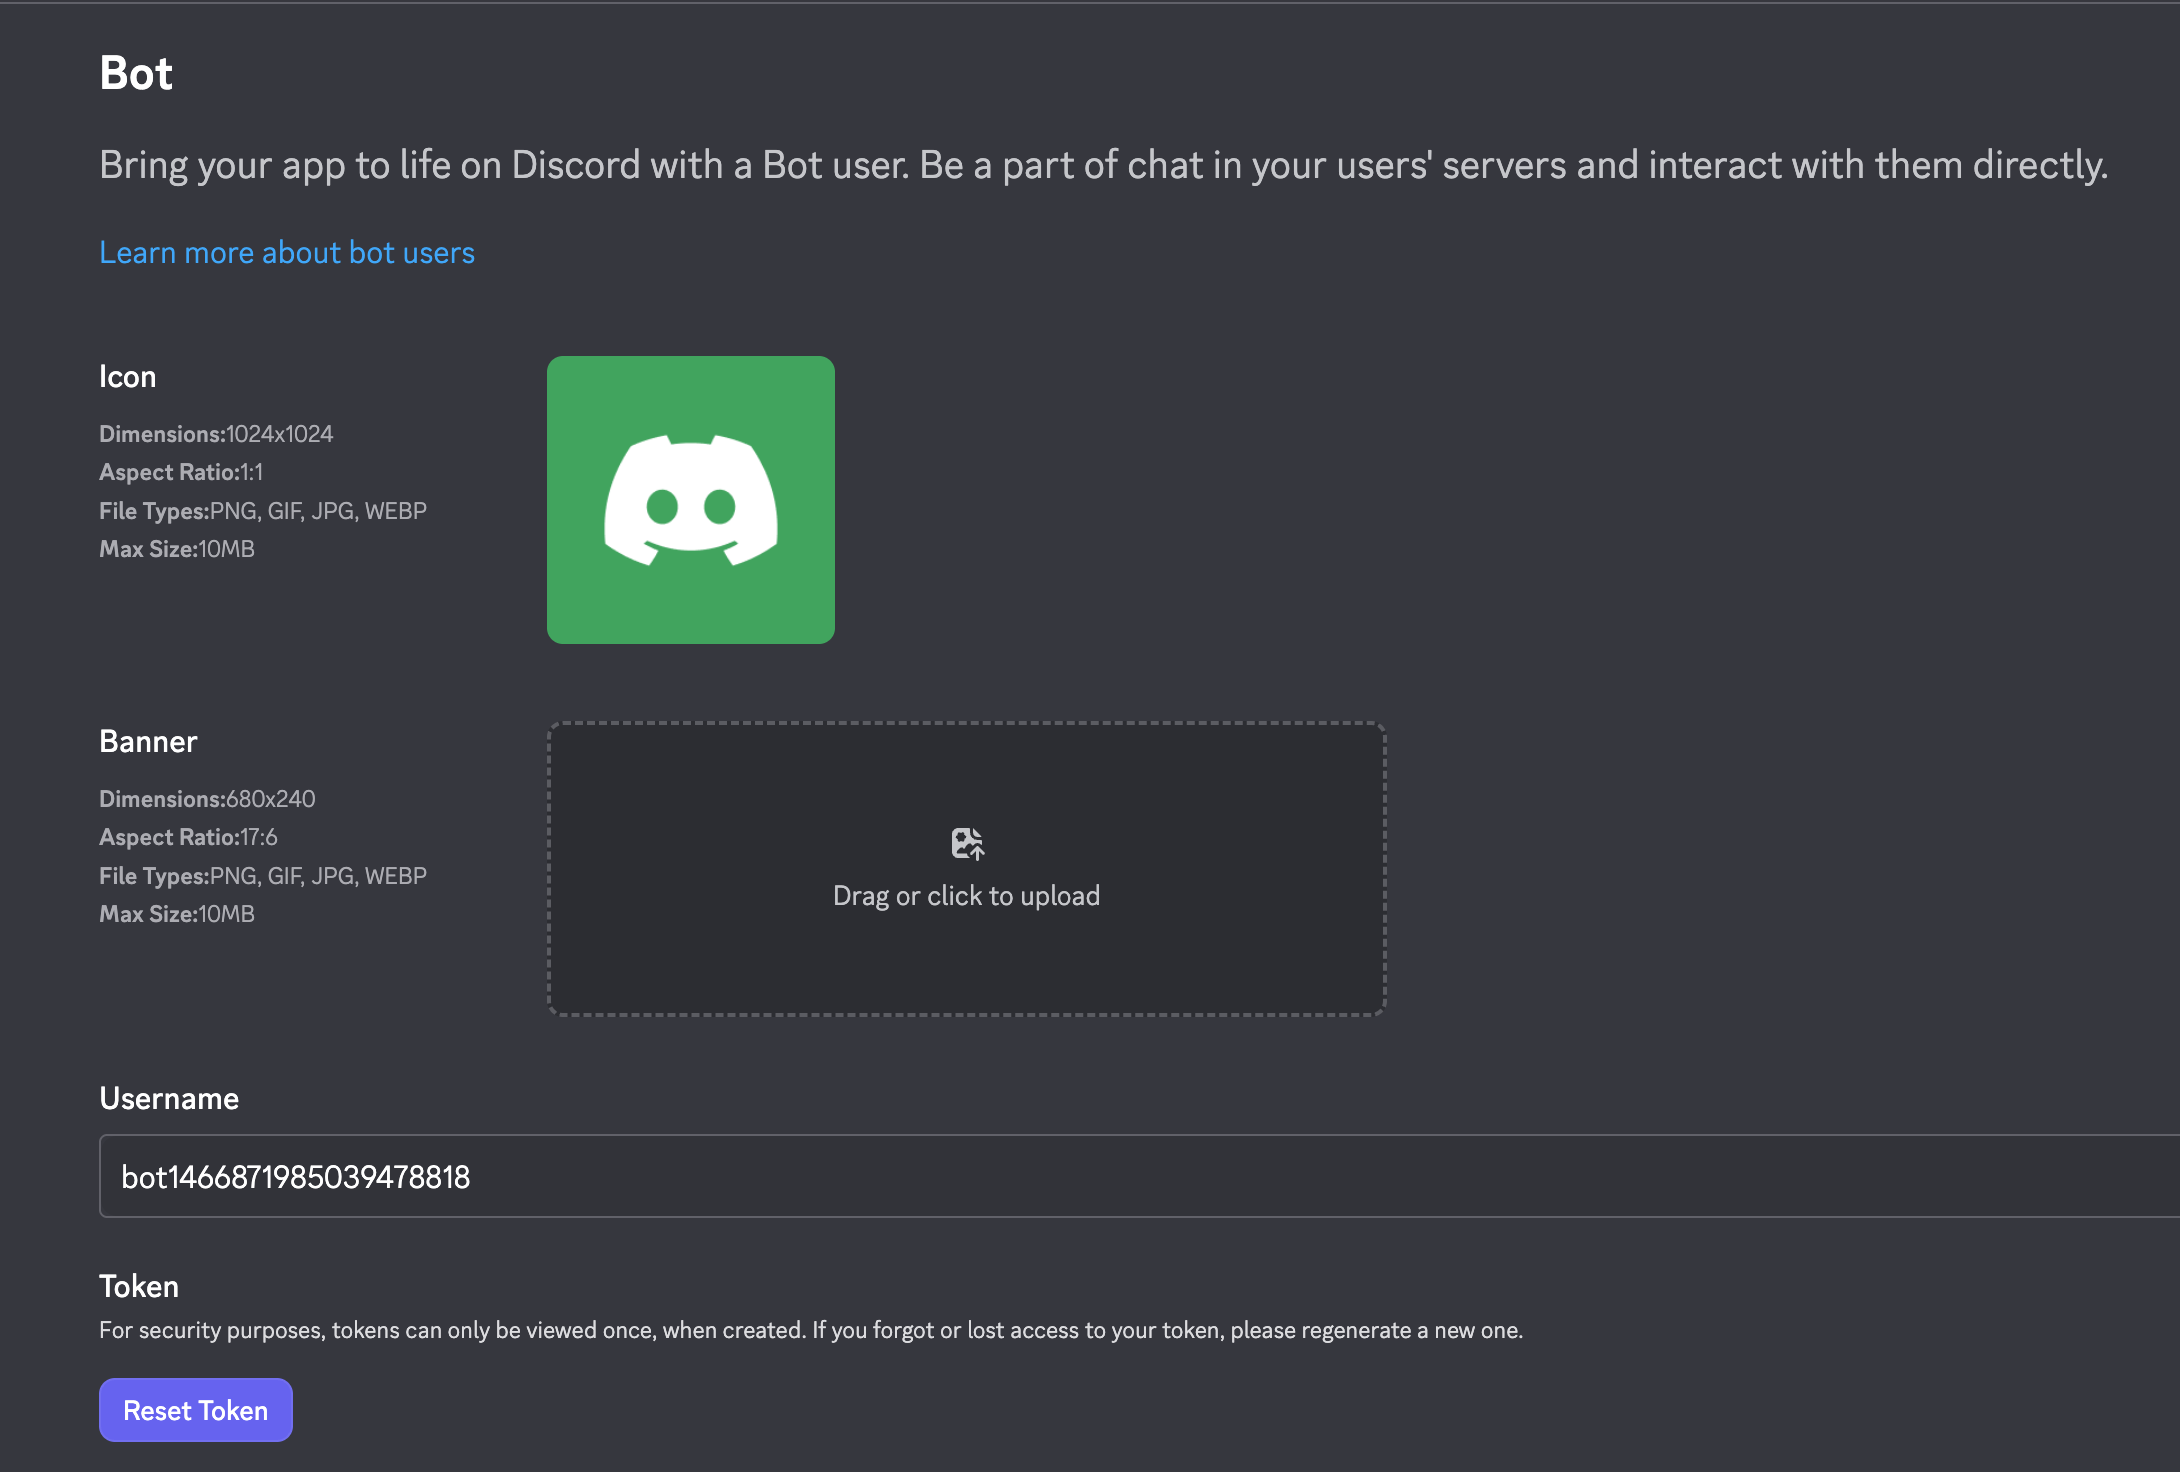
In the Developer Portal, navigate to the **Bot** tab and look for the **Token** section.
Click **Reset Token** and copy your bot token.
Use the **Install Link** on the **Installation** tab to install the app in your Discord server.
Go to the channel settings and click on the "Permissions" tab.
Add your app to the "Allowed Users" list.
In the Developer Portal, navigate to the **Bot** tab and look for the **Token** section.
Click **Reset Token** and copy your bot token.
 Navigate to the Onyx Admin Panel > Discord Bots.
Paste your bot token into the **Bot Token** field and click **Create!**
Navigate to the Onyx Admin Panel > Discord Bots.
Paste your bot token into the **Bot Token** field and click **Create!**
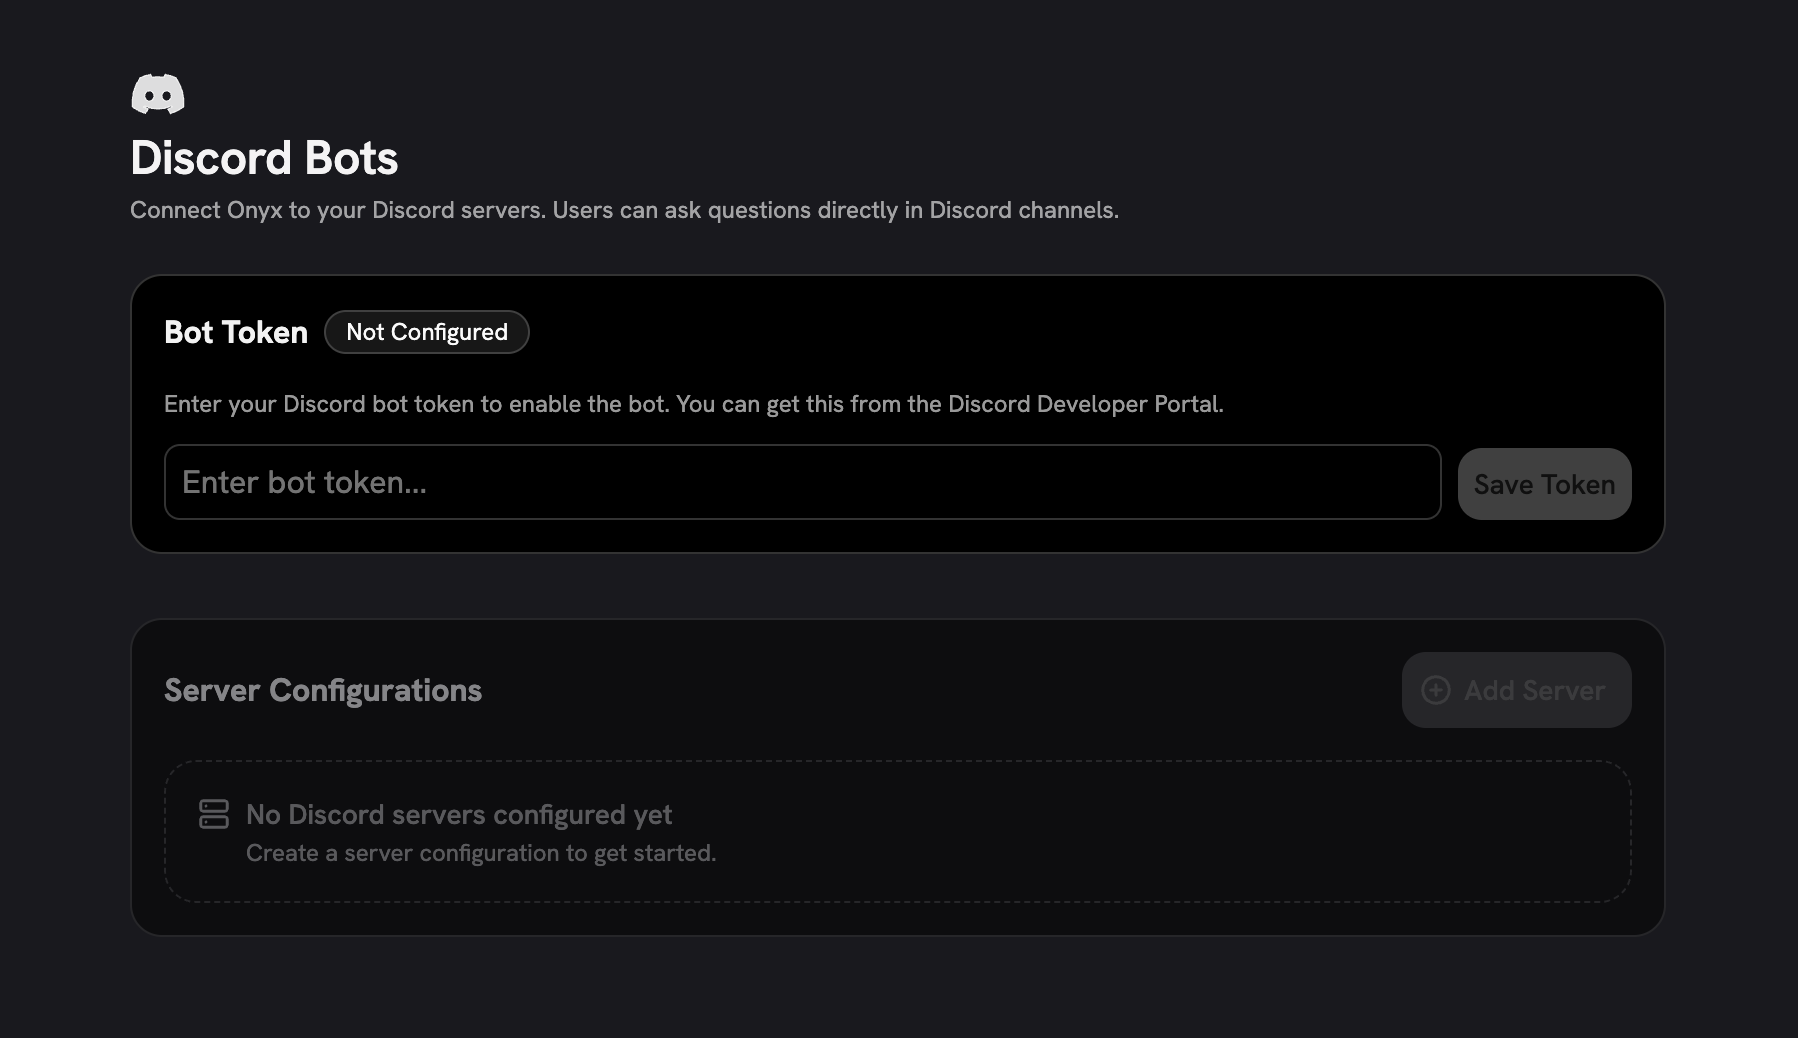 Click on the **Add Server** button and copy the registration key.
The registration key will only be shown once. If you lose it,
delete the server configuration and create a new one.
The key is invalidated as soon as you use it and does not allow any other access to your Onyx instance.
Send your registration key in the private channel you allowed your app to access.
Your Onyx bot should respond with a message confirming the server has been registered.
In Onyx, you should see the server status **Registered**.
Click the pencil icon next to the server name to configure the bot's behavior.
By default, the bot will not respond in any channels. You must select the channels you want the bot to respond in.
We highly recommend configuring a **custom agent** with specific data access for the bot.
Otherwise it may answer from privately indexed data.
You can customize:
* The default agent that powers the bot's responses
* Agent overrides for specific channels
* Whether the bot should respond to all messages or only to messages tagged with @OnyxBot
* Whether the bot responds in replies or threads
## FAQ
### Why can't I see all of my channels in Onyx?
If you've added or removed channels from your Discord server, you'll need to sync the channels to Onyx.
Run `!sync-channels` in any text channel that OnyxBot has access to.
### `!` is already taken by another command!
`!sync-channels` is currently the only command supported for OnyxBot.
If you are self-hosting, you can set the `DISCORD_BOT_INVOKE_CHAR` environment variable to change the command prefix.
If you are using the official OnyxBot, unfortunately, we cannot change the prefix. However,
you may still be able to run the command by creating a private channel that only OnyxBot has access to.
### My Discord bot is connected but not responding to any messages
If you are seeing this behavior, you could be experiencing the following error (in background container):
```
api_client.py 182: Failed to connect to API: Cannot connect to host 127.0.0.1:8080
```
To fix this, make sure you have the latest docker-compose.yml files by running `git pull` in your Onyx repo.
Verify that `API_SERVER_PROTOCOL` and `API_SERVER_HOST` exists in your compose file.
Click on the **Add Server** button and copy the registration key.
The registration key will only be shown once. If you lose it,
delete the server configuration and create a new one.
The key is invalidated as soon as you use it and does not allow any other access to your Onyx instance.
Send your registration key in the private channel you allowed your app to access.
Your Onyx bot should respond with a message confirming the server has been registered.
In Onyx, you should see the server status **Registered**.
Click the pencil icon next to the server name to configure the bot's behavior.
By default, the bot will not respond in any channels. You must select the channels you want the bot to respond in.
We highly recommend configuring a **custom agent** with specific data access for the bot.
Otherwise it may answer from privately indexed data.
You can customize:
* The default agent that powers the bot's responses
* Agent overrides for specific channels
* Whether the bot should respond to all messages or only to messages tagged with @OnyxBot
* Whether the bot responds in replies or threads
## FAQ
### Why can't I see all of my channels in Onyx?
If you've added or removed channels from your Discord server, you'll need to sync the channels to Onyx.
Run `!sync-channels` in any text channel that OnyxBot has access to.
### `!` is already taken by another command!
`!sync-channels` is currently the only command supported for OnyxBot.
If you are self-hosting, you can set the `DISCORD_BOT_INVOKE_CHAR` environment variable to change the command prefix.
If you are using the official OnyxBot, unfortunately, we cannot change the prefix. However,
you may still be able to run the command by creating a private channel that only OnyxBot has access to.
### My Discord bot is connected but not responding to any messages
If you are seeing this behavior, you could be experiencing the following error (in background container):
```
api_client.py 182: Failed to connect to API: Cannot connect to host 127.0.0.1:8080
```
To fix this, make sure you have the latest docker-compose.yml files by running `git pull` in your Onyx repo.
Verify that `API_SERVER_PROTOCOL` and `API_SERVER_HOST` exists in your compose file.