> ## Documentation Index
> Fetch the complete documentation index at: https://docs.onyx.app/llms.txt
> Use this file to discover all available pages before exploring further.
# SAML
> SAML authentication setup
Configure Onyx with SAML authentication.
This guide will walk you through the setup process for Okta. Other identity providers will have a similar process.
Please contact us if you need help with a different identity provider.
SAML authentication requires building Onyx images from source!
See details in the [Docker Compose guide](/deployment/getting_started/quickstart#launch-with-docker-compose).
## Guide
Navigate to the Okta **Admin Console** → **Applications** → **Create App Integration**.
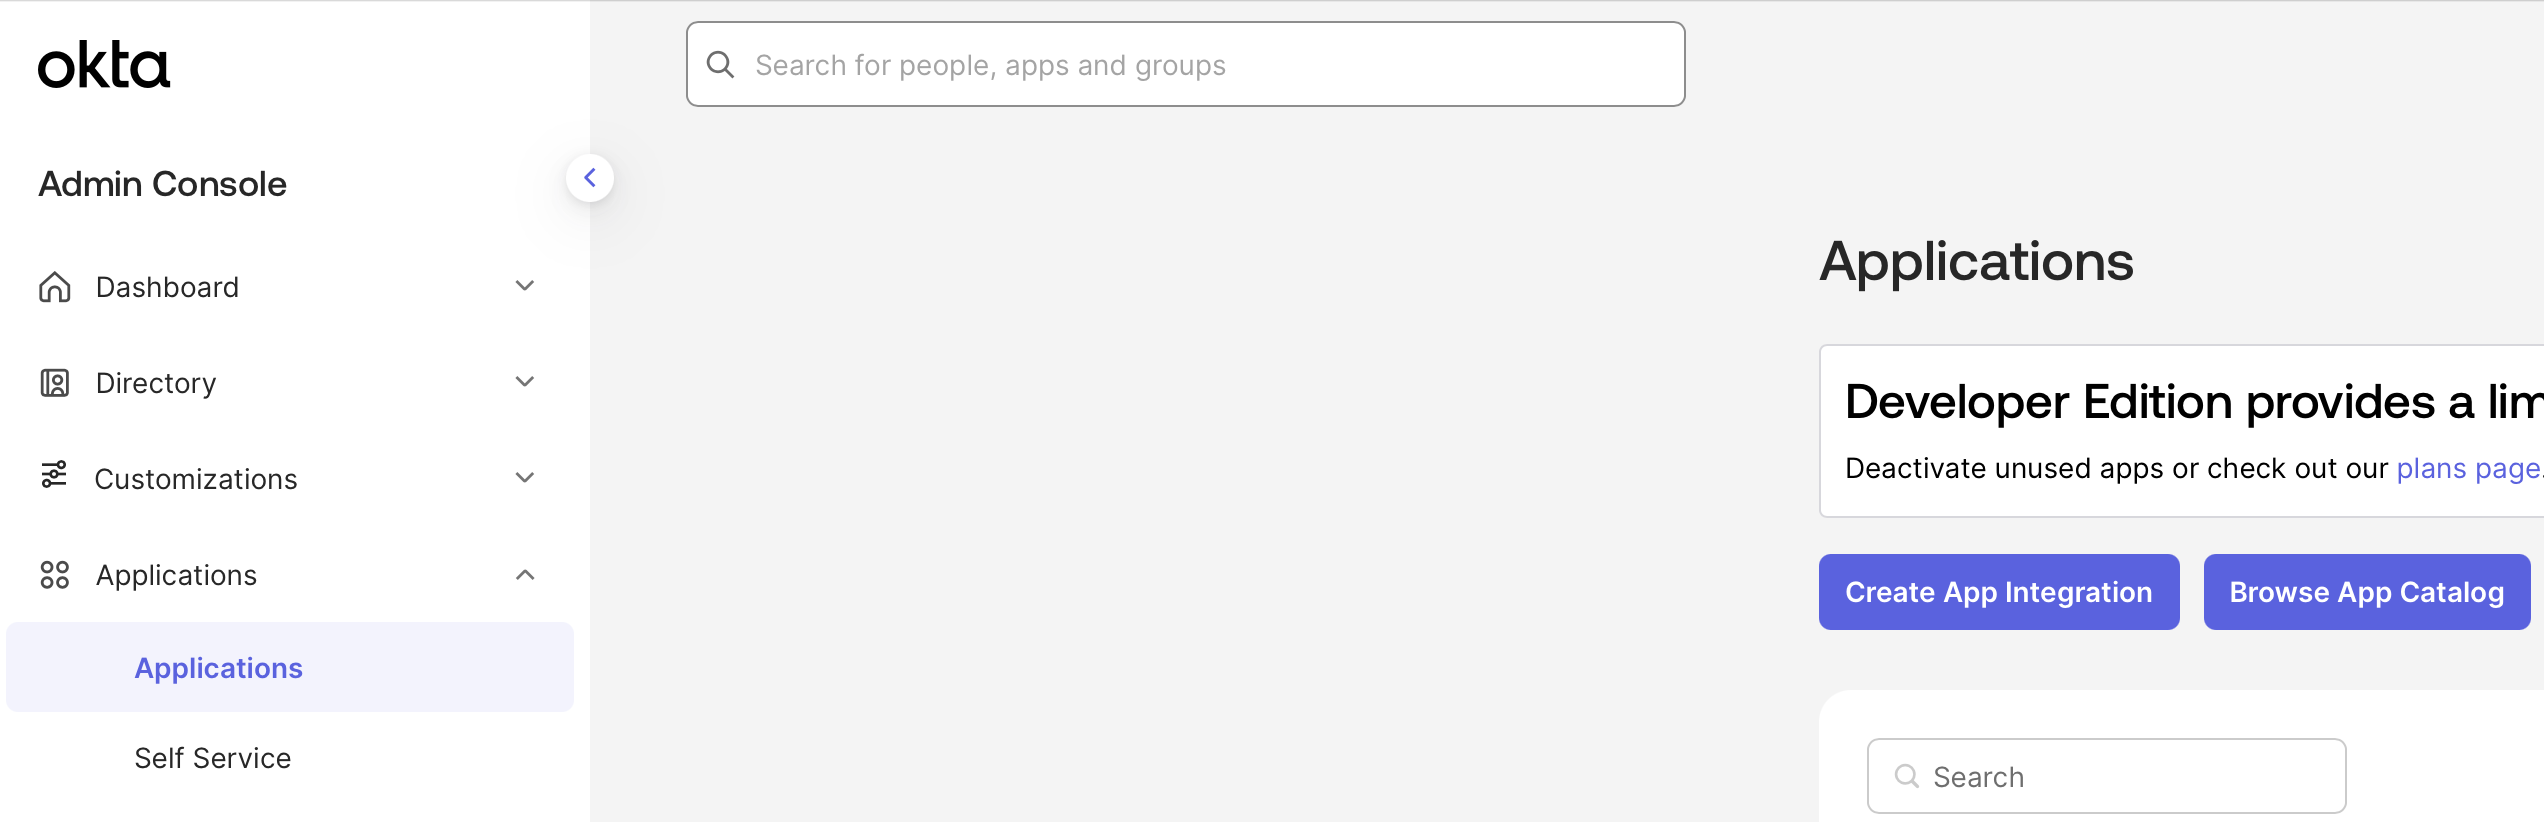 Select **SAML 2.0**.
**Name** your application `Onyx` and upload the Onyx logo.
If you are white-labeling Onyx, you can freely name your application and upload your own logo.
Add a **Sign sign-on URL**
```
https://YOUR_ONYX_DOMAIN.com/auth/saml/callback
```
Add an **Audience URI (SP Entity ID)**
```
https://YOUR_ONYX_DOMAIN.com/metadata
```
Add an **Attribute Statement** where **Name** is `email` and **Value** is `user.email`.
Select **SAML 2.0**.
**Name** your application `Onyx` and upload the Onyx logo.
If you are white-labeling Onyx, you can freely name your application and upload your own logo.
Add a **Sign sign-on URL**
```
https://YOUR_ONYX_DOMAIN.com/auth/saml/callback
```
Add an **Audience URI (SP Entity ID)**
```
https://YOUR_ONYX_DOMAIN.com/metadata
```
Add an **Attribute Statement** where **Name** is `email` and **Value** is `user.email`.
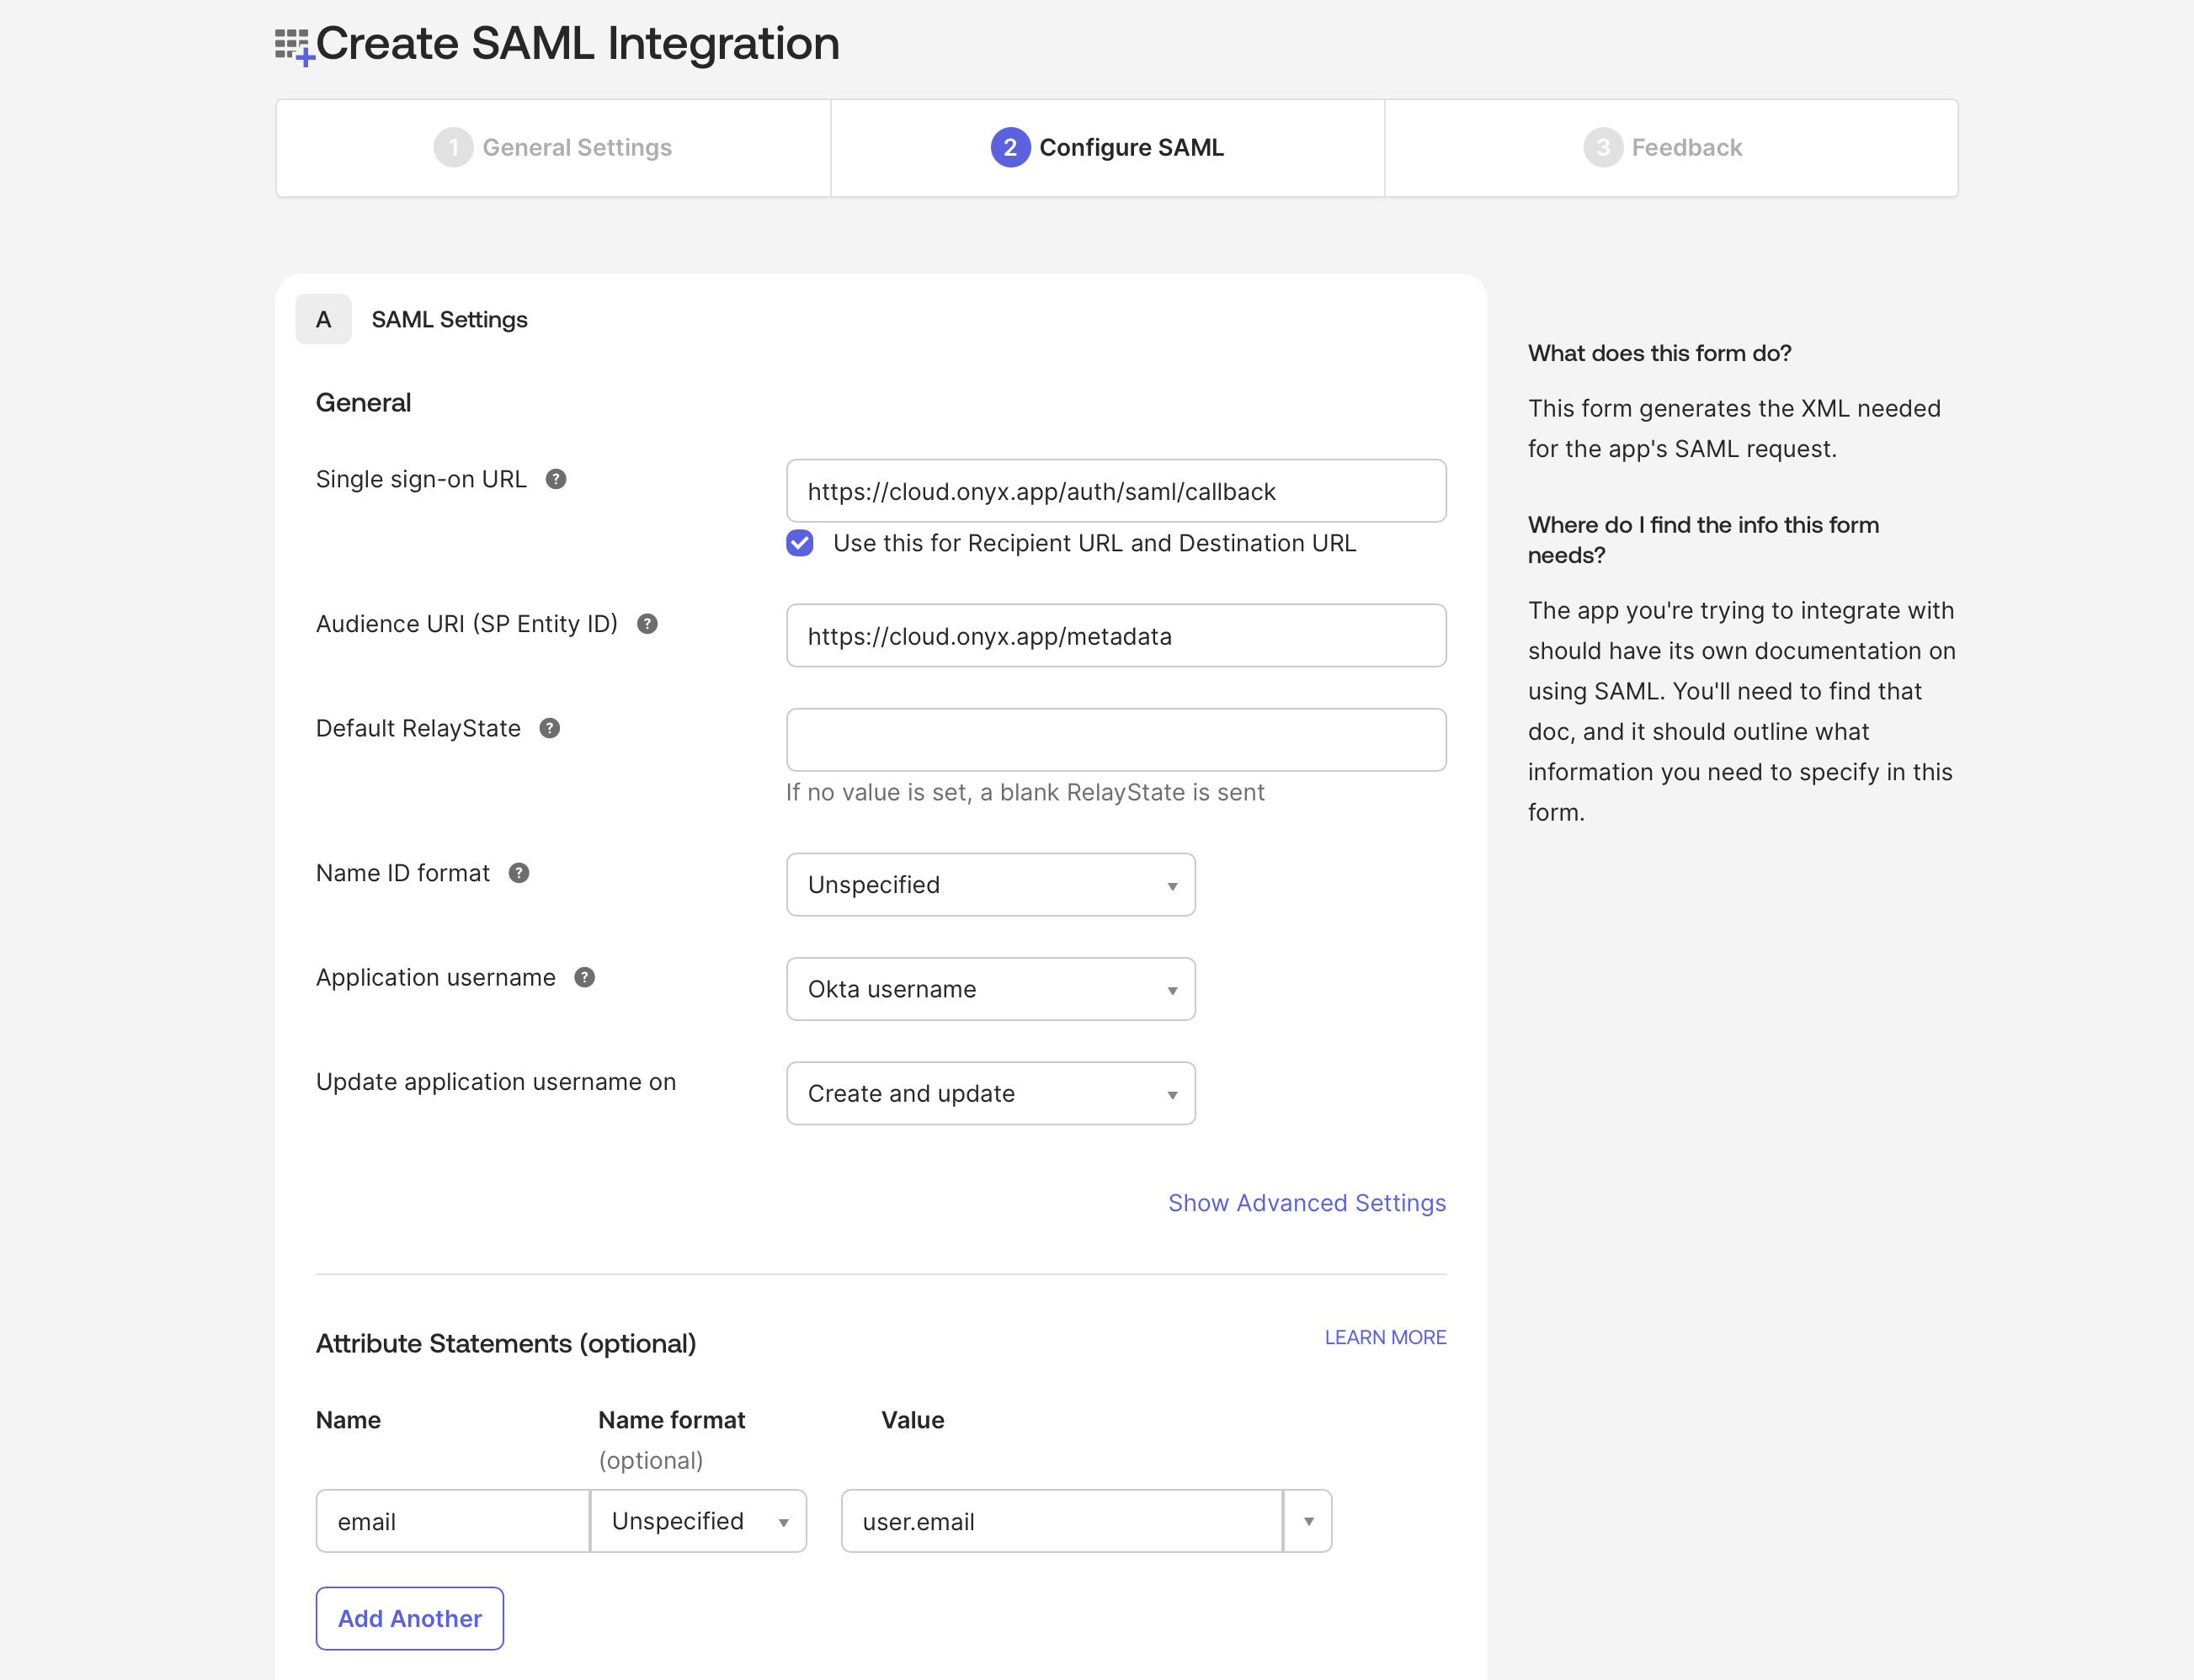 Create the application and navigate to the **Assignments** tab to assign users.
Navigate to `onyx/backend/ee/onyx/configs/saml_config` and copy the template settings file.
```bash theme={null}
cd onyx/backend/ee/onyx/configs/saml_config
cp template_settings.yaml settings.yaml
```
Edit the `settings.yaml` file with the following values:
Go to the **Sign On** tab of your application in Okta, copy the **Metadata URL**,
and paste it into your browser. You should see XML like:
```XML theme={null}
...
```
Copy the `entityID` value and paste it into `idp: entityId` in `settings.yaml`.
In the XML from the previous step, find the `ds:X509Certificate` element.
```XML theme={null}
[Some certificate value here]
```
Copy the certificate value and paste it into `idp: x509cert` in `settings.yaml`.
Go to the **General** tab of your application in Okta and copy the **Embed Link**.
This is the same as the **Audience URI (SP Entity ID)** you added to the Okta application.
```
https://YOUR_ONYX_DOMAIN.com/metadata
```
This is the same as the **Sign sign-on URL** you added to the Okta application.
```
https://YOUR_ONYX_DOMAIN.com/auth/saml/callback
```
Generate a self-signed certificate:
```bash theme={null}
openssl genrsa -out sp-private-key.pem 2048
openssl req -new -x509 -key sp-private-key.pem -out sp-cert.pem -days 730 -subj "/CN="
awk 'NF {sub(/\r/, ""); printf "%s\\n",$0;}' sp-cert.pem
```
Copy the certificate value and paste it into `sp: x509cert` in `settings.yaml`.
Set the following environment variables in your `.env` or `values.yaml` file (Docker and Kubernetes, respectively).
```bash .env theme={null}
AUTH_TYPE=saml
```
If you're using Docker but don't have a `.env` file,
copy `onyx/deployment/docker_compose/env.prod.template` to a new `.env` file in the same directory.
```bash values.yaml theme={null}
configMap:
AUTH_TYPE: saml
```
Create the application and navigate to the **Assignments** tab to assign users.
Navigate to `onyx/backend/ee/onyx/configs/saml_config` and copy the template settings file.
```bash theme={null}
cd onyx/backend/ee/onyx/configs/saml_config
cp template_settings.yaml settings.yaml
```
Edit the `settings.yaml` file with the following values:
Go to the **Sign On** tab of your application in Okta, copy the **Metadata URL**,
and paste it into your browser. You should see XML like:
```XML theme={null}
...
```
Copy the `entityID` value and paste it into `idp: entityId` in `settings.yaml`.
In the XML from the previous step, find the `ds:X509Certificate` element.
```XML theme={null}
[Some certificate value here]
```
Copy the certificate value and paste it into `idp: x509cert` in `settings.yaml`.
Go to the **General** tab of your application in Okta and copy the **Embed Link**.
This is the same as the **Audience URI (SP Entity ID)** you added to the Okta application.
```
https://YOUR_ONYX_DOMAIN.com/metadata
```
This is the same as the **Sign sign-on URL** you added to the Okta application.
```
https://YOUR_ONYX_DOMAIN.com/auth/saml/callback
```
Generate a self-signed certificate:
```bash theme={null}
openssl genrsa -out sp-private-key.pem 2048
openssl req -new -x509 -key sp-private-key.pem -out sp-cert.pem -days 730 -subj "/CN="
awk 'NF {sub(/\r/, ""); printf "%s\\n",$0;}' sp-cert.pem
```
Copy the certificate value and paste it into `sp: x509cert` in `settings.yaml`.
Set the following environment variables in your `.env` or `values.yaml` file (Docker and Kubernetes, respectively).
```bash .env theme={null}
AUTH_TYPE=saml
```
If you're using Docker but don't have a `.env` file,
copy `onyx/deployment/docker_compose/env.prod.template` to a new `.env` file in the same directory.
```bash values.yaml theme={null}
configMap:
AUTH_TYPE: saml
```