> ## Documentation Index
> Fetch the complete documentation index at: https://docs.onyx.app/llms.txt
> Use this file to discover all available pages before exploring further.
# SSO Providers
> Manage multiple SSO providers from the admin panel
Onyx supports configuring SSO providers directly from the admin panel. Google, OIDC,
and SAML providers are stored as rows you can add, edit,
and enable without touching environment variables or restarting Onyx. Users pick their provider on the login page,
so one Onyx instance can serve teams on different identity providers.
Available starting in `v4.4.0`. From this version on, the admin panel is the only way to set up SSO.
The legacy environment variables (`AUTH_TYPE=google_oauth`, `AUTH_TYPE=oidc`,
or `AUTH_TYPE=saml` and their companion variables) no longer enable SSO on a new install.
Onyx logs a warning while `AUTH_TYPE` is still set, and the variables are planned for full removal in `v4.5`.
On a fresh install, create the first user with email and password (the first user becomes an admin),
then add your provider from the admin panel.
If you are upgrading from `v4.3` or earlier with environment-based SSO,
the upgrade imports your configuration into an SSO provider entry automatically, and existing logins keep working.
The import runs once, when the upgrade first runs against your existing database,
so keep the legacy configuration in place through the upgrade.
Migrated providers keep using the redirect URIs and ACS URLs already registered with your identity provider,
so nothing changes on the IdP side. Remove the legacy variables after the provider appears in the admin panel.
## Managing Providers
Navigate to **Admin Panel** → **Organization** → **SSO Providers**.
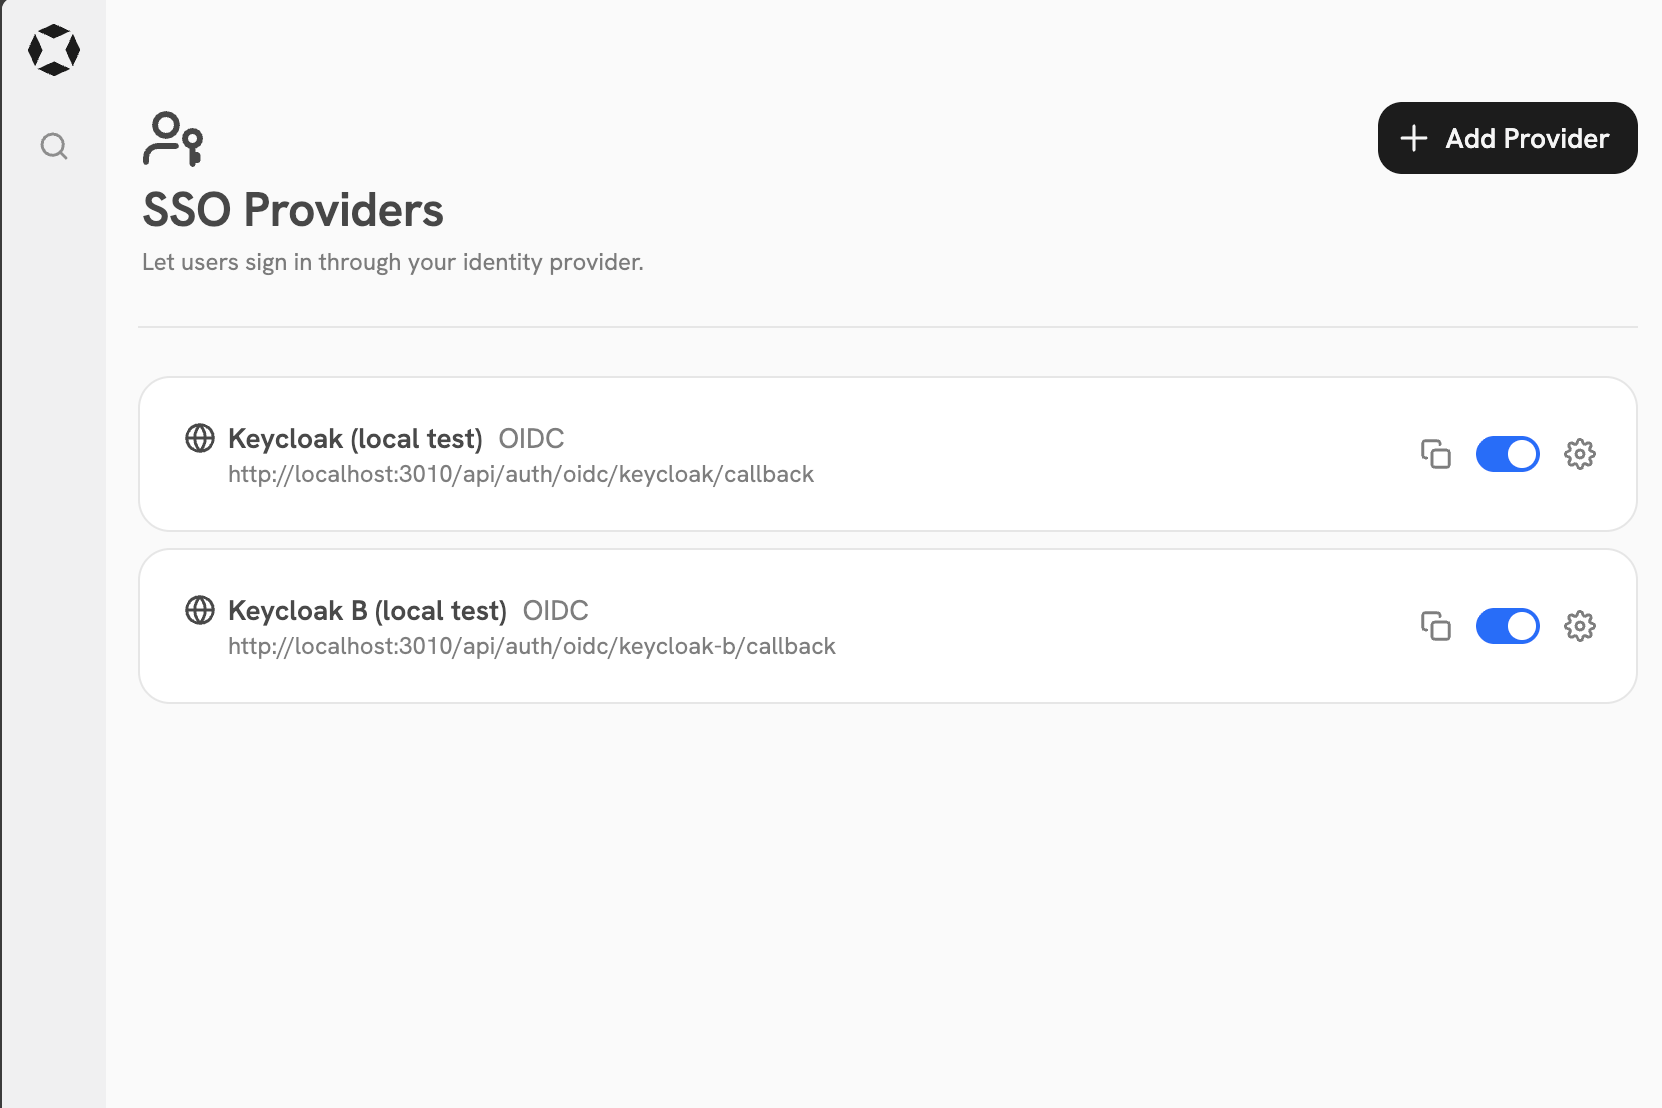 Click **Add Provider** and pick the provider type: **Google**, **OIDC**, or **SAML**.
Give the provider a **Name** (a lowercase slug used in the login URL)
and a **Display Name** (the label users see on the sign-in button).
Click **Add Provider** and pick the provider type: **Google**, **OIDC**, or **SAML**.
Give the provider a **Name** (a lowercase slug used in the login URL)
and a **Display Name** (the label users see on the sign-in button).
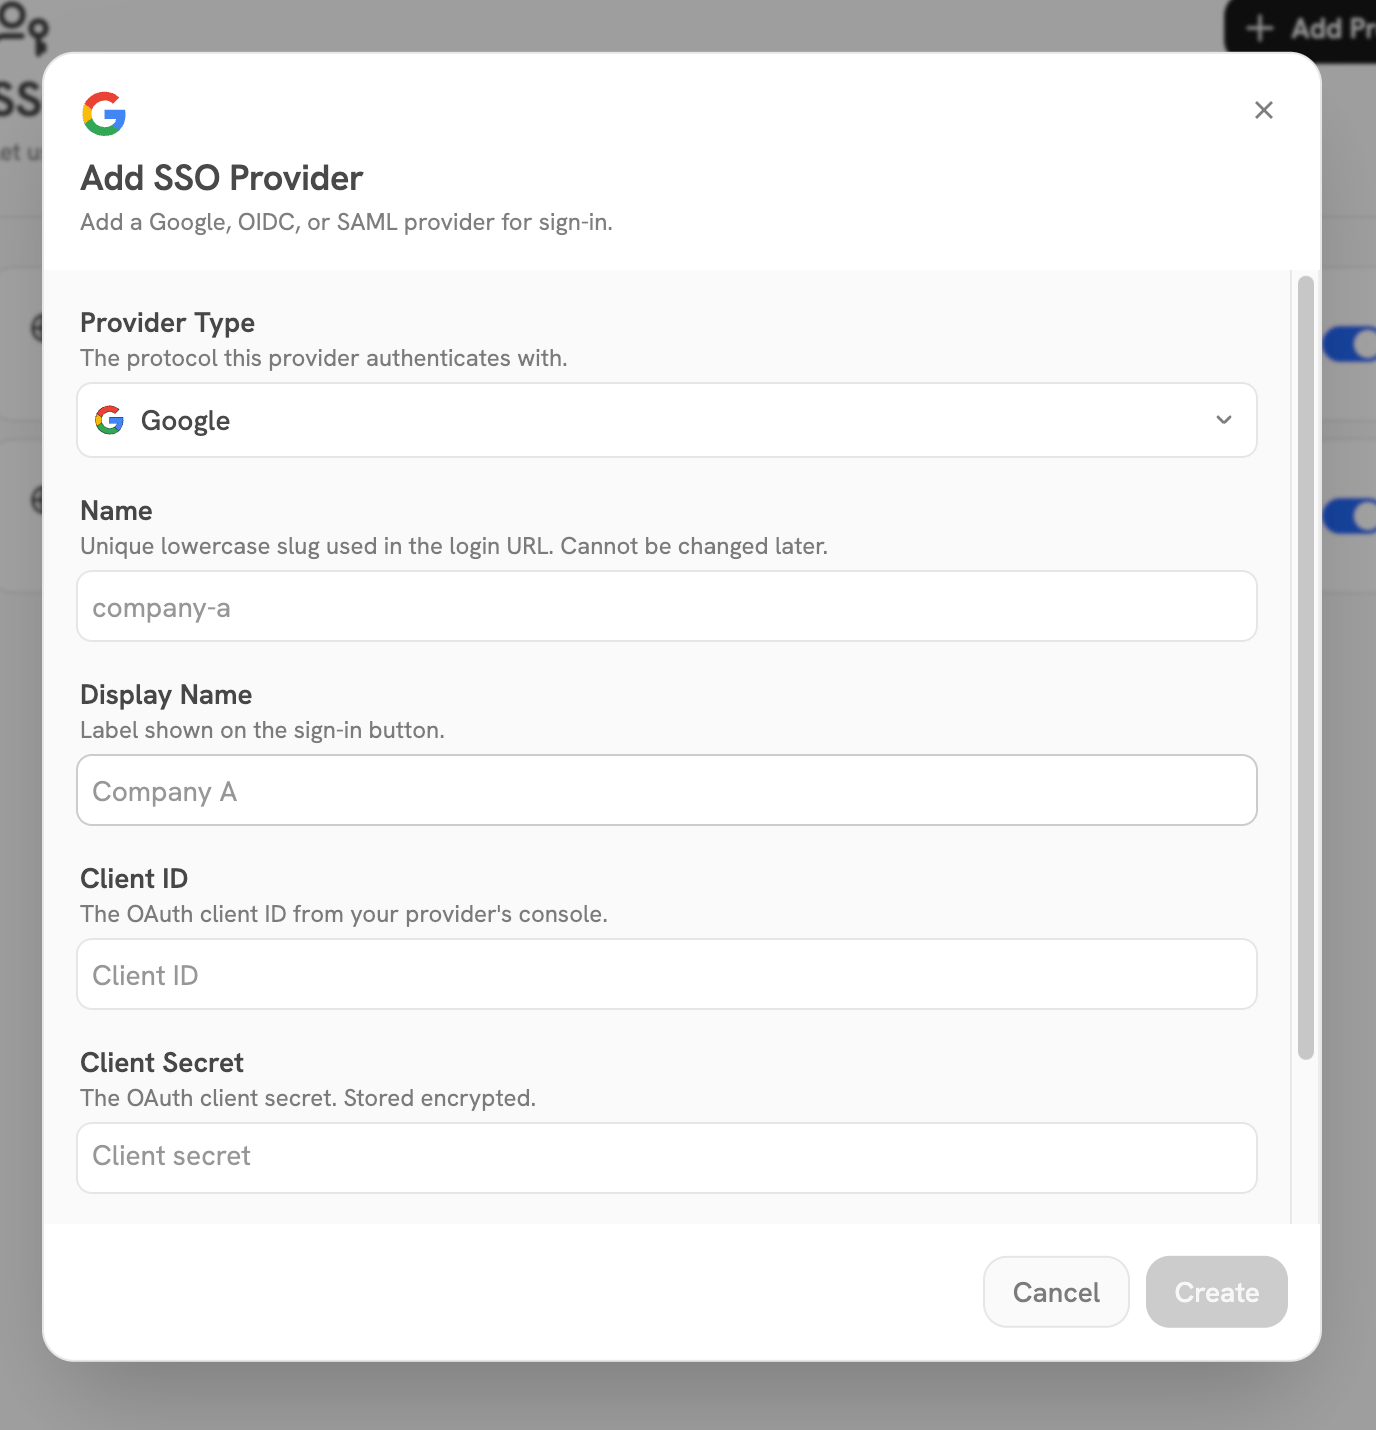 Each provider type asks for its own credentials:
* **Google**: Client ID and Client Secret from your Google Cloud Console.
* **OIDC**: Client ID, Client Secret, and the OpenID configuration URL
(the `.well-known/openid-configuration` endpoint).
* **SAML**: IdP entity ID, IdP SSO URL, the IdP x509 certificate, and
the SP entity ID. The SP certificate, private key, and email attribute are optional depending on your IdP.
Optionally restrict the provider to specific **email domains**.
Users outside those domains cannot sign in through it.
After saving, the provider row shows its **Redirect URI** (OIDC and Google) or **ACS URL** (SAML).
Copy it into your identity provider's console as the allowed callback for the application.
New providers are enabled on creation and appear as sign-in options on the login page.
Use the toggle on the provider row to disable or re-enable it later.
## Plan Availability
Configuring a single SSO provider is available on every plan.
Enabling more than one provider at the same time requires the **Business** plan or above.
## Notes
* Secrets are write-only. After saving, credentials are shown masked and are
never returned in full by the API.
* Provider **type** and **name** are fixed after creation. To change them,
add a new provider and disable the old one.
* Providers are disabled rather than deleted, so accounts that signed in
through a provider survive a disable and re-enable.
* Google and OIDC sign-ins do not attach to an existing account with the same email.
The sign-in fails with an error instead of merging the accounts. To move a user to a Google or OIDC provider,
have an admin deactivate and then delete the account so the user can sign up fresh through it.
SAML sign-ins match users by email, so an existing account can sign in through a new SAML provider directly.
* If open sign-up is restricted (the **Restrict Open Sign-Up** setting on
**Admin Panel** → **Permissions** → **Users**), SSO sign-ups are gated too.
New users who have not been invited are rejected at sign-in until an admin invites their email address.
Each provider type asks for its own credentials:
* **Google**: Client ID and Client Secret from your Google Cloud Console.
* **OIDC**: Client ID, Client Secret, and the OpenID configuration URL
(the `.well-known/openid-configuration` endpoint).
* **SAML**: IdP entity ID, IdP SSO URL, the IdP x509 certificate, and
the SP entity ID. The SP certificate, private key, and email attribute are optional depending on your IdP.
Optionally restrict the provider to specific **email domains**.
Users outside those domains cannot sign in through it.
After saving, the provider row shows its **Redirect URI** (OIDC and Google) or **ACS URL** (SAML).
Copy it into your identity provider's console as the allowed callback for the application.
New providers are enabled on creation and appear as sign-in options on the login page.
Use the toggle on the provider row to disable or re-enable it later.
## Plan Availability
Configuring a single SSO provider is available on every plan.
Enabling more than one provider at the same time requires the **Business** plan or above.
## Notes
* Secrets are write-only. After saving, credentials are shown masked and are
never returned in full by the API.
* Provider **type** and **name** are fixed after creation. To change them,
add a new provider and disable the old one.
* Providers are disabled rather than deleted, so accounts that signed in
through a provider survive a disable and re-enable.
* Google and OIDC sign-ins do not attach to an existing account with the same email.
The sign-in fails with an error instead of merging the accounts. To move a user to a Google or OIDC provider,
have an admin deactivate and then delete the account so the user can sign up fresh through it.
SAML sign-ins match users by email, so an existing account can sign in through a new SAML provider directly.
* If open sign-up is restricted (the **Restrict Open Sign-Up** setting on
**Admin Panel** → **Permissions** → **Users**), SSO sign-ups are gated too.
New users who have not been invited are rejected at sign-in until an admin invites their email address.