S3 Connector
AWS Access Keys Authorization
Authorize the S3 connector using AWS Access Keys.
AWS Access Keys Authorization
- Log into your AWS Management Console.
- Navigate to the IAM (Identity and Access Management) dashboard.
- In the left sidebar, click on “Users” and then “Create user”.

- Set a name for the new user (e.g., “OnyxS3Connector”) and click “Next”.
- Click “Attach policies directly” and search for “AmazonS3ReadOnlyAccess” or a similarly permissive policy.
- Select this policy and click “Next”.
- Add any tags if needed, then click “Create user”.
- You’ll now be on the
userspage. Click on the user you just created. - In the summary section, click “Create access key” and choose “Third-party service” as the use case.
- Select “I understand the above recommendation and want to proceed to create an access key” and then “Next”.
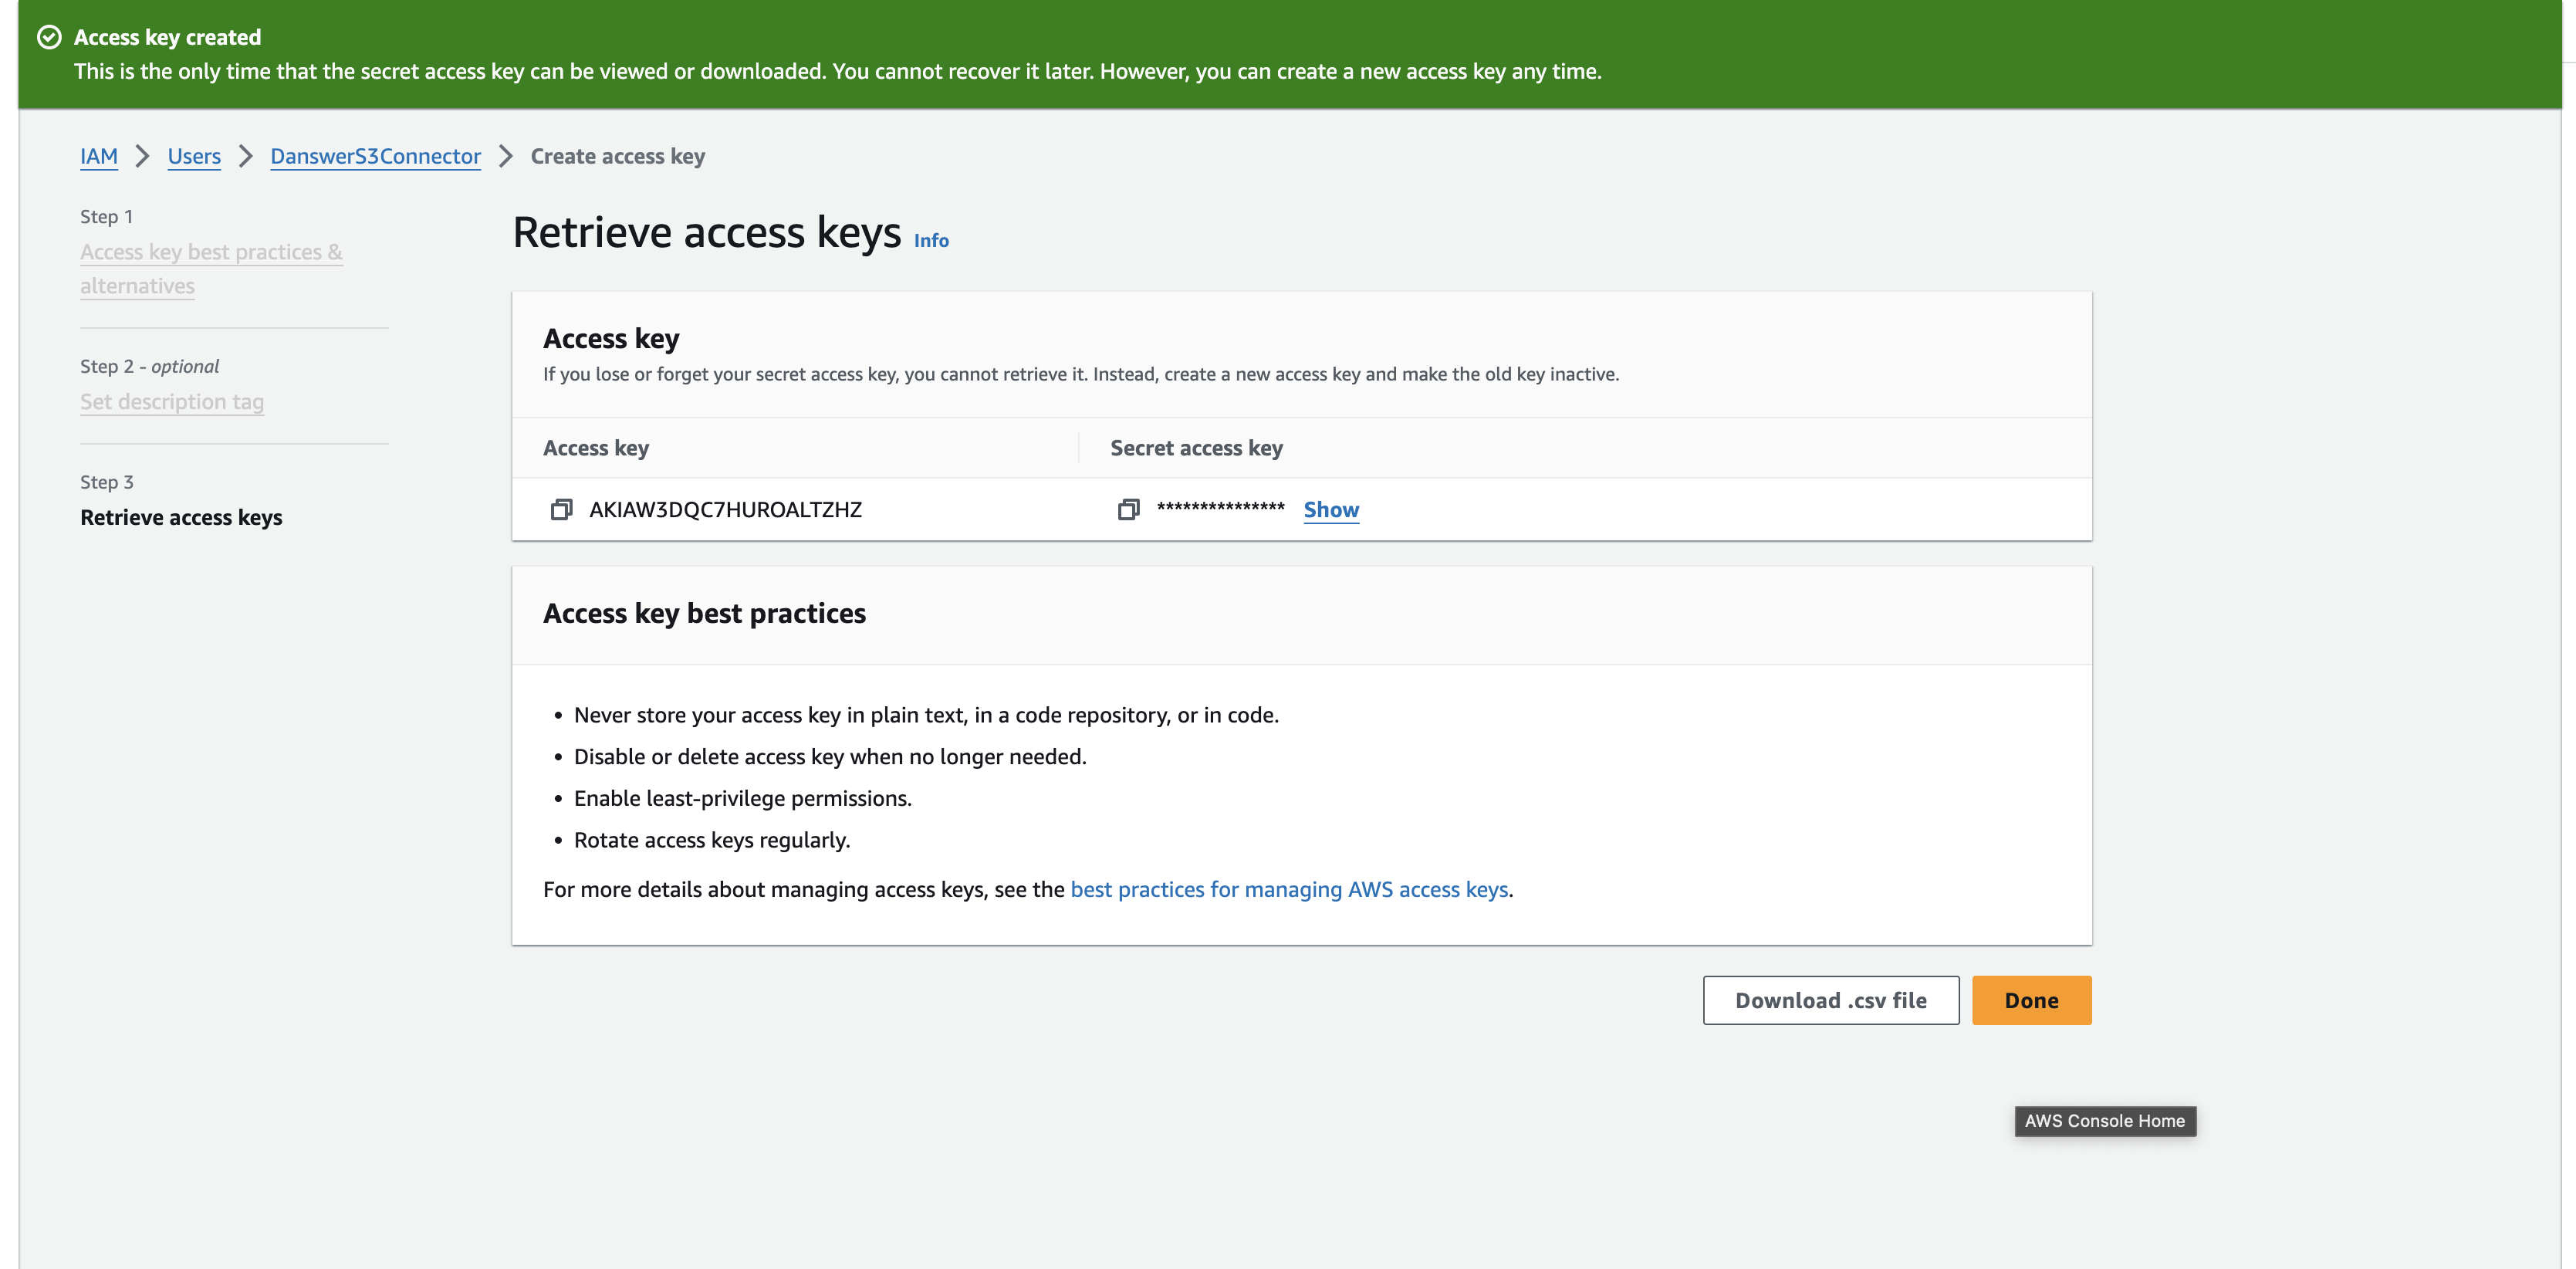
- Optionally, set a description tag and then press “create access key”.
- You should now see, you’ll see the Access Key ID and Secret Access Key. Make sure to copy these immediately as you won’t be able to access the Secret Access Key again.
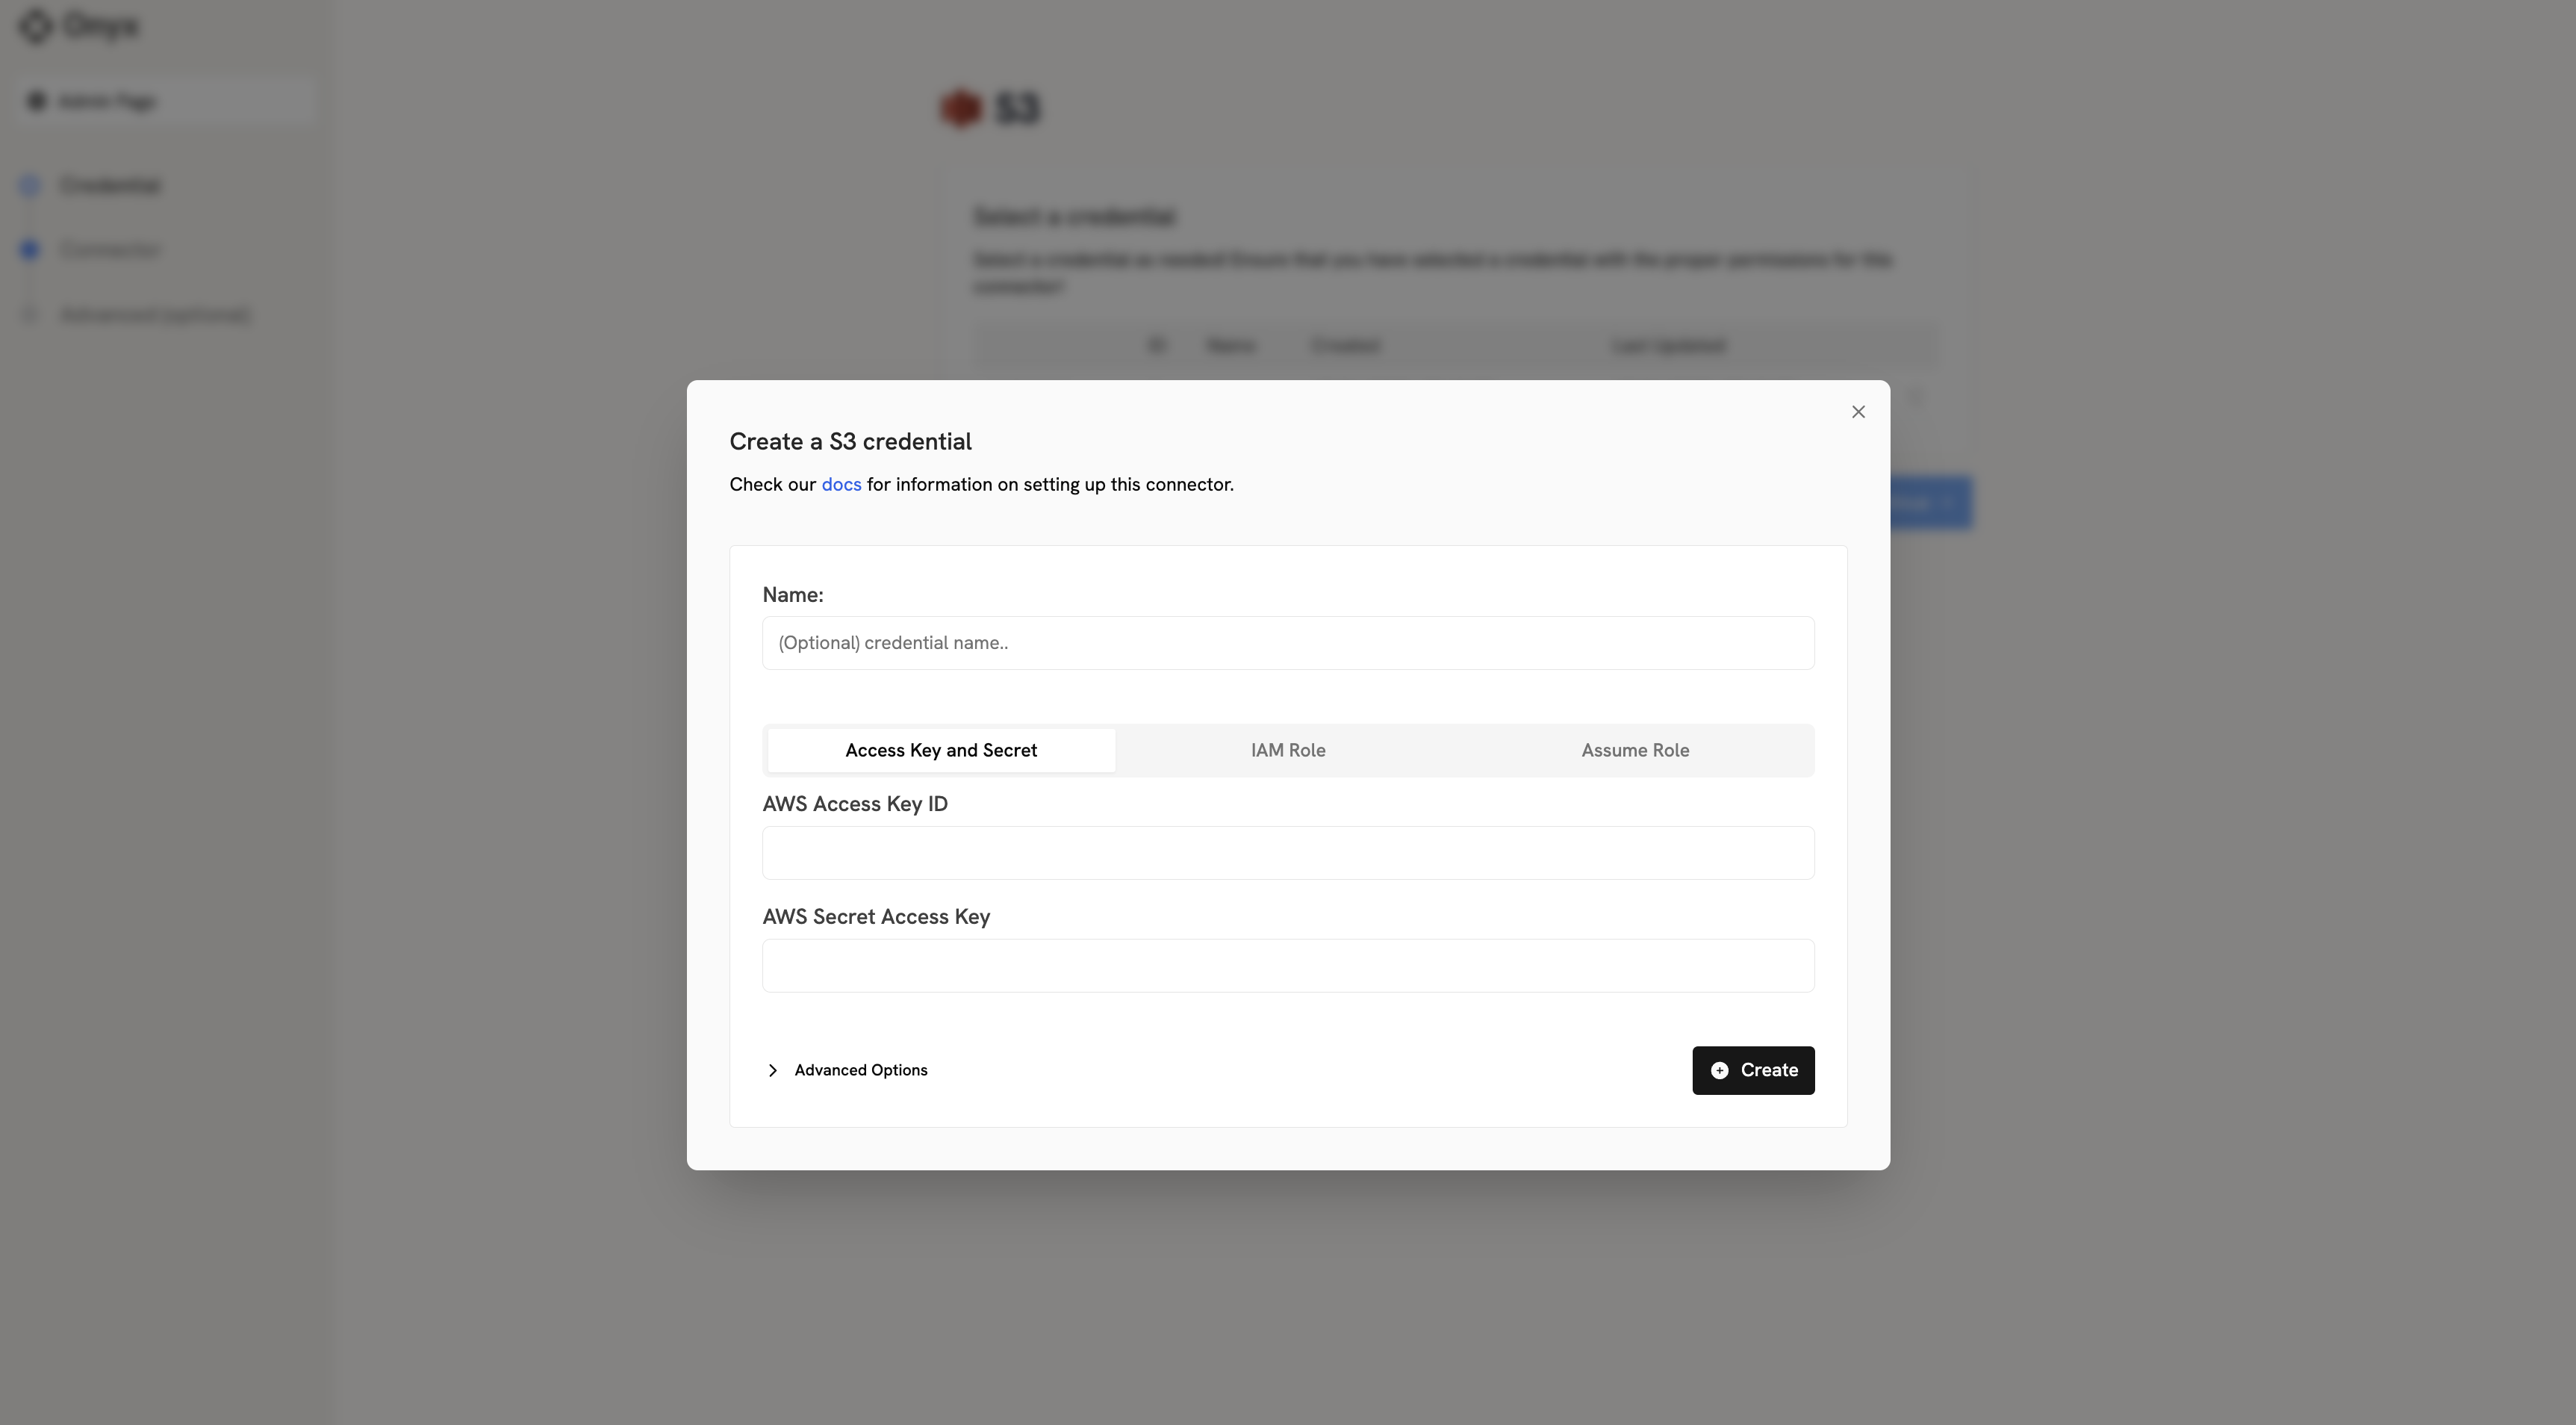
Credential Entry in Onyx
When configuring the S3 connector in Onyx, you’ll enter your credentials as follows:- AWS Access Key ID: Paste the Access Key ID you copied from AWS
- AWS Secret Access Key: Paste the Secret Access Key you copied from AWS
 Once you have your AWS Access Keys, proceed to the indexing steps in the overview to configure your S3 connector.