

Available starting in
v4.4.0. From this version on, the admin panel is the only way to set up SSO.
The legacy environment variables (AUTH_TYPE=google_oauth, AUTH_TYPE=oidc,
or AUTH_TYPE=saml and their companion variables) no longer enable SSO on a new install.
Onyx logs a warning while AUTH_TYPE is still set, and the variables are planned for full removal in v4.5.
On a fresh install, create the first user with email and password (the first user becomes an admin),
then add your provider from the admin panel.If you are upgrading from
v4.3 or earlier with environment-based SSO,
the upgrade imports your configuration into an SSO provider entry automatically, and existing logins keep working.
The import runs once, when the upgrade first runs against your existing database,
so keep the legacy configuration in place through the upgrade.
Migrated providers keep using the redirect URIs and ACS URLs already registered with your identity provider,
so nothing changes on the IdP side. Once the migrated provider appears in the admin panel,
sign-ins and token refresh use the provider entry’s credentials, and the legacy variables (AUTH_TYPE,
the OAuth credential variables, and for SAML the settings file) can be removed.
The variables only act as a fallback for login accounts that no provider entry matches,
such as after deleting or renaming the migrated provider.Managing Providers
Navigate to Admin Panel → Organization → SSO Providers.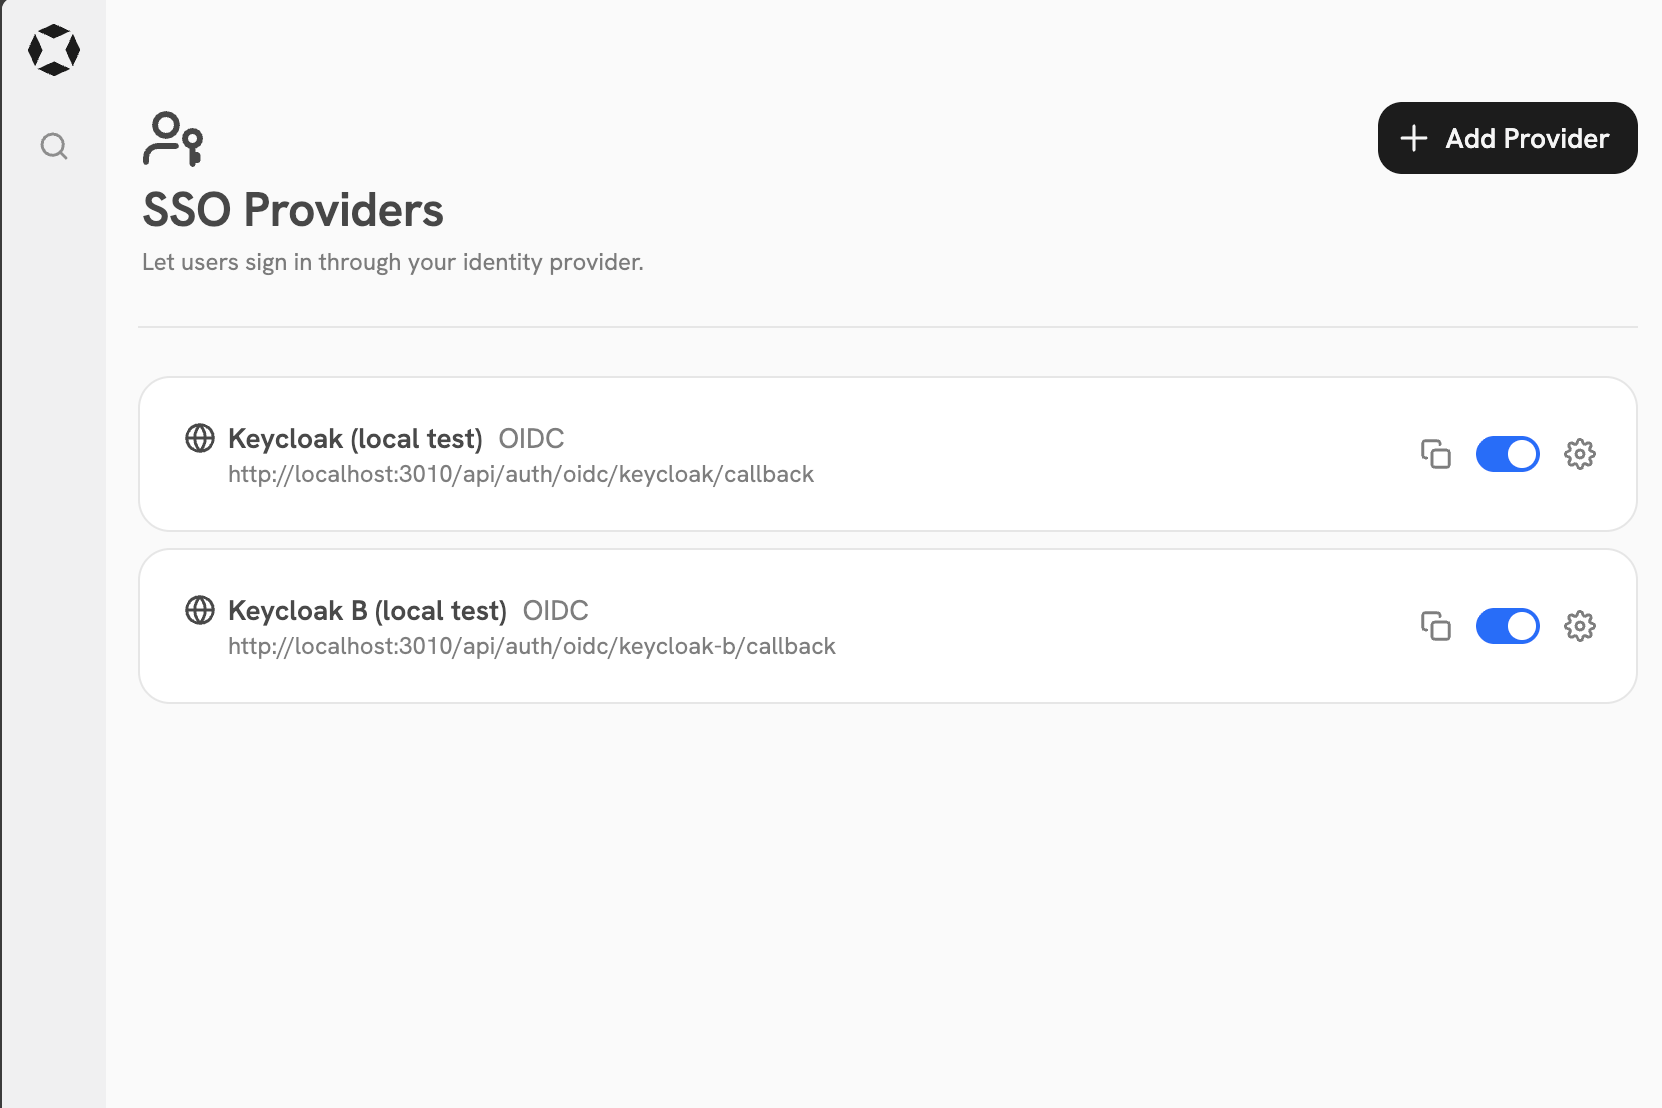
1
Add a Provider
Click Add Provider and pick the provider type: Google, OIDC, or SAML.Give the provider a Name (a lowercase slug used in the login URL)
and a Display Name (the label users see on the sign-in button).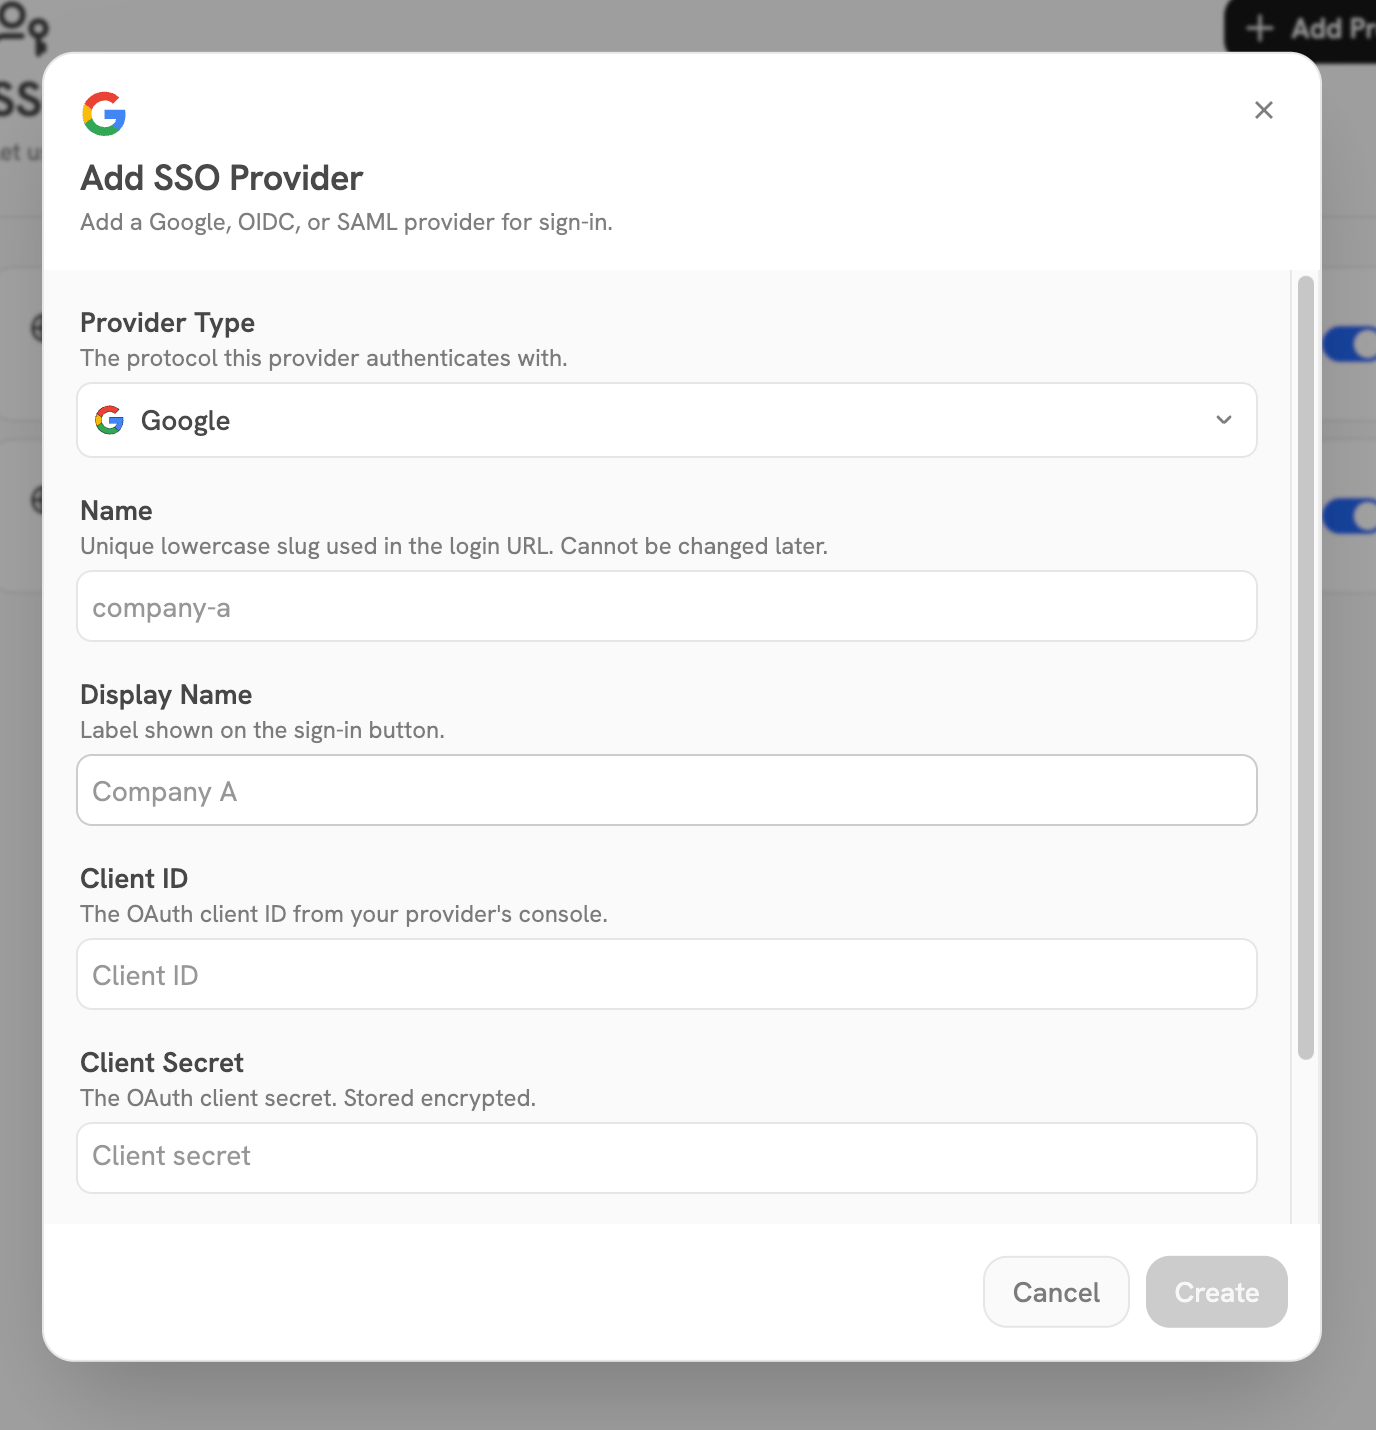
2
Fill in the Provider Configuration
Each provider type asks for its own credentials:
- Google: Client ID and Client Secret from your Google Cloud Console.
- OIDC: Client ID, Client Secret, and the OpenID configuration URL
(the
.well-known/openid-configurationendpoint). - SAML: IdP entity ID, IdP SSO URL, the IdP x509 certificate, and the SP entity ID. The SP certificate, private key, and email attribute are optional depending on your IdP.
email_verified
claim. Starting in v4.5,
Google and OIDC entries additionally offer Enable PKCE and a per-provider Scopes override,
taking precedence over the deployment-wide environment variables.
See Customizing requested scopes for the details.3
Register the Callback with your Identity Provider
After saving, the provider row shows its Redirect URI (OIDC and Google) or ACS URL (SAML).
Copy it into your identity provider’s console as the allowed callback for the application.
4
Verify the Sign-In Option
New providers are enabled on creation and appear as sign-in options on the login page.
Use the toggle on the provider row to disable or re-enable it later.
Onyx Cloud
Onyx Cloud is multi-tenant: many workspaces share one login page, so provider configuration and sign-in work a little differently than self-hosted.- The provider type picker offers Google and OIDC only. SAML is not available on Onyx Cloud.
- Email Domains are required, not optional. Without them the provider would admit every account your identity provider authenticates, and each one consumes a seat.
- The login page shows a single Sign in with SSO button. A visitor enters their email first, and Onyx resolves which workspace they belong to (or, for a first-time employee, which workspace their domain belongs to) and shows that workspace’s sign-in options next.
Domain Verification
Because Onyx Cloud serves many companies from one instance, a domain only routes sign-ins once your workspace proves it controls that domain: listing a domain on a provider claims it, but a first-time employee on that domain cannot sign in and be provisioned automatically until the claim is verified. Users already provisioned in the workspace can always sign in through the provider regardless of verification status.1
Save the Provider
Add or update the provider with the domain listed under Email Domains, then save.
2
Publish the DNS Record
Reopen the provider and find the domain under Domain Verification.
Copy the shown Name and Value into a new TXT record at your DNS provider.
3
Verify the Domain
Click Verify Domain. Onyx resolves the record and, on a match, marks the domain verified.
DNS changes can take up to an hour to propagate, so if verification fails right away, wait and try again.
Domain verification does not apply to Google. List your email domains as usual,
but a first-time employee on a Google Workspace domain can sign in and be provisioned without a DNS TXT record,
since their Google sign-in already proves they control an address on that domain.
Turning Off Password Login
Available in
v4.5 and in v4.4 patch releases after v4.4.5.- The save is refused unless at least one SSO provider is enabled, so you cannot lock yourself out.
- With the switch on, the login page shows only the SSO sign-in options, the sign-up page redirects to login, and password sign-in is refused by the backend regardless of how it is called.
- Disabling the last enabled SSO provider is refused while the switch is on.
- Self-hosted (single-tenant) deployments only.
Plan Availability
Configuring a single SSO provider is available on every plan. Enabling more than one provider at the same time requires the Business plan or above.Notes
- Secrets are write-only. After saving, credentials are shown masked and are never returned in full by the API.
- Provider type and name are fixed after creation. To change them, add a new provider and disable the old one.
- Providers are disabled rather than deleted, so accounts that signed in through a provider survive a disable and re-enable.
- Google and OIDC sign-ins do not attach to an existing account with the same email. The sign-in fails with an error instead of merging the accounts. To move a user to a Google or OIDC provider, have an admin deactivate and then delete the account so the user can sign up fresh through it. SAML sign-ins match users by email, so an existing account can sign in through a new SAML provider directly.
- If open sign-up is restricted (the Restrict Open Sign-Up setting on Admin Panel → Permissions → Users), SSO sign-ups are gated too. New users who have not been invited are rejected at sign-in until an admin invites their email address.