MCP in Onyx
Navigate to the Actions Dashboard
Click your user profile icon and select Admin Panel and select the MCP Actions tab in the sidebar.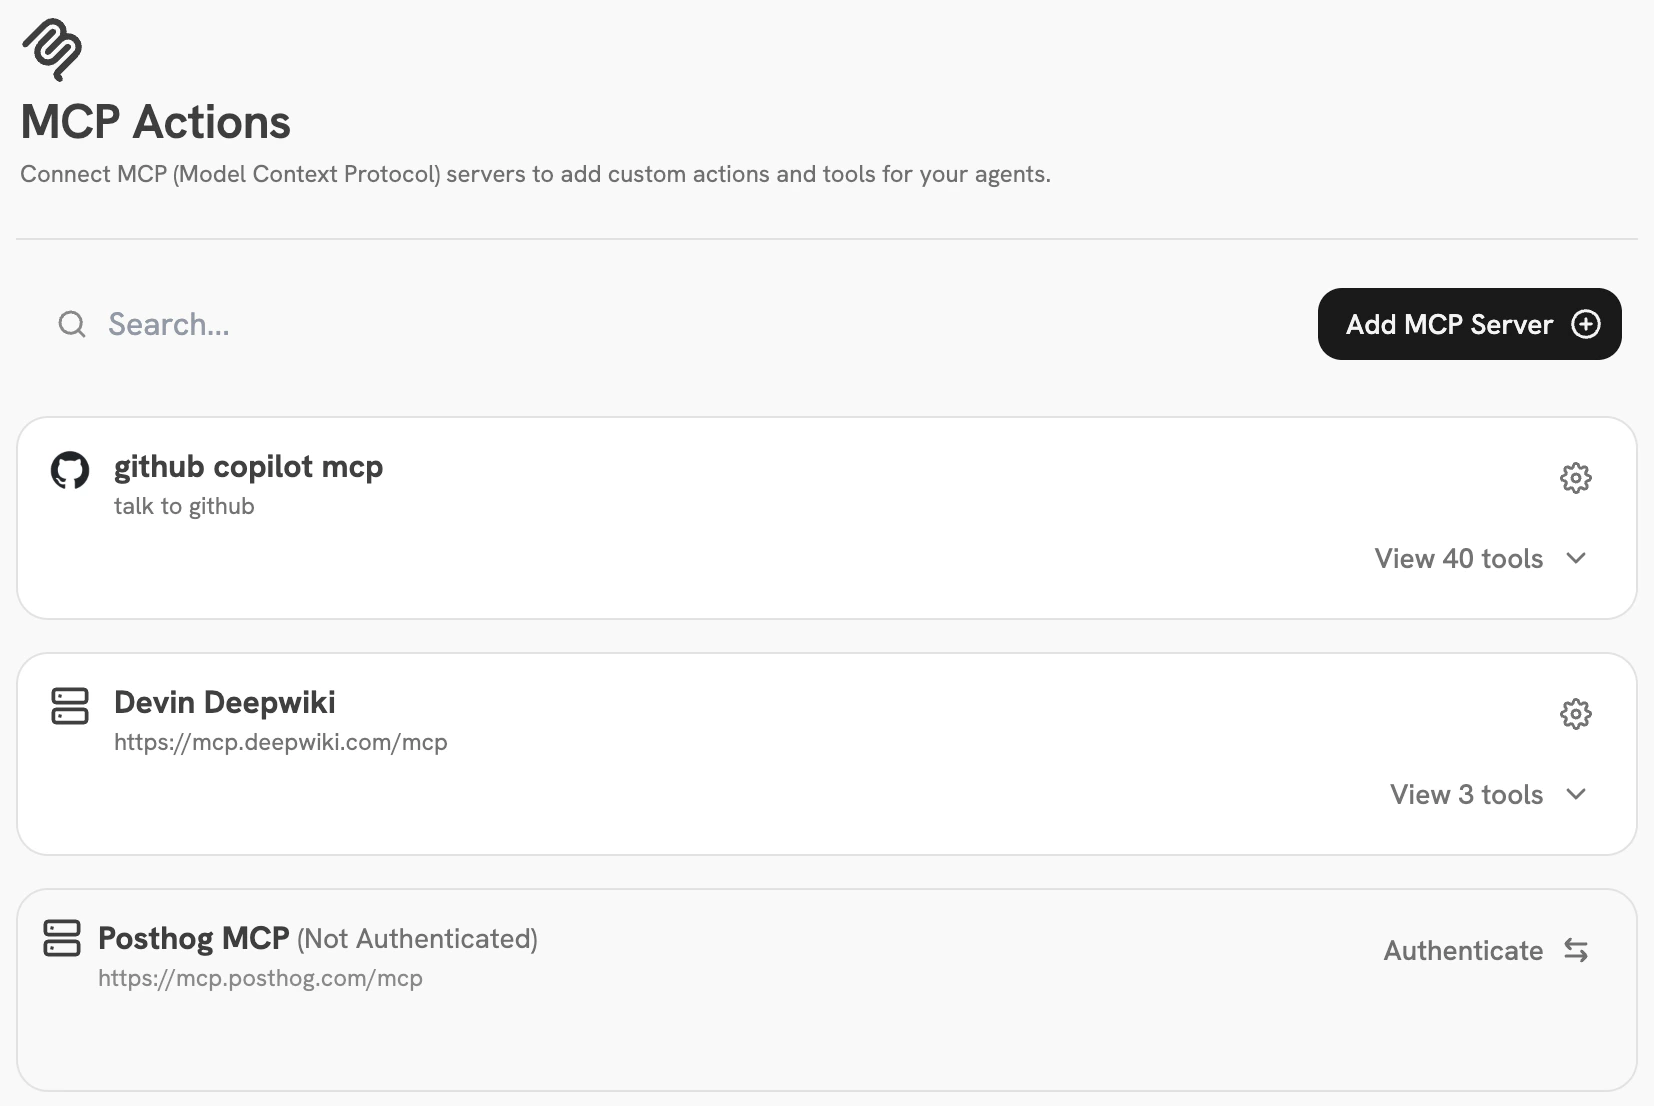
Add an MCP Server to Onyx
Click the Add MCP Server button and fill out the following fields: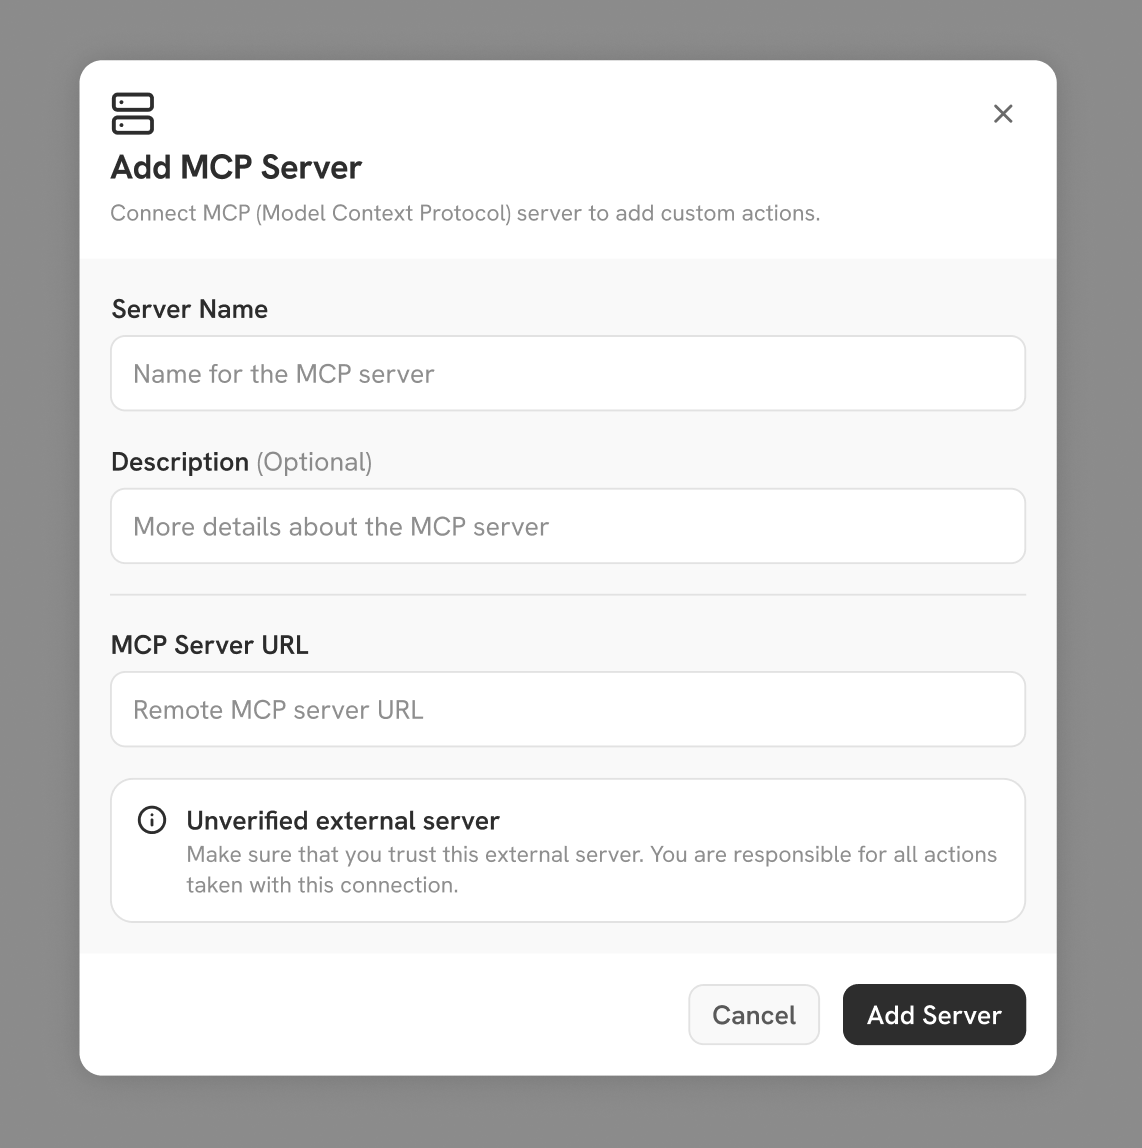
- Server Name — A human-readable name for this MCP server. Typically the name of the service you’re connecting to (e.g. “Slack”, “Jira”).
- Description — Any additional information that helps identify the server. Useful for distinguishing multiple configured MCP server connections that talk to the same service.
- MCP Server URL — The URL of the MCP server, which must be reachable from your Onyx instance. Most URLs end in
/mcp, or/ssefor older servers. - Managed MCP server: The URL is typically found in the provider’s documentation describing how to connect.
- Self-hosted MCP server: You’ll need to run your server in HTTP transport mode — Onyx doesn’t currently support connecting via stdio. If the server is running on the same machine as Onyx, use
http://127.0.0.1:<port>. Otherwise, use the URL and port the server is exposed at.
Configure and Authenticate with an MCP Server
No Auth
Use this when your MCP server is unprotected. Typically only used for testing when connecting to a local MCP server on a local Onyx instance, but may be useful if the server is deployed inside a VPC and you want all users to have the same unrestricted access to it.API Key
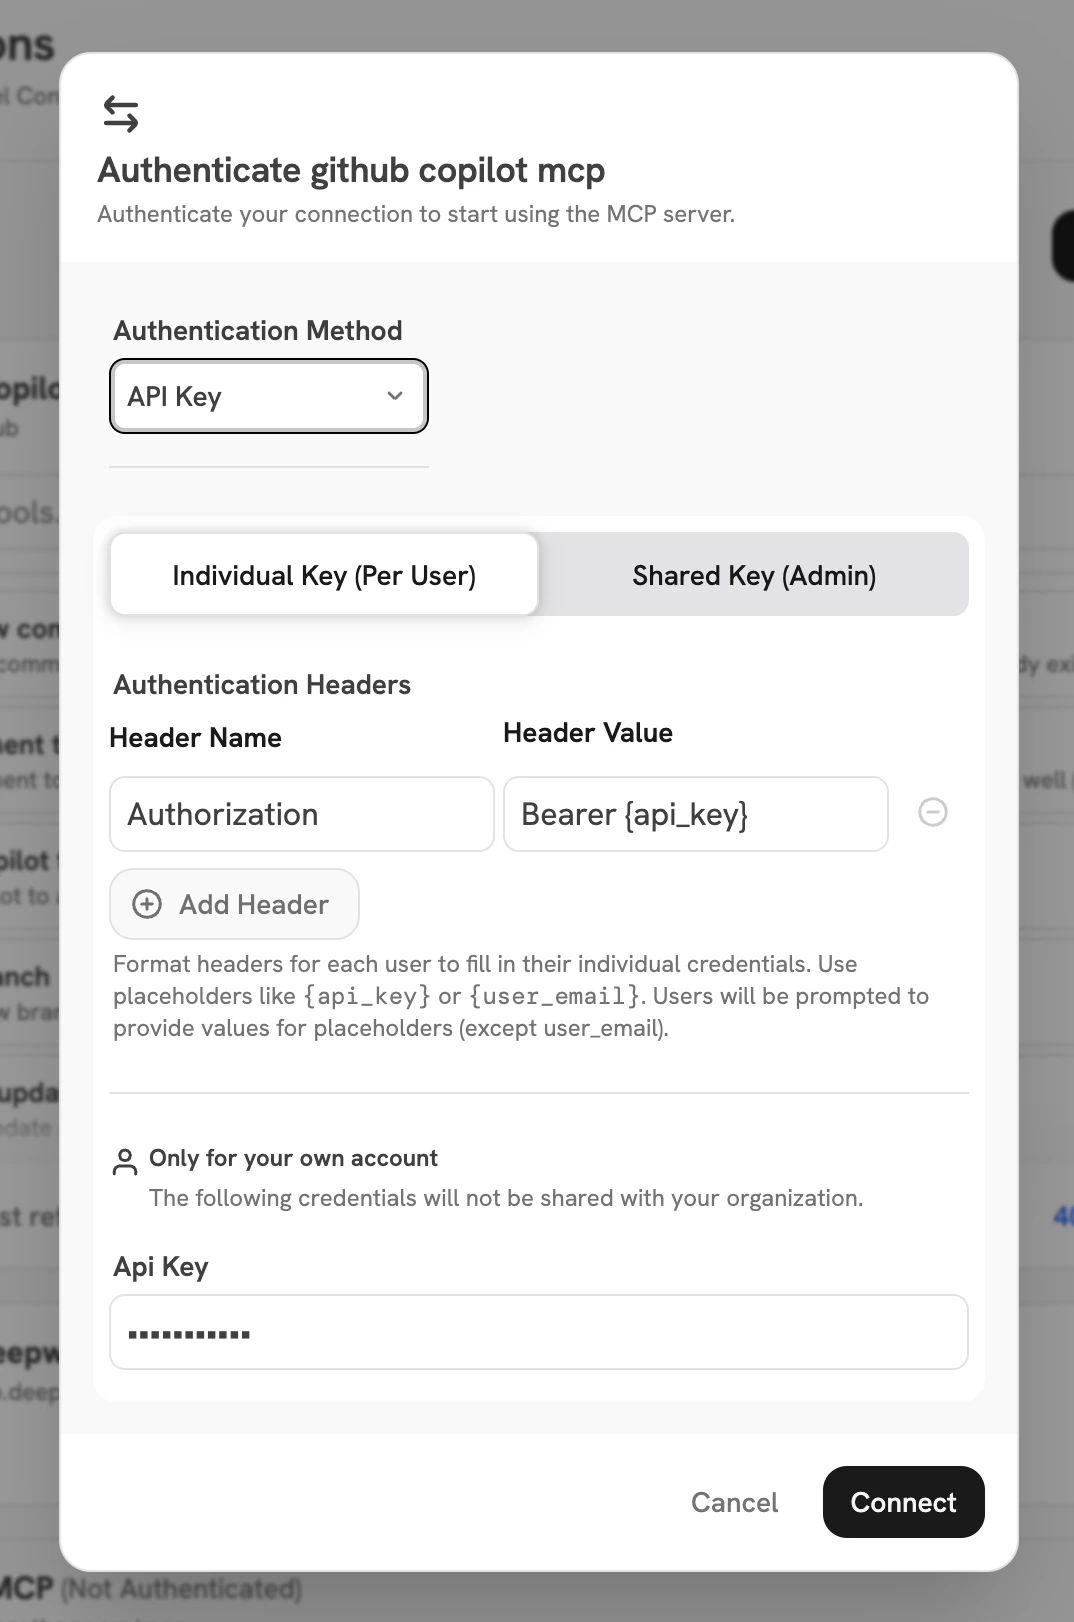
The server is protected by API key authentication, typically using theAuthorization: Bearer <token> format.
There are two sub-modes:- Shared Key — The admin configures a single API key used for all user requests. Similar to No Auth in that users won’t need any additional configuration and will all get the same level of access (whatever is provided by the API key you choose).
- Individual Key — Users authenticate in the chat flow by providing their own API key(s) to connect to the server. Useful when you want users to have differing access to an external service by identity. This mode is also the most configurable — Onyx allows the admin to specify arbitrary header patterns to send to the MCP server.
OAuth
Many modern MCP servers support OAuth authentication to give users access to tools and data using the same login flow they use when manually accessing the service.Most OAuth-enabled MCP servers also support DCR (Dynamic Client Registration). If yours doesn’t, you will need to create an OAuth App in the IdP (Identity Provider) the MCP server uses and provide Onyx with the generated Client ID and Client Secret. When DCR is supported, no further configuration is necessary — clicking Connect will send the admin through the OAuth flow to confirm that the server connection works.Pass-Through OAuth
Only available when your Onyx instance is configured to authenticate via OAuth. In this mode, Onyx passes the user’s OAuth access token through as anAuthorization: Bearer header to the MCP server.
This is most often useful if your organization hosts its own MCP servers and would rather not require users to
authenticate again after already going through the OAuth flow to log in to Onyx.Clicking Connect will validate that Onyx can reach the MCP server using the provided authentication method. The MCP Actions dashboard then lets the admin list the tools available from the MCP server and select which subset of tools should be made available for use in Agents across the organization.