How it works
The Bitbucket Connector indexes all Pull Requests from a specified Bitbucket Cloud repository, project, or entire workspace.- It indexes
OPEN,MERGED, andDECLINEDpull requests, including their titles and descriptions. - It also captures key metadata such as the author, reviewers, current state, creation/update timestamps, and a direct link back to the original pull request in Bitbucket.
Setting up
This connector can only be used with Bitbucket Cloud.
Authorization
The Bitbucket Connector uses an API Token for authentication. To create an API token:1
Log in to Bitbucket
Log in to your Bitbucket account.
2
Open account settings
Select the Settings cog in the upper-right corner of the top navigation bar.
3
Access Atlassian account settings
Under Personal settings, select Atlassian account settings.
4
Go to the Security tab
Select the Security tab on the top navigation bar.
5
Manage API tokens
Select Create and manage API tokens.
6
Create a scoped token
Select Create API token with scopes.
7
Name the token
Give the API token a name and an expiry date,
usually related to the application that will use the token and select Next.
8
Choose Bitbucket
Select Bitbucket as the app and select Next.
9
Select scopes
Select the scopes (permissions) the API token needs and select Next.
- Projects:
read:project:bitbucket - Repositories:
read:repository:bitbucket - Pull Requests:
read:pullrequest:bitbucket
10
Create the token
Review your token and select the Create token button. The page will display the new API token.
11
Save the token
Copy the generated API token and either record or paste it into the application you want to give access.
The token is only displayed once and can’t be retrieved later.
Indexing
1
Open the Bitbucket connector
Navigate to the Admin Dashboard and select the Bitbucket Connector.
2
Create credentials
Click Create new credentials and provide the following:
- Name: A descriptive name for your credentials.
- Email: The email address for your Bitbucket account.
-
API token: The API token you created in the previous step.

3
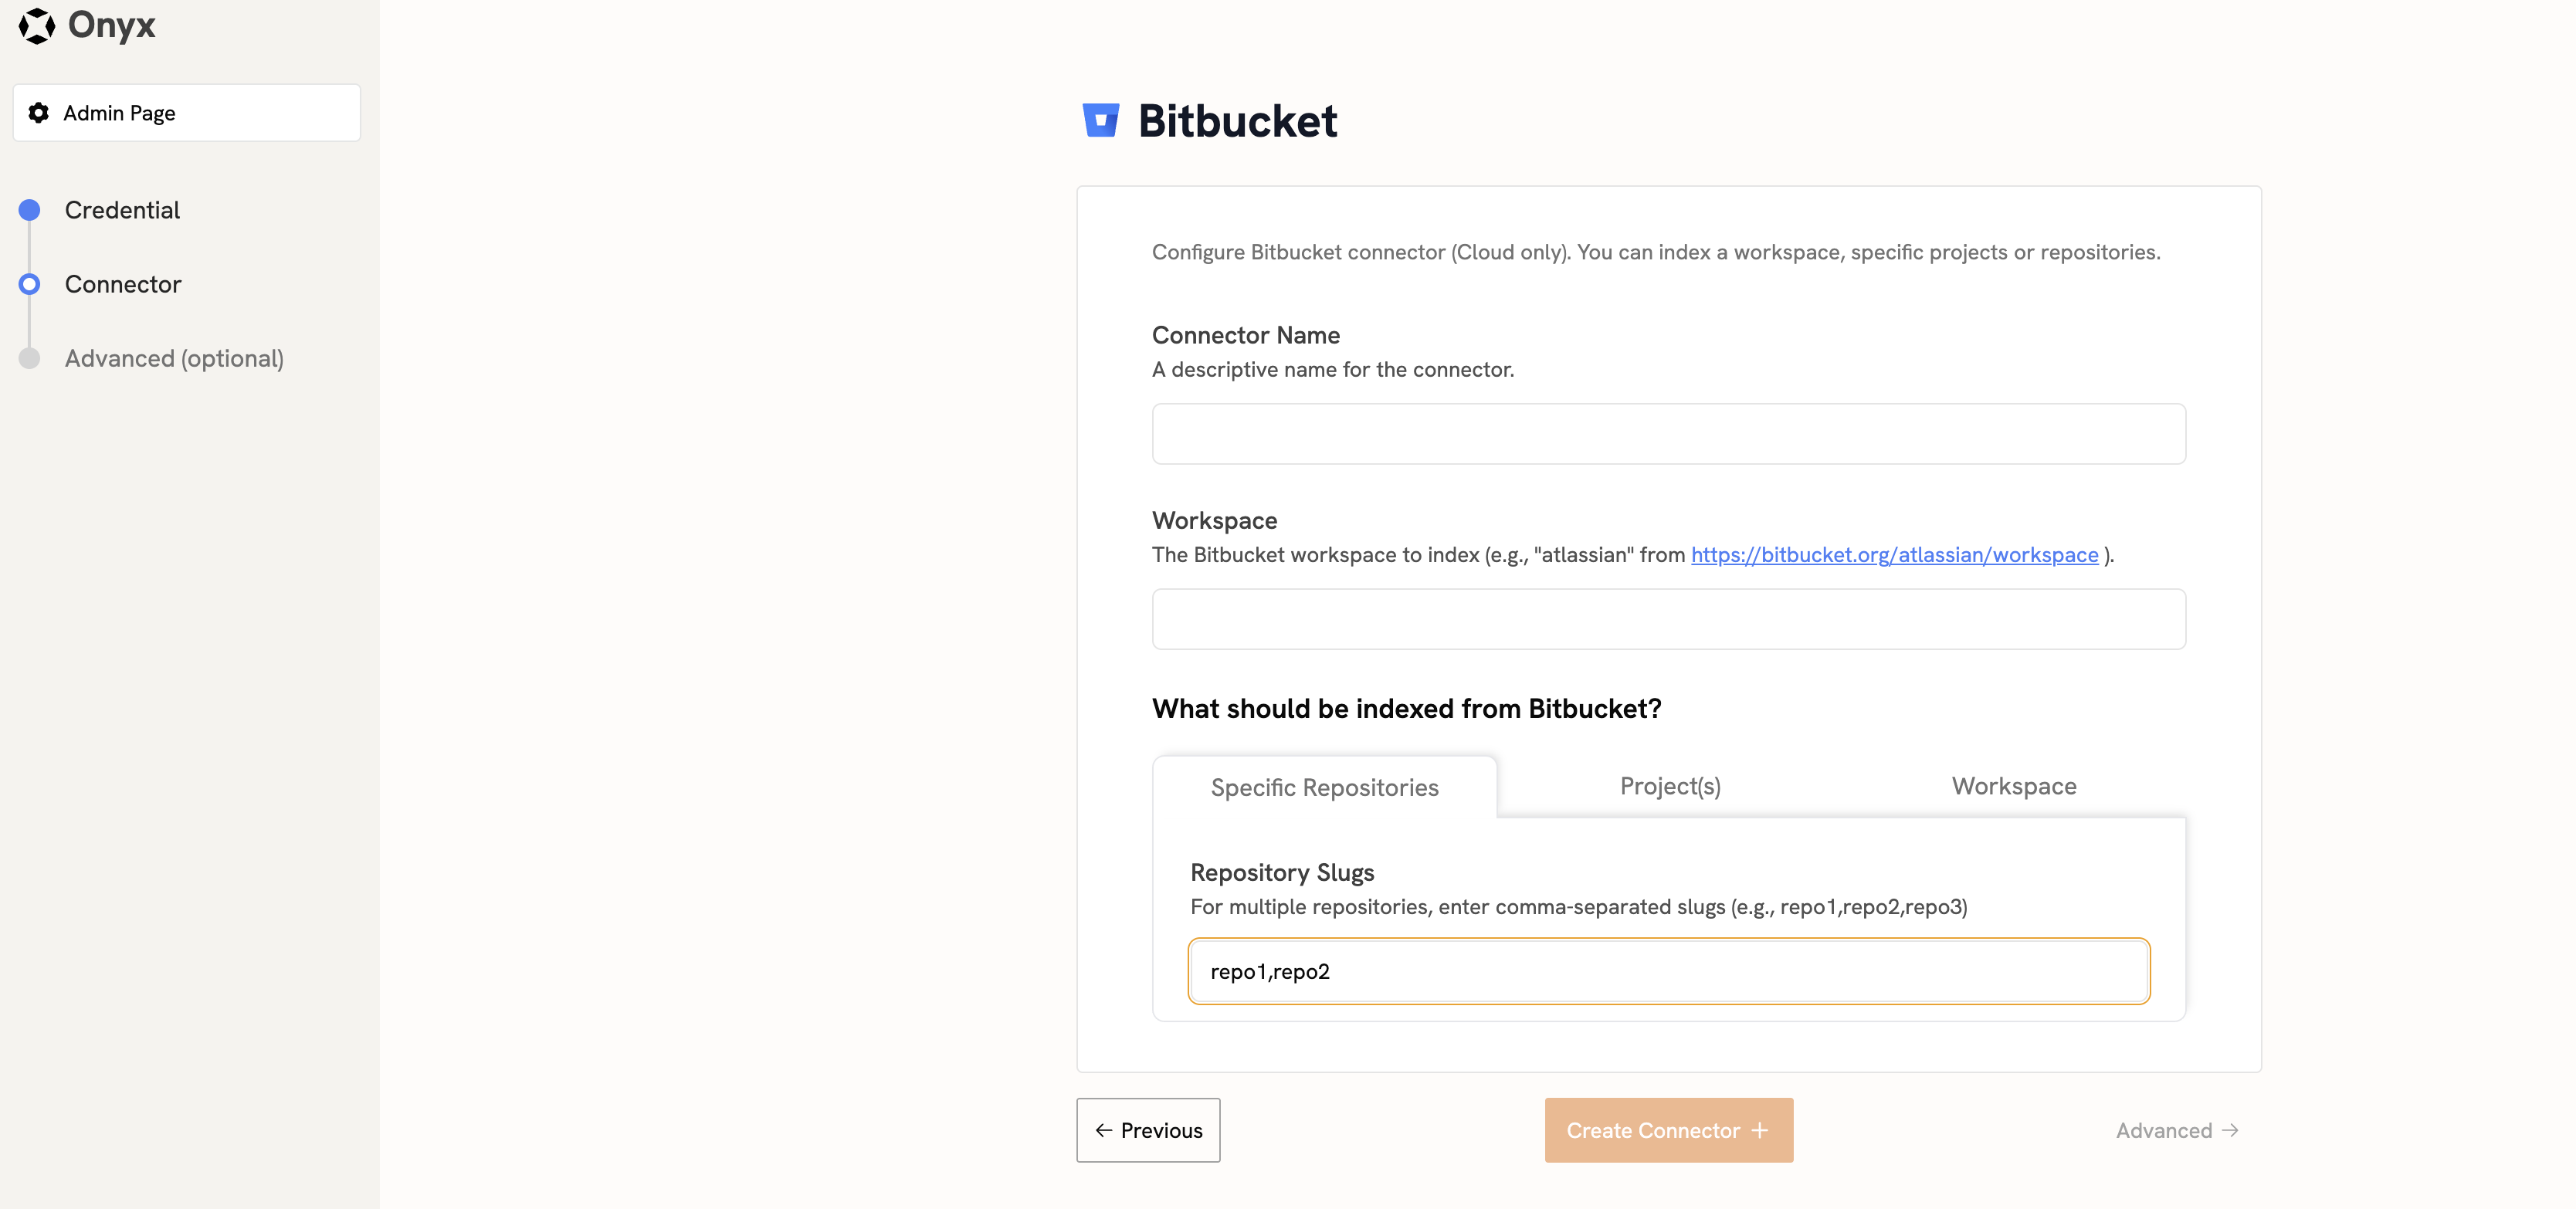
Configure connector details
Fill in the connector details:
- Name: A descriptive name for the connector.
-
Workspace name: The
WORKSPACE_NAMEfrom your Bitbucket URL (https://bitbucket.org/{WORKSPACE_NAME}/...). -
Repositories or Projects (Optional): A comma-separated list of repository slugs or project keys to index.