How it works
The Google Cloud Storage connector pulls in all documents from the specified GCS bucket. It supports various file formats including PDF, DOC, DOCX, TXT, and more. Documents are updated every 1 day.Setting up
Authorization
1
Open Interoperability settings
Log into your Google Cloud Console.
Navigate to “Cloud Storage” > “Settings” > “Interoperability”.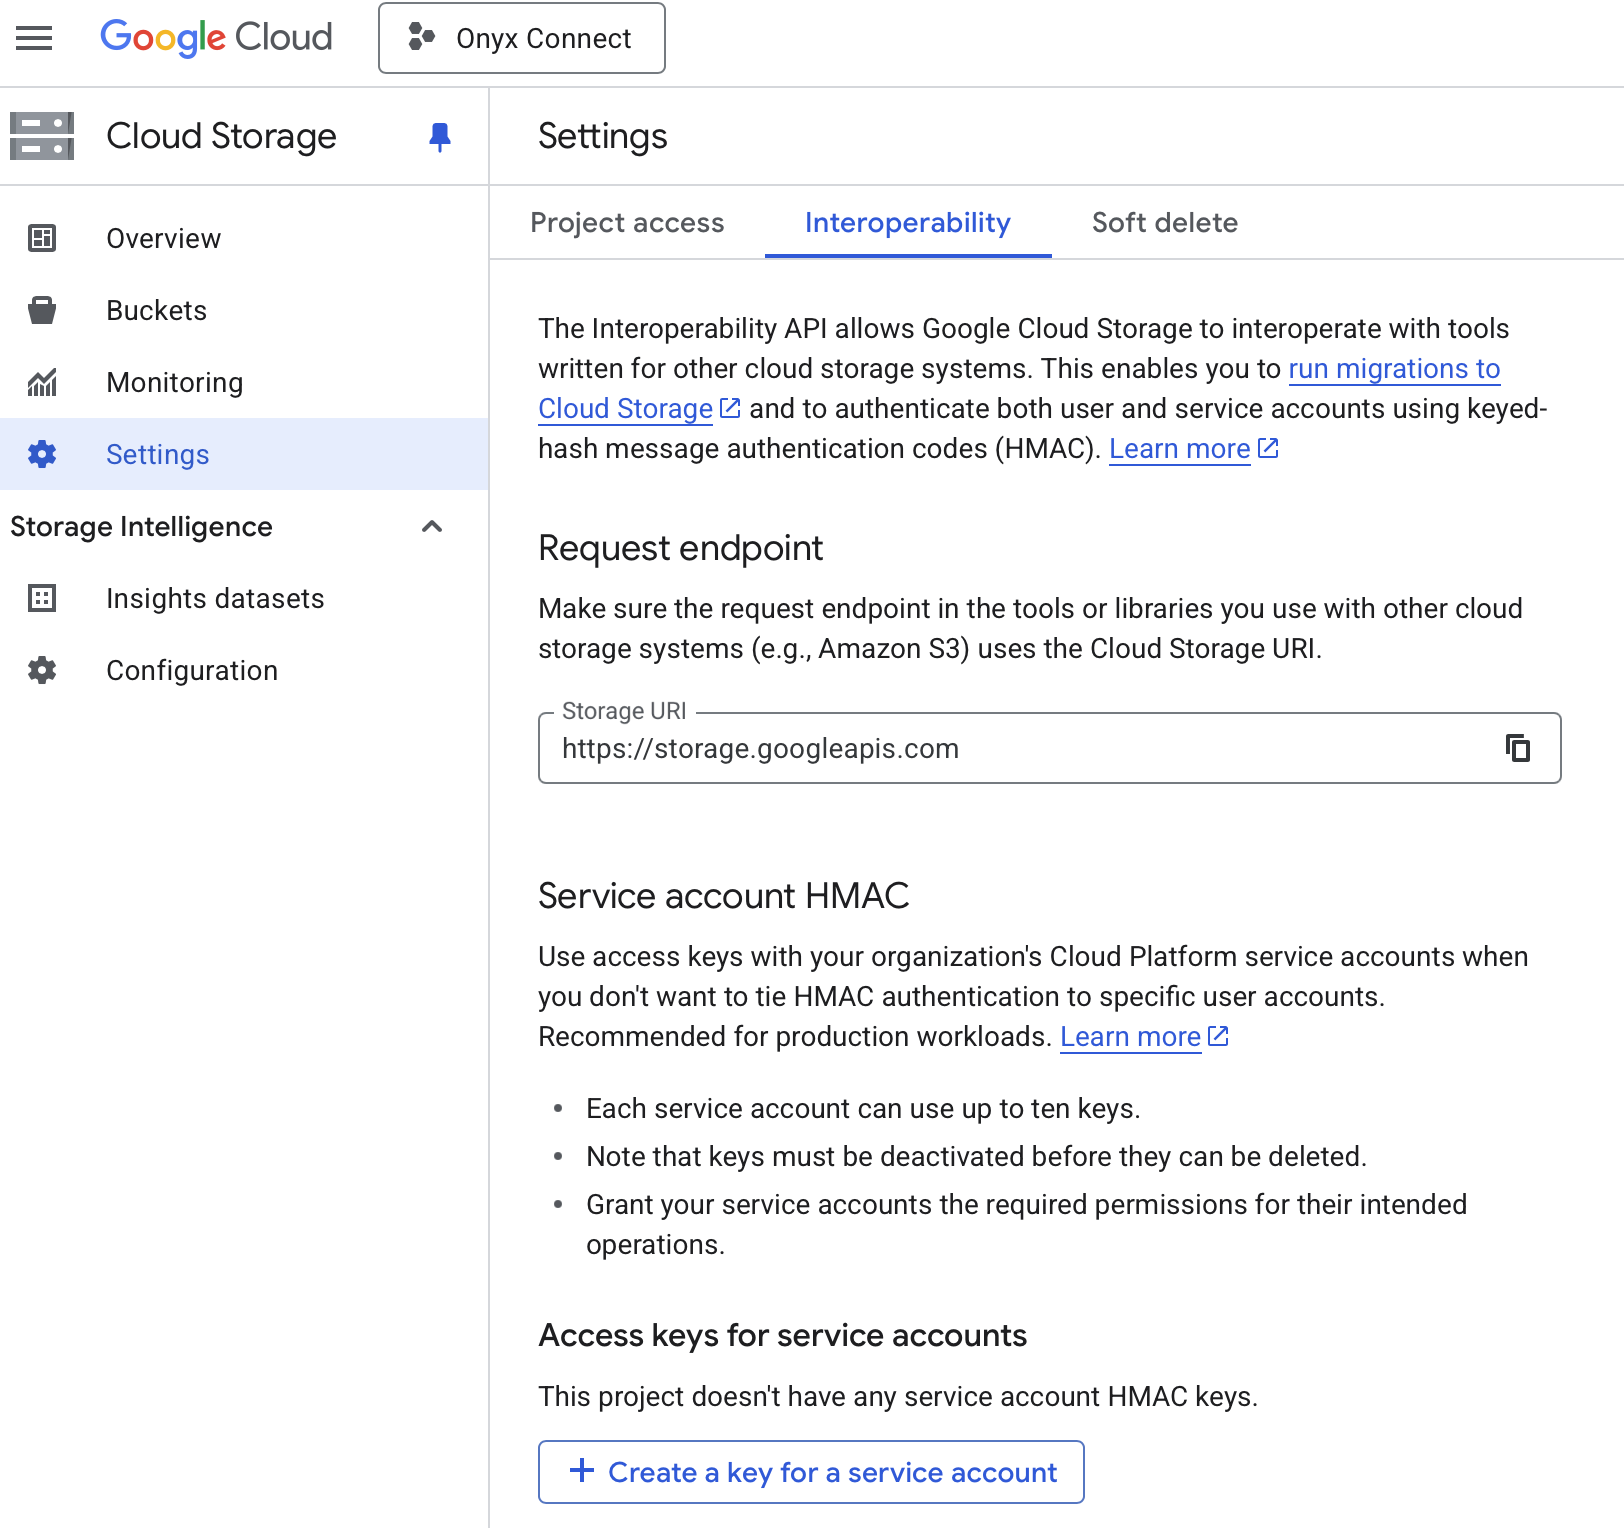
2
Create service account key
Click “Create a key for a service account”.
Click “Create new account” (or select an existing account and click Create key).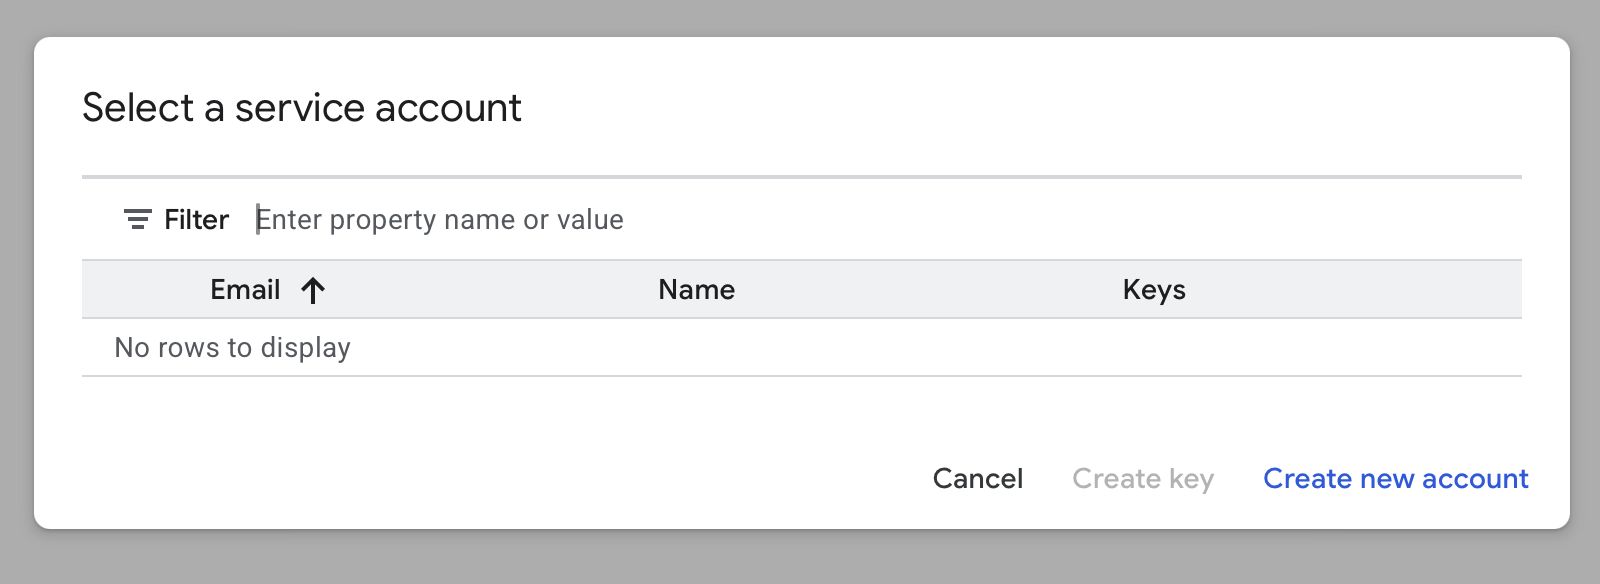
3
Set service account details
Set a name for the new service account (e.g., “onyx-gcs-connector”) and click “Create and continue”.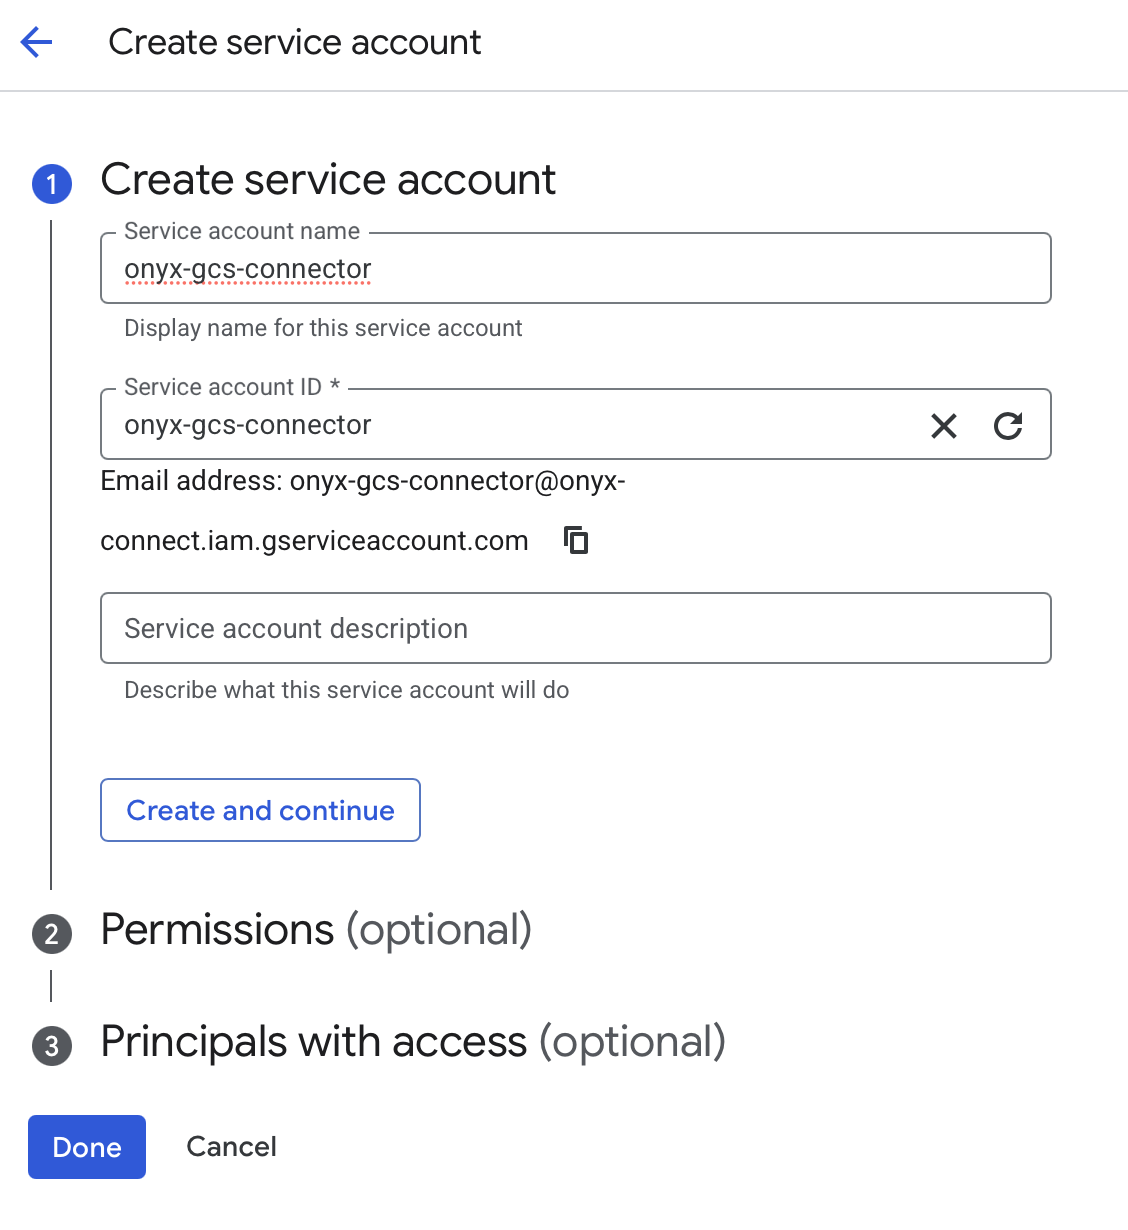
4
Assign role and finish
Click “Select a role” and select Storage Object Viewer or another, more permissive role. Click “Done”.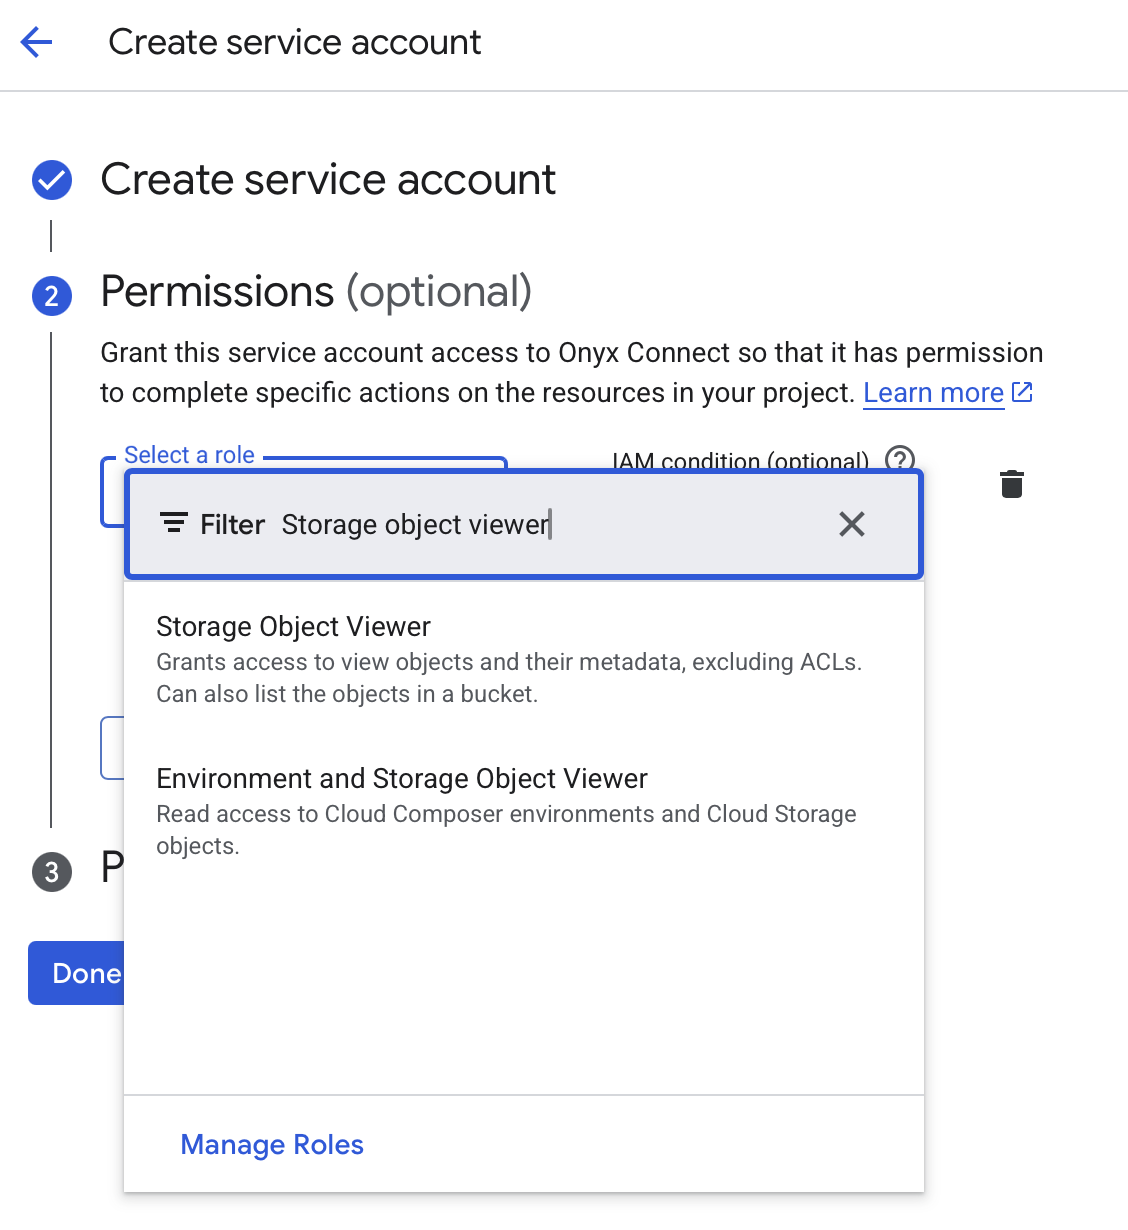
5
Record HMAC keys
Back on the Interoperability page you should see the new credentials. Record both 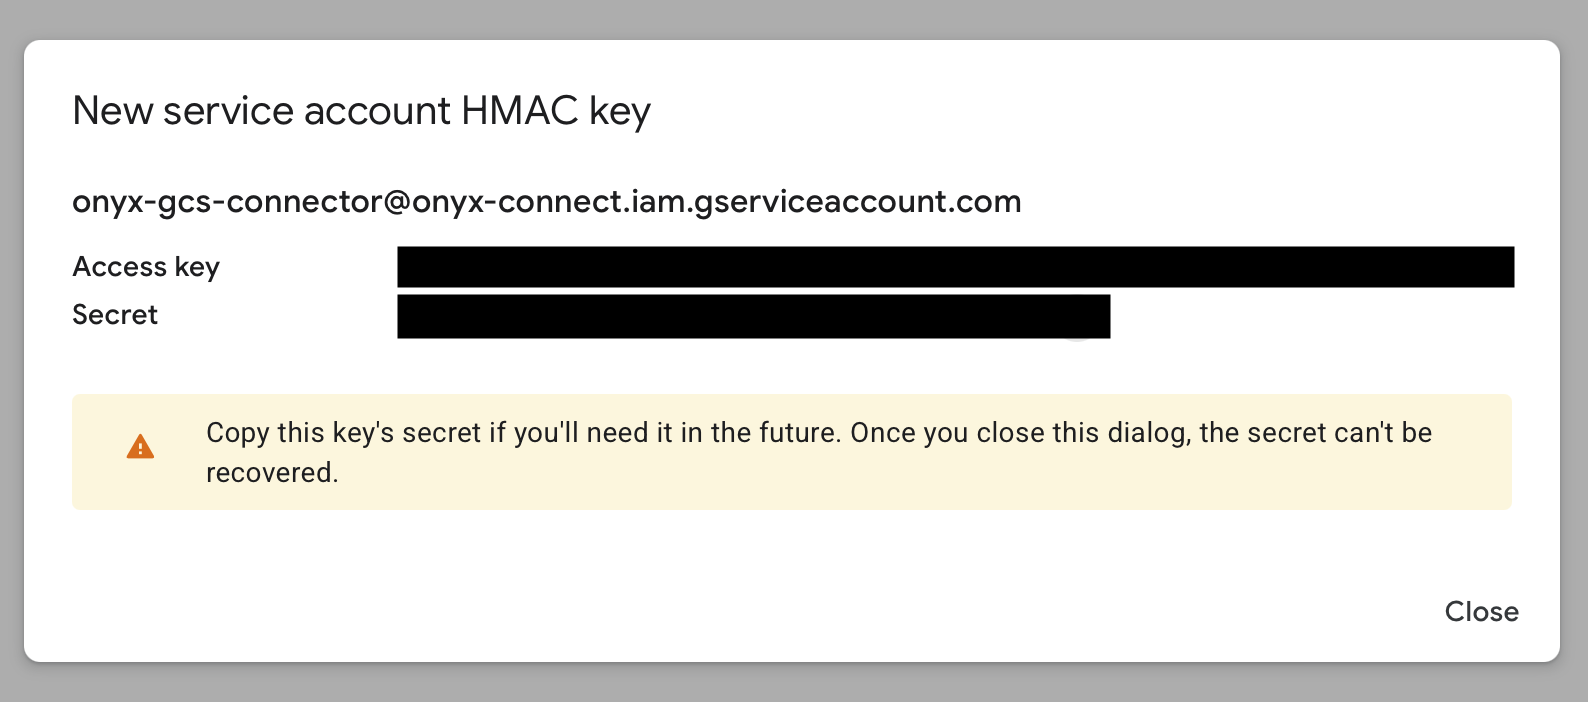
Access key and Secret.Indexing
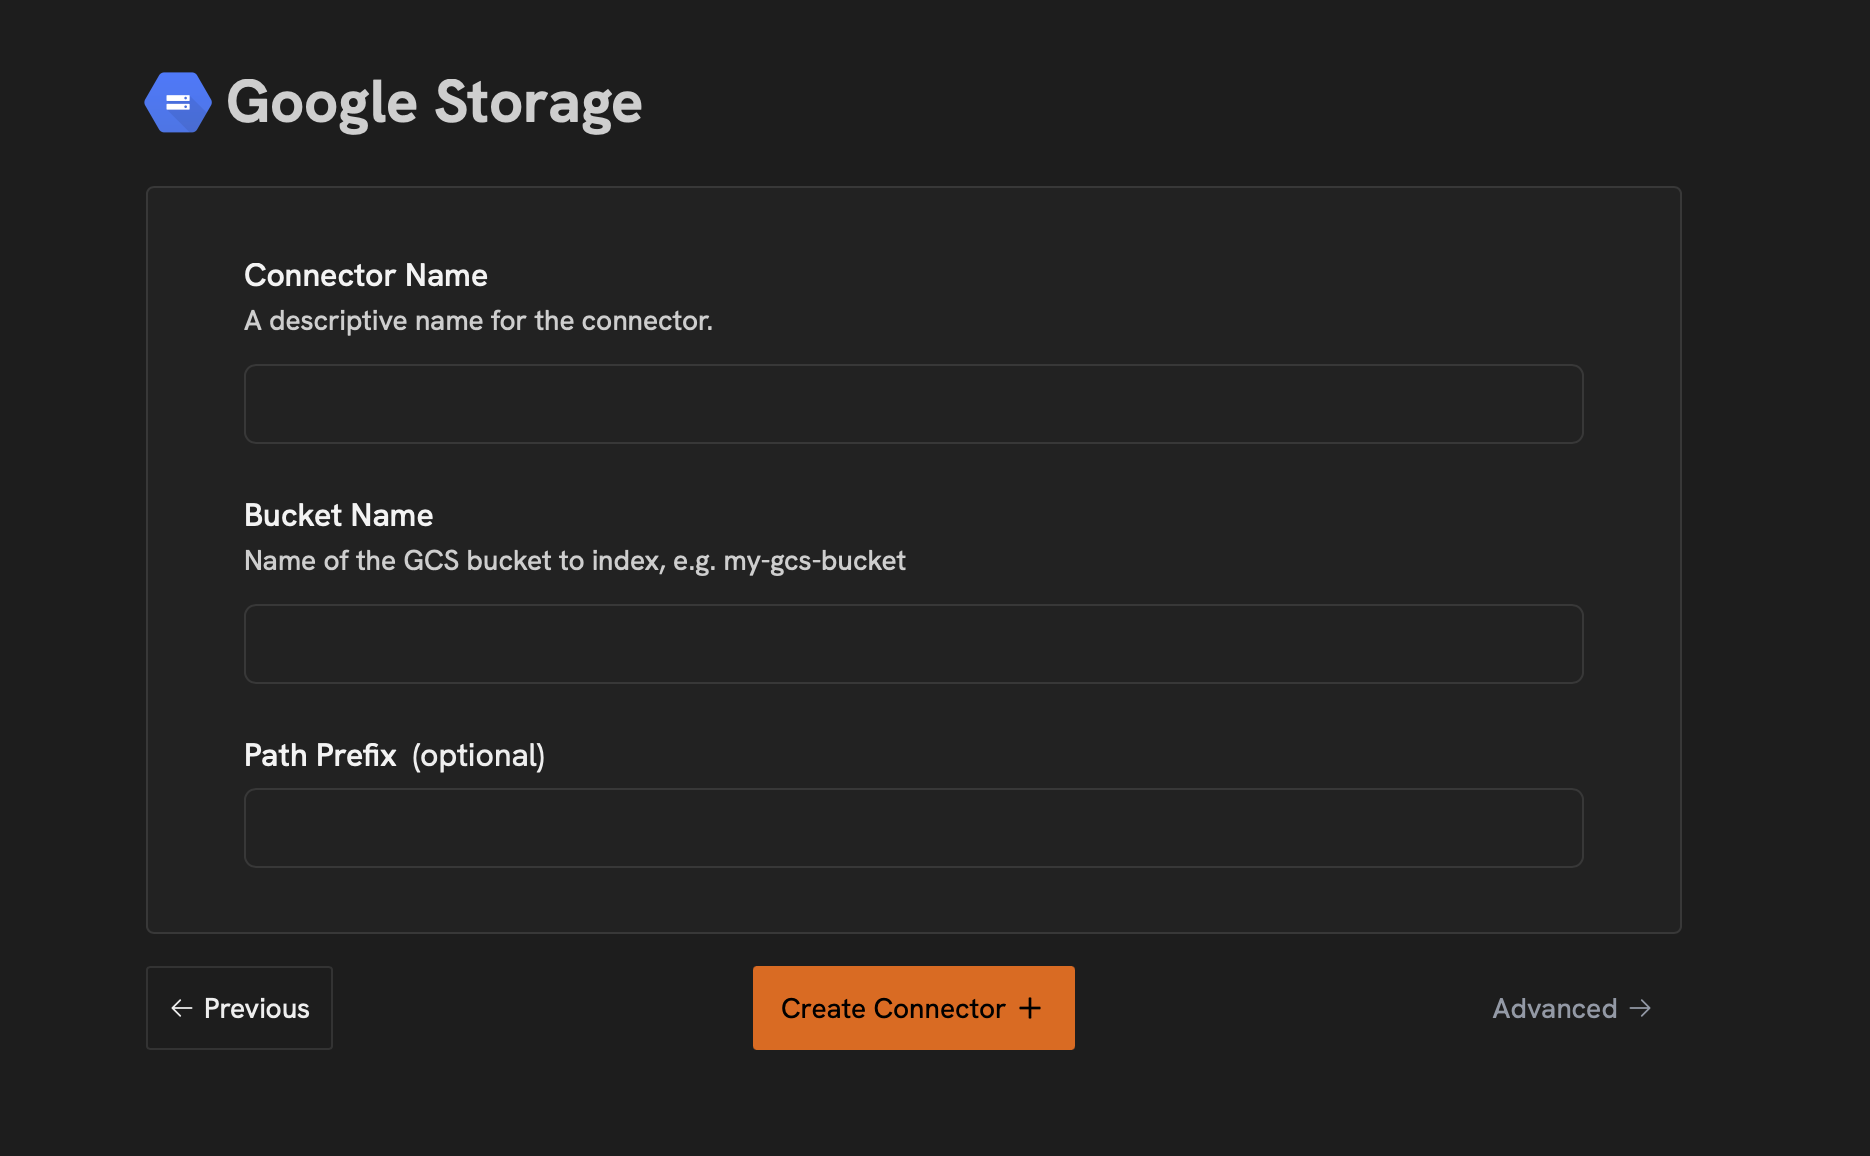
1
Open Google Storage connector
Navigate to the Admin Panel > Add Connector > Google Storage.
2
Create credentials
Click Create New to create a new credential.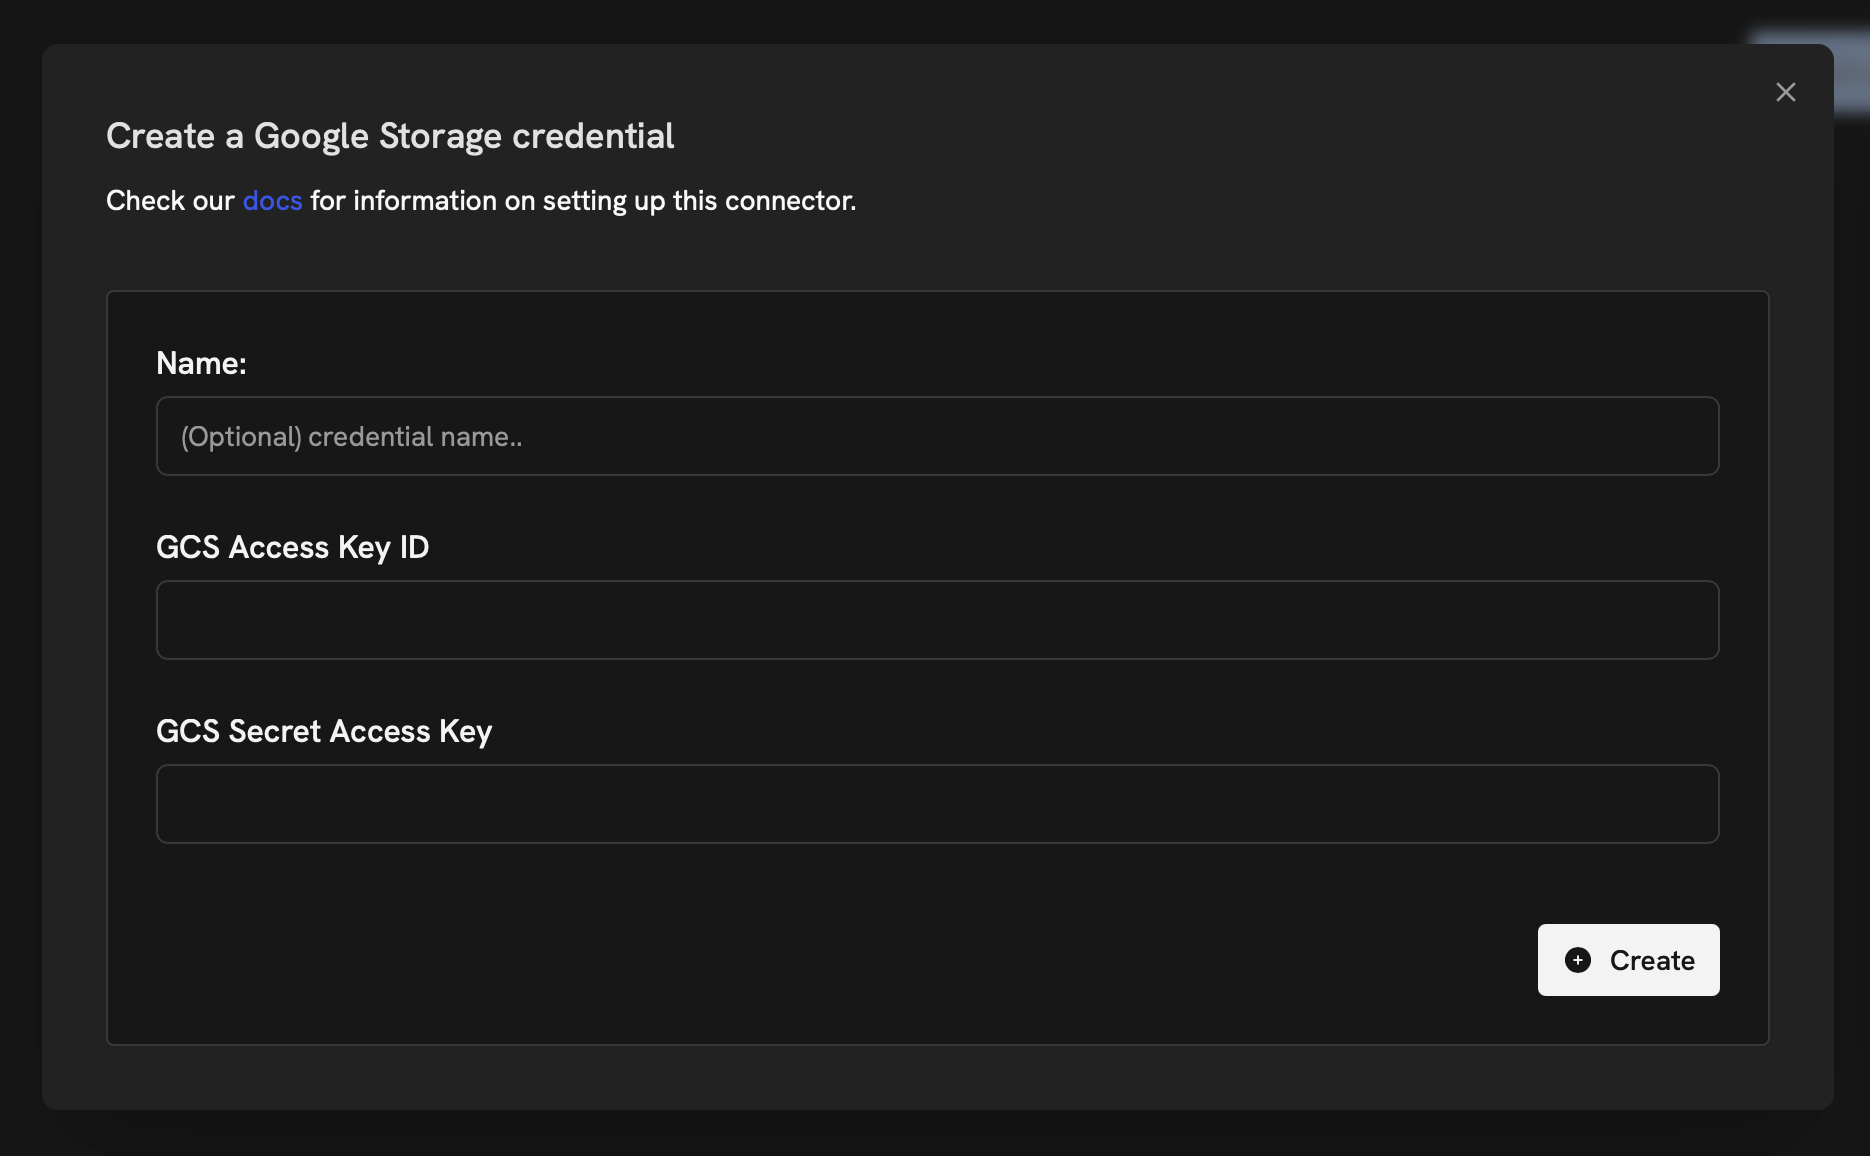
3
Enter keys and connect
Paste your Access key and Secret in the form. Click Create and Continue. Name your connector,
specify the GCS bucket you would like to index, and click Create Connector.