Authorization
1
Create Google Cloud Project
2
Enable Gmail API and Admin SDK
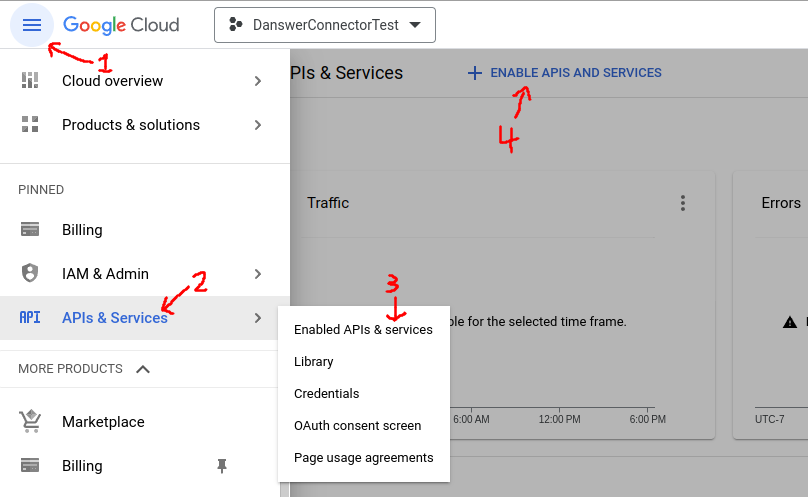
- On the left panel, open APIs & services
- Go to Enabled APIs and services
- On the top click +ENABLE APIS AND SERVICES
- Search for Gmail API and click ENABLE
- Alternatively visit this link, select your project and enable the Gmail API
- Also enable Admin SDK API (search and enable)
3
Create Service Account
- Go to the Service Account management page in Google Cloud.
- Click
Create Service Accountbutton and fill out the fields in step 1. You can ignore steps 2 and 3. - Go to the
Keyssection, and clickAdd Key. Download this key, you will need to upload it to Onyx later.
- To give the service account the proper permissions you will have to navigate to this link
- Then select
Manage, selectOverride parent's policyand then selectNot enforcedunderRules. - Finally, select
SET POLICY
4
Grant domain-wide delegation
Give this Service Account read-only access to Gmail
- Copy the
Unique IDof the Service Account - Go to the Domain-wide Delegation page in the Google Admin Console.
- Click
Add new, fill in the client ID with theUnique IDof the Service account - Copy this comma separated list of scopes and paste it into field
OAuth scopes:https://www.googleapis.com/auth/gmail.readonly,https://www.googleapis.com/auth/admin.directory.group.readonly,https://www.googleapis.com/auth/admin.directory.user.readonly