June 2025 Update
Slack has changed their Terms of Service, preventing users from indexing their data (source: Slack). As a result, the only way to add Slack information into Onyx is by using thesearch APIs that Slack provides.
These APIs are significantly slower and lower quality than the previous index-based approach.
Your data is your data — if you care about higher quality Slack search then please talk to your customer success
representative and make it clear that this change reduces the value you get out of Slack.
If you have any questions, please reach out to founders@onyx.app or send us a message in Slack.
Setting up
Authorization
1
Prerequisite
You must be an admin of the Slack workspace to set up the connector.
2
Open Slack apps
Navigate and sign in to https://api.slack.com/apps.
3
Create new app
Click the Create New App button in the top right. Select From an app manifest option.
Select the relevant workspace from the dropdown and click Next.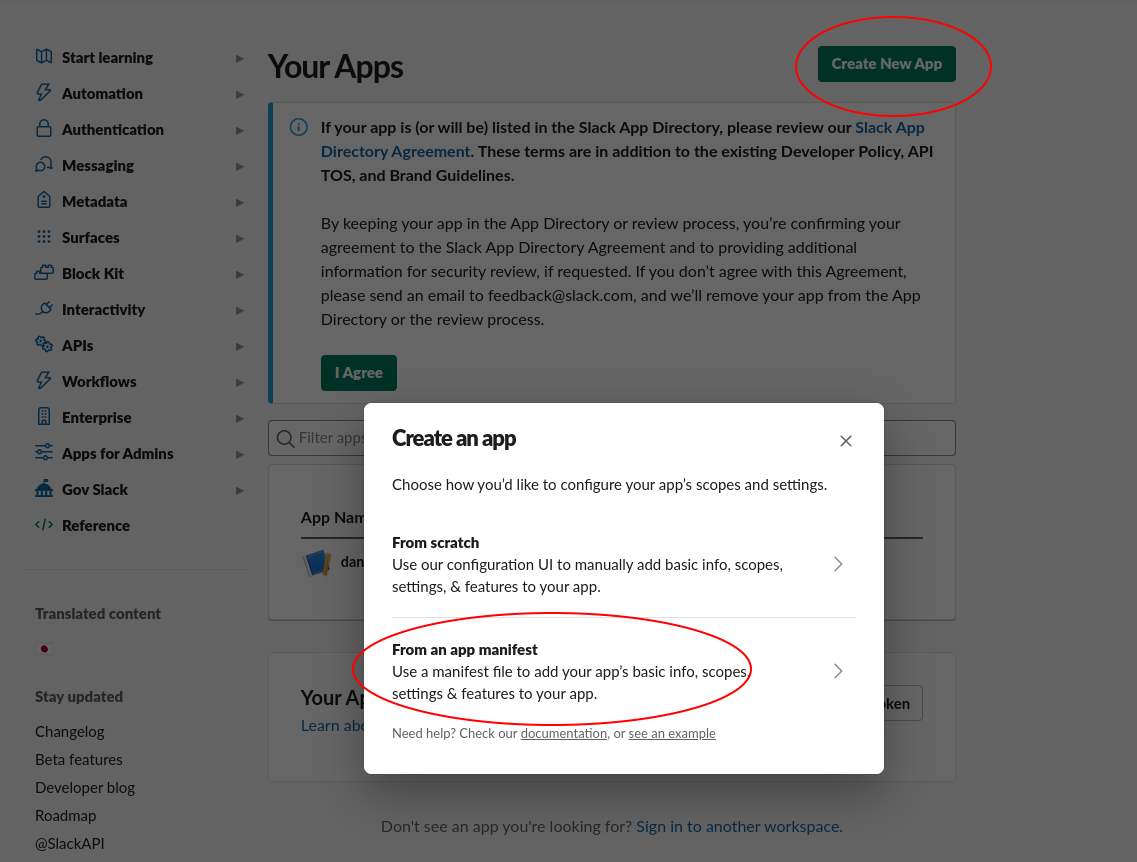
4
Paste manifest
Select the “YAML” tab, paste the following manifest into the text box, and click Next:
For Onyx Cloud, the
redirect_urls value should be https://cloud.onyx.app/federated/oauth/callback.We do not currently support token rotation, so
token_rotation_enabled: false is necessary.1
Create app
Click the Create button.
2
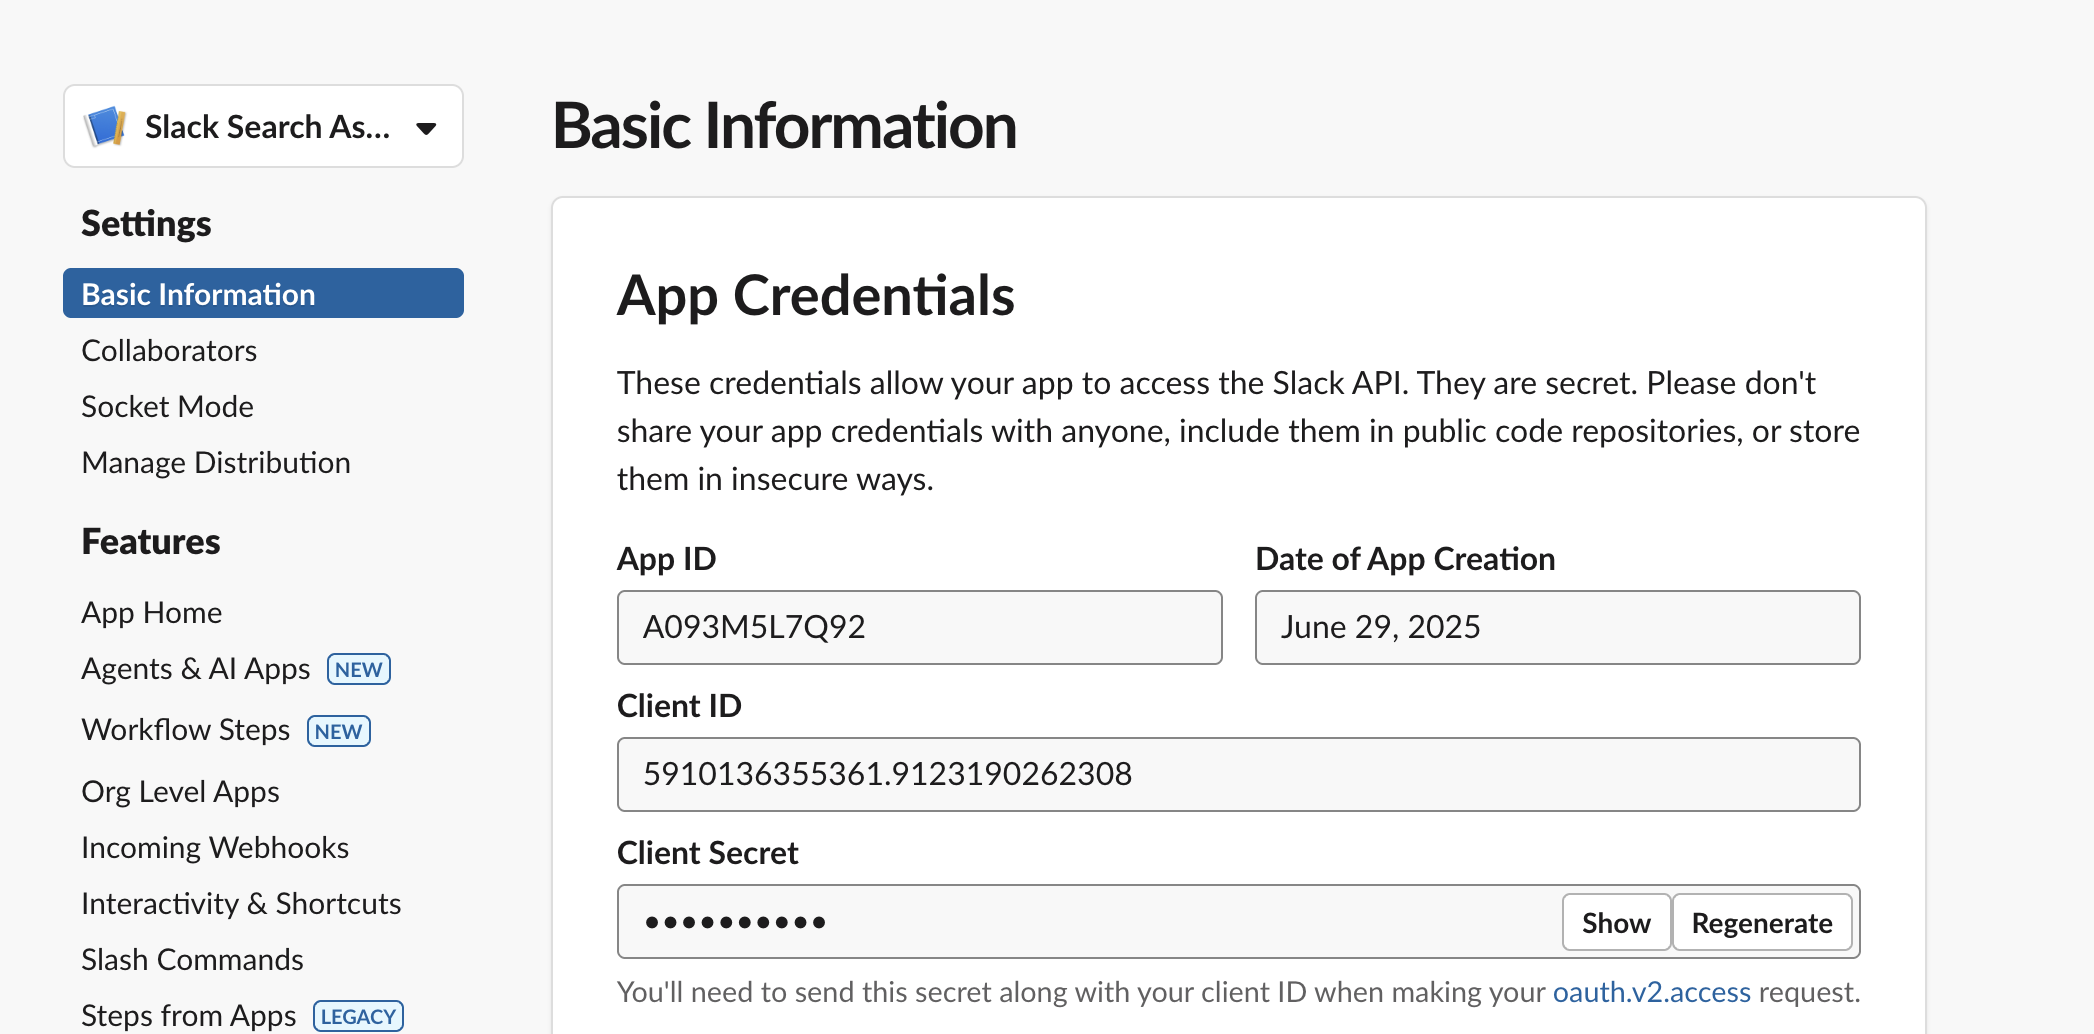
Open Basic Information
In the app page, navigate to the Basic Information tab under the Settings header.
3
Copy client credentials
Copy the Client ID and Client Secret. Store those somewhere safe for the next step.
Indexing
1
Open Slack connector
Navigate to the Connector Dashboard and select the Slack Connector.
2
Enter client credentials
Enter the Client ID and Client Secret from step 7. Click the Create button.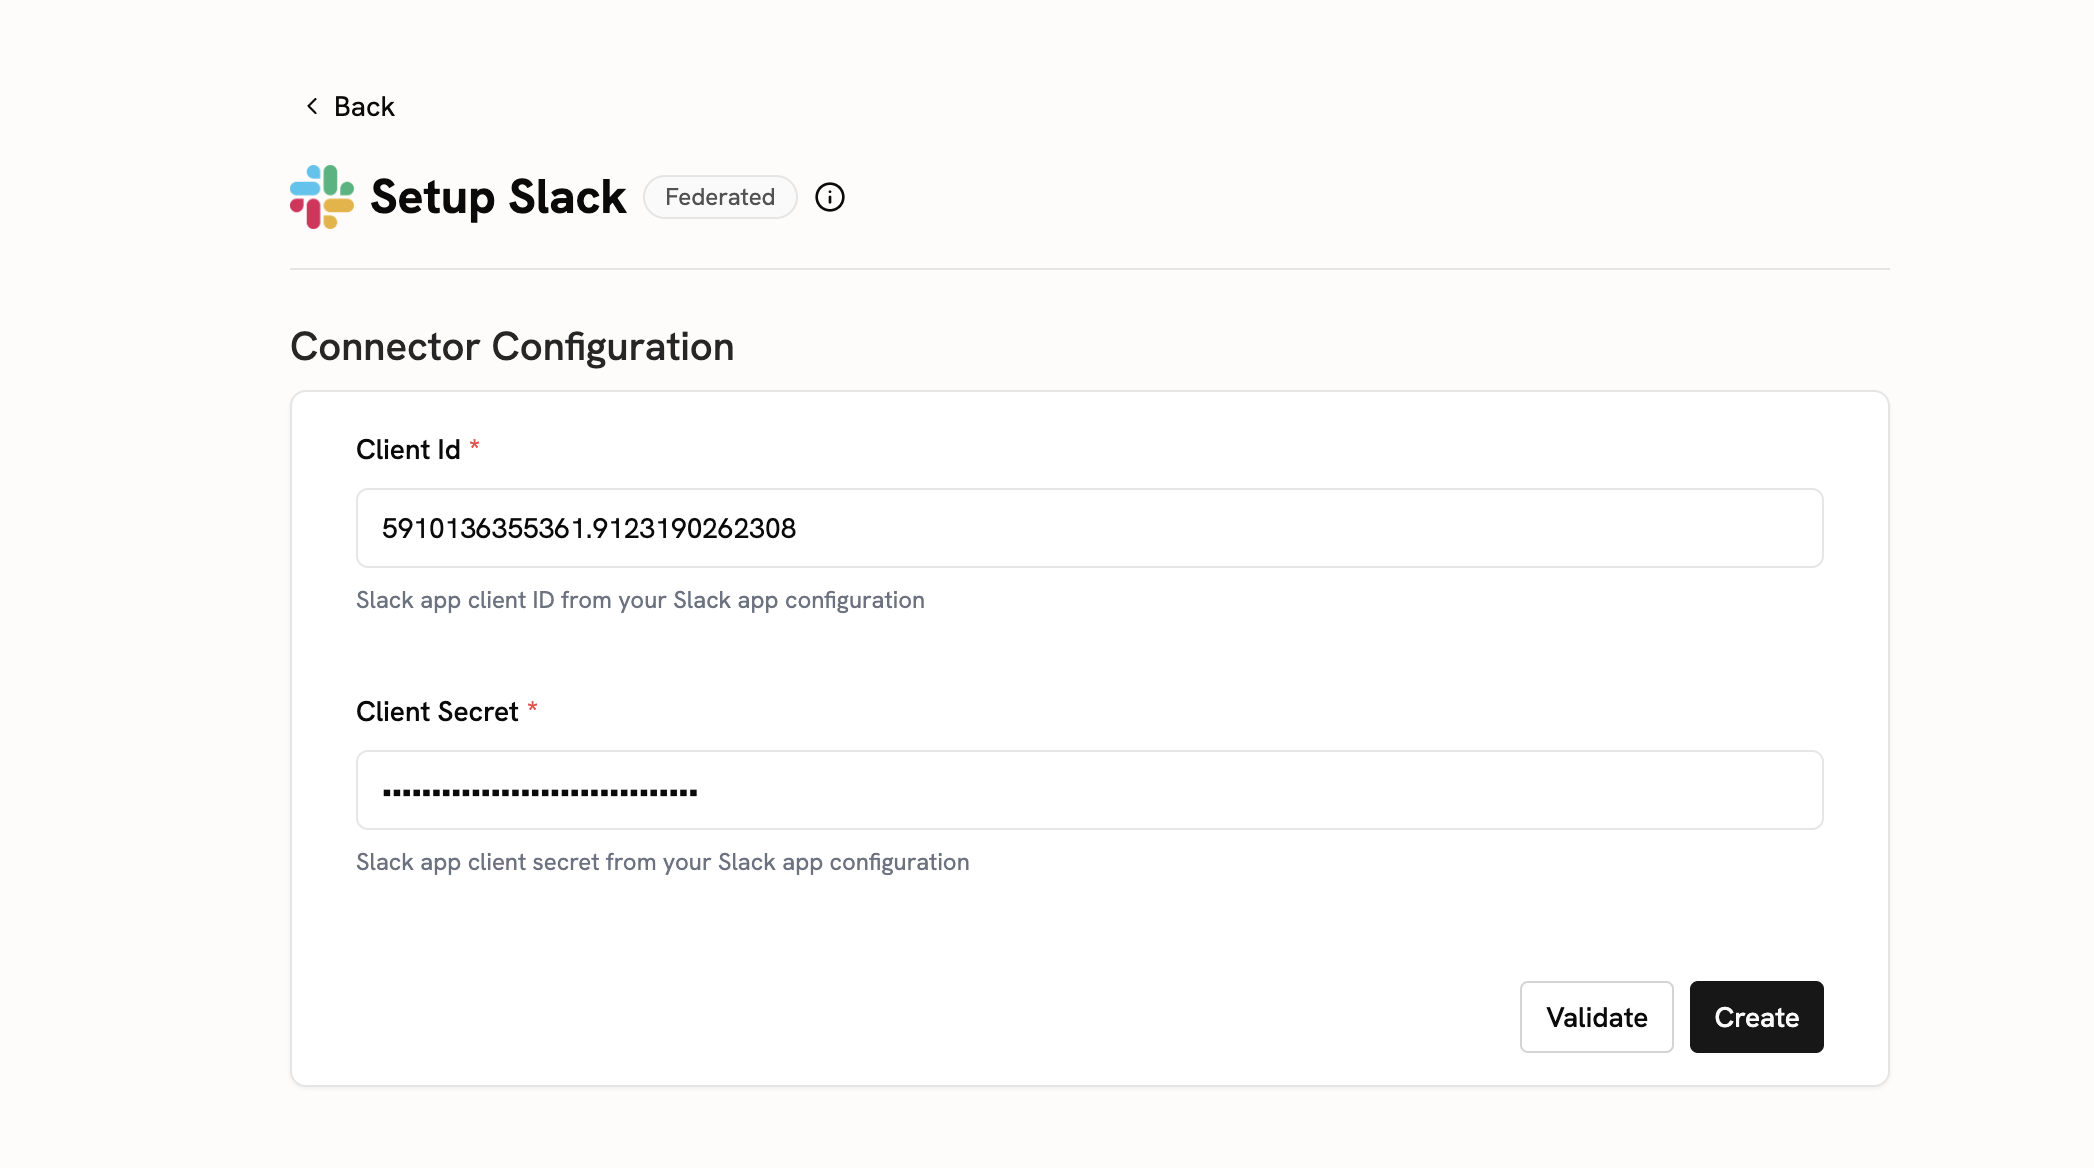
3
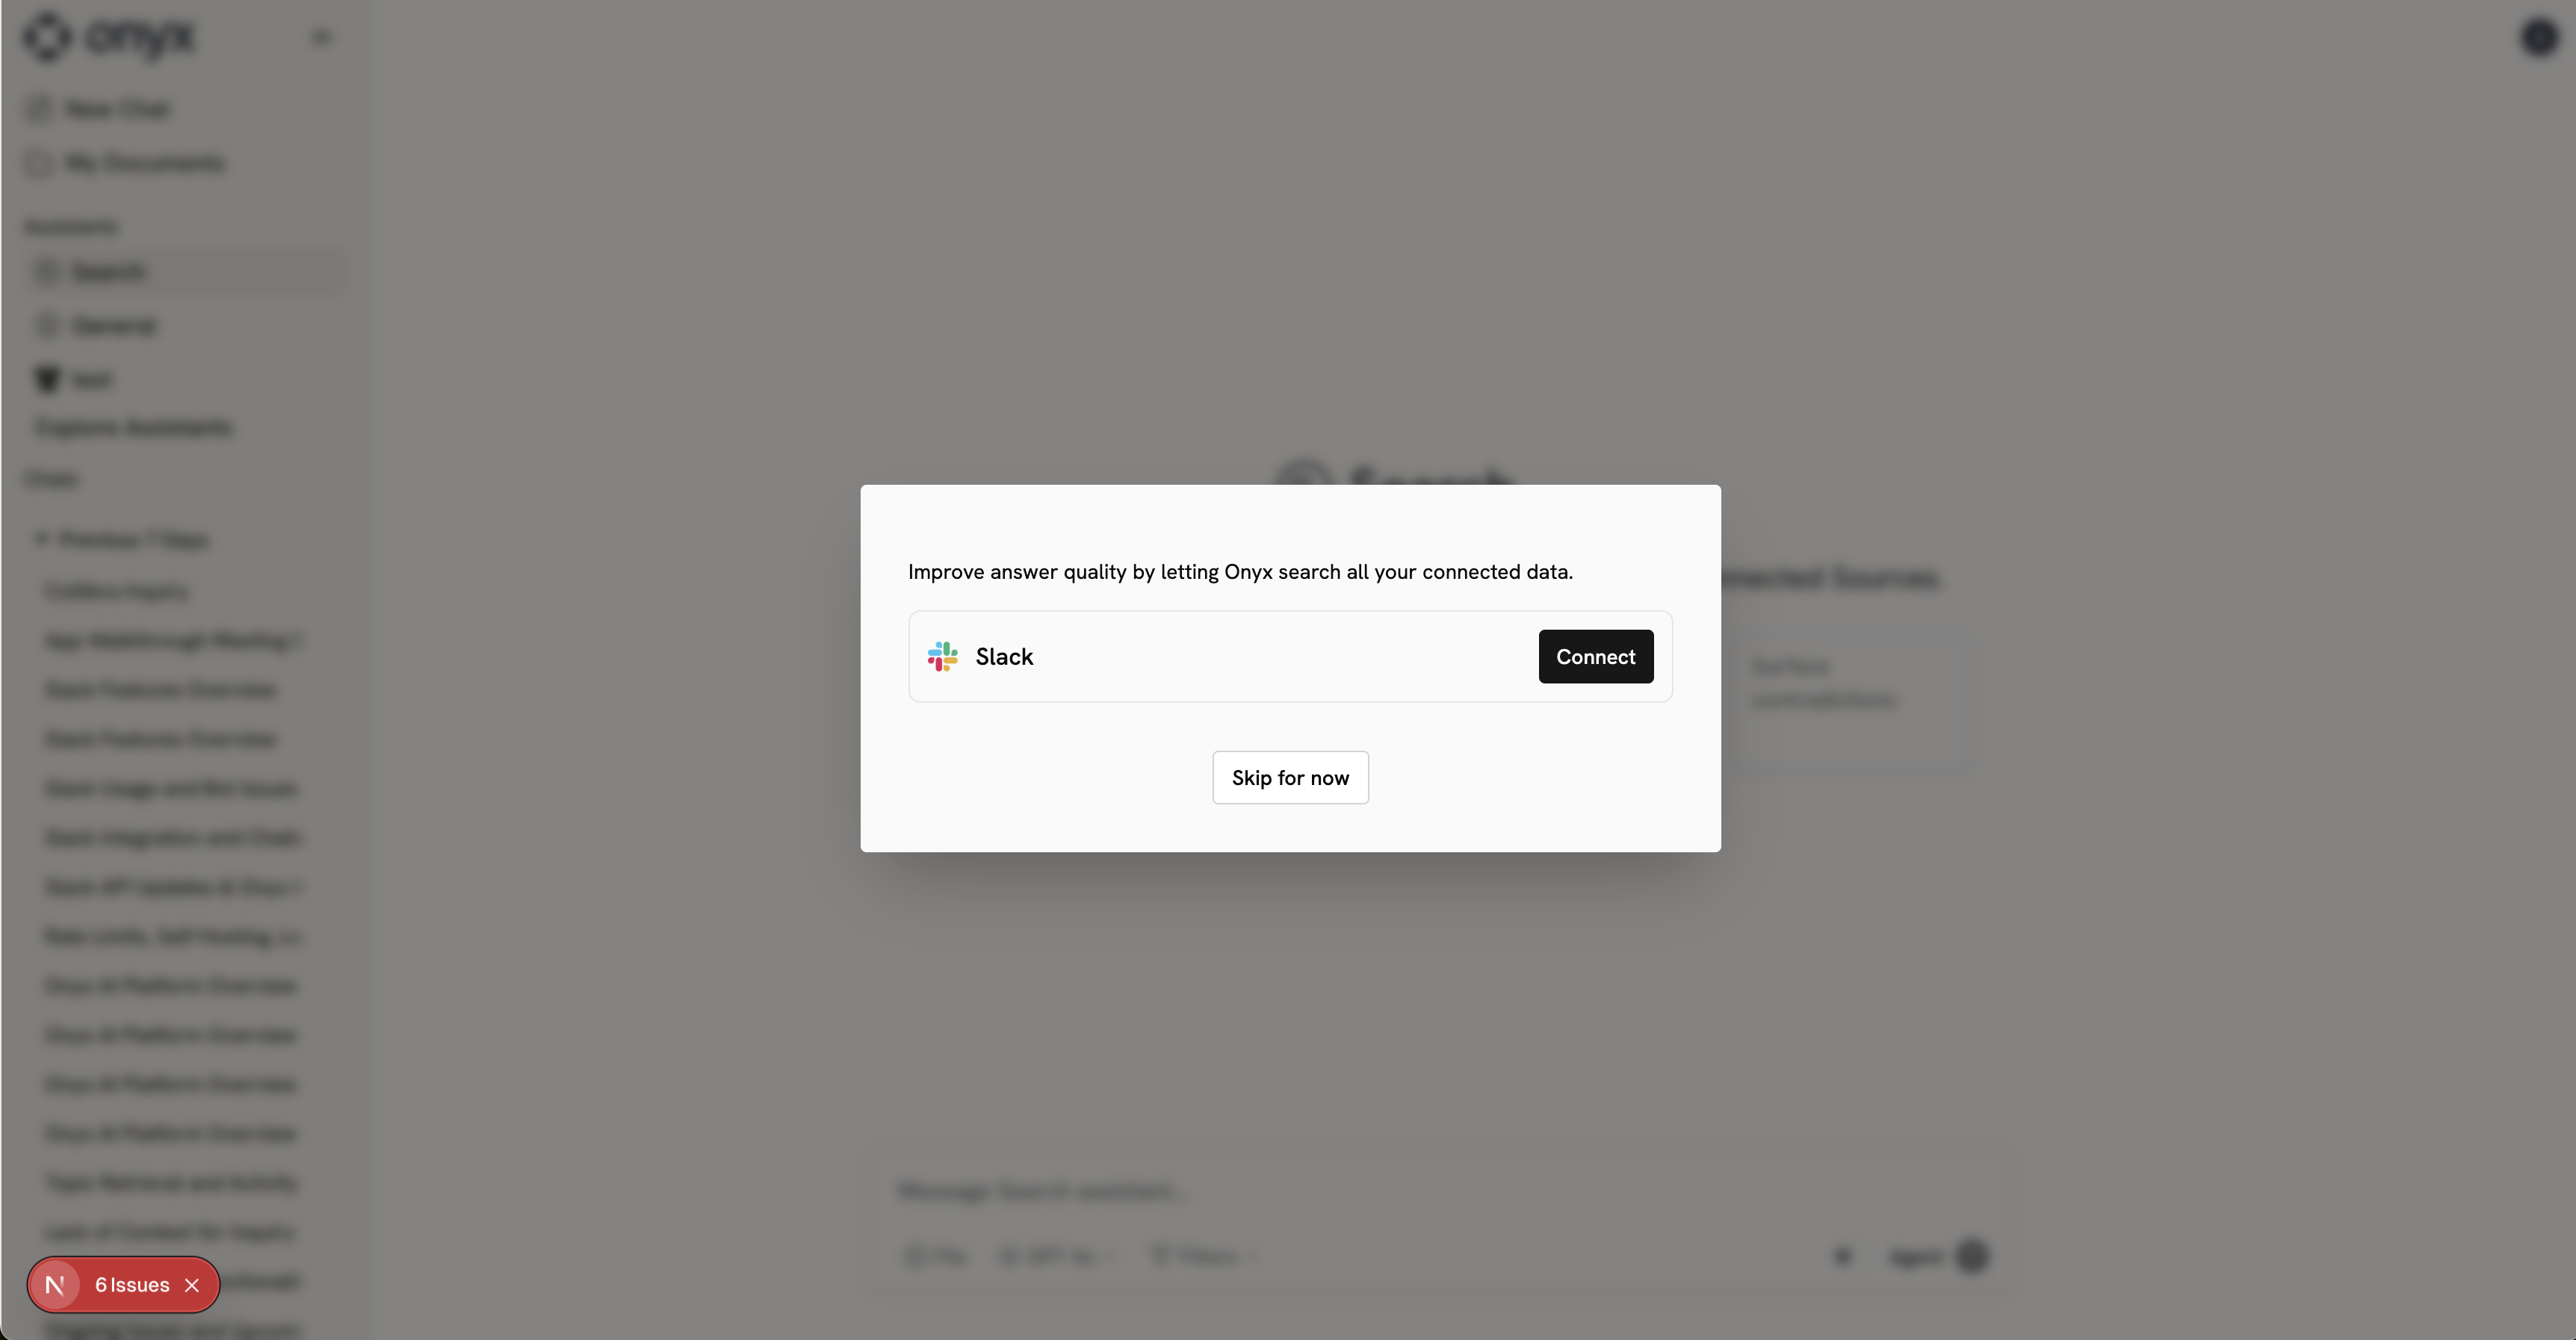
Complete OAuth
Head back to the main Chat page and go through the OAuth flow!
Every user will need to go through this OAuth flow. All DMs, public channels,
and private channels that the user has access to will be searchable.