Prerequisites
- Ensure your EC2 instance has an IAM role attached.
- Verify the instance profile is properly configured via AWS Console under EC2 › Instance Settings › Attach/Replace IAM role.
Updating the Existing IAM Role
Since your EC2 instance already has an IAM role attached, you need to update it with the necessary S3 permissions:1
Open role in IAM
In AWS Console, go to IAM › Roles and find your EC2 instance’s existing role.
2
Attach S3 policy
Click on the role and go to the Permissions tab. Click Add permissions › Attach policies.
Search for and select AmazonS3ReadOnlyAccess policy. Click Attach policies.
1
Create inline policy
In the same role’s Permissions tab, click Add permissions › Create inline policy.
Switch to JSON and add this policy (replace Name the policy (e.g.,
your-source-bucket-name):OnyxS3Access) and click Create policy.Credential Entry in Onyx
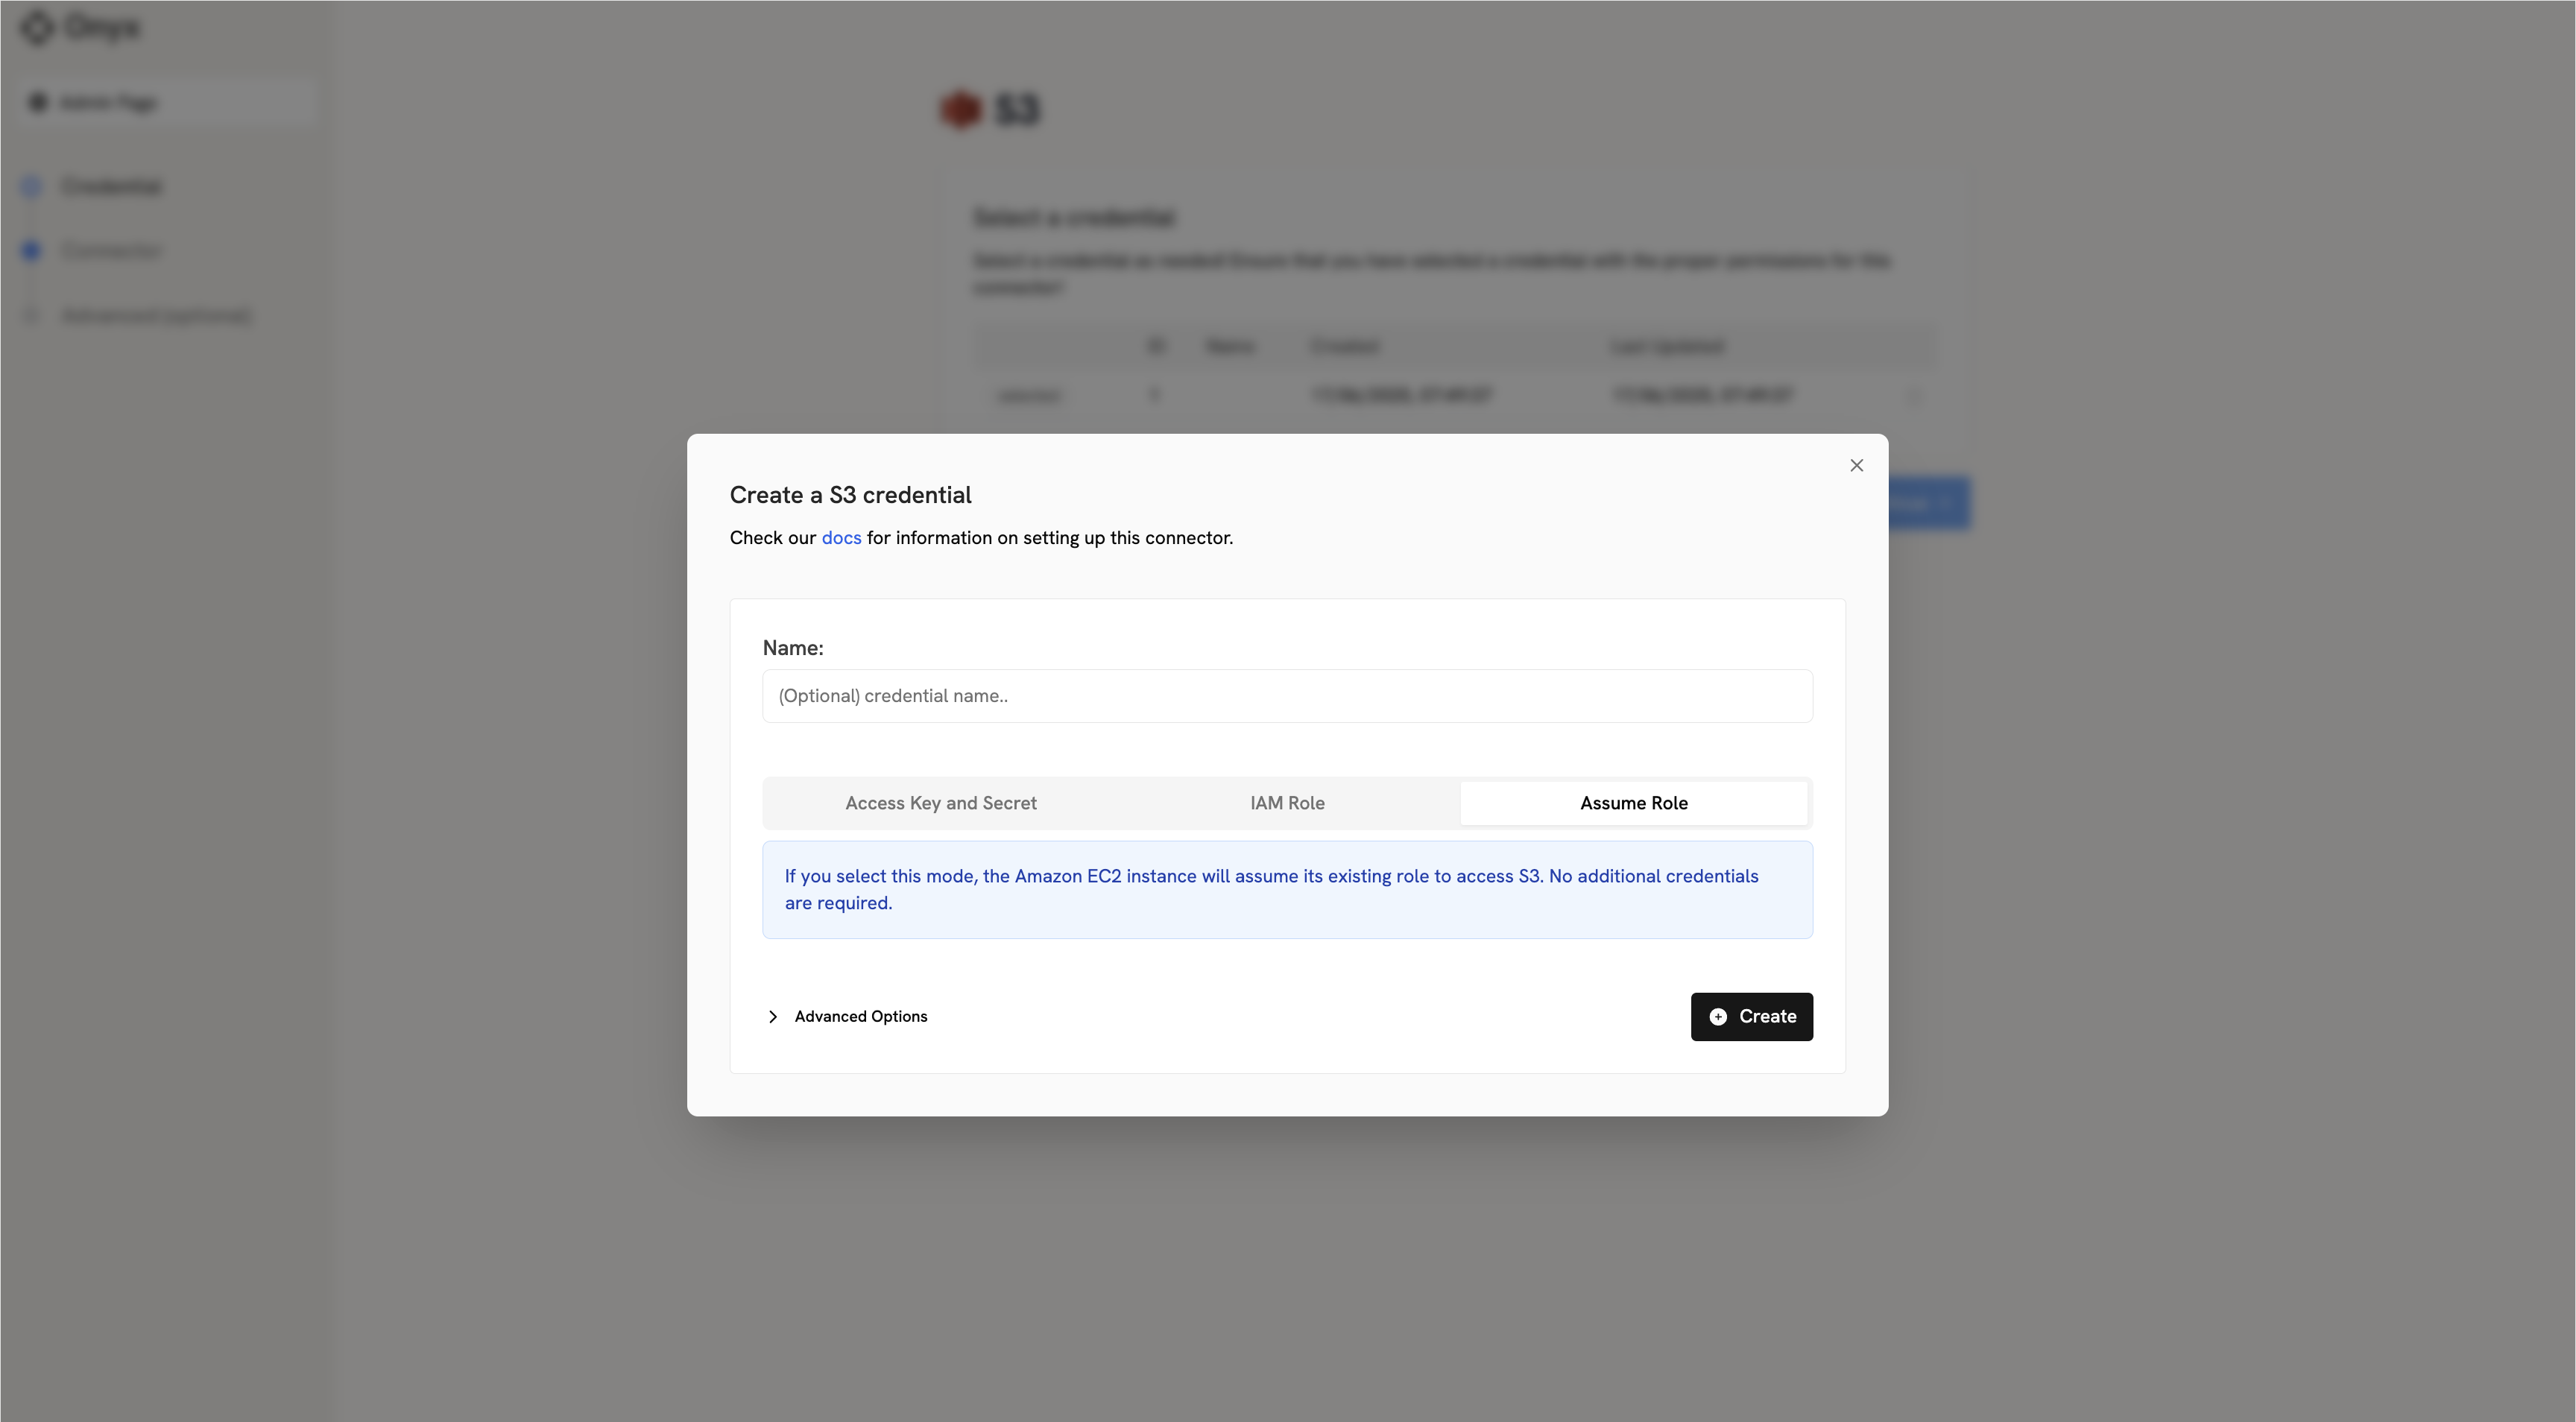
When configuring the S3 connector in Onyx, you’ll need to:1
Open Assume Role tab
Click on the Assume Role tab
2
No credentials required
No credentials need to be entered — the connector automatically uses your EC2 instance’s attached role.