When to use this method
- When you need to segregate permissions, granting specific S3 access without modifying your EC2 instance’s main role
- When you require temporary, frequently rotated credentials for S3 access, without managing long-lived access keys
- When working in multi-account AWS environments, enabling cross-account S3 access through role assumption
Setting up the IAM Role
1
Create the S3 Access Role
- In AWS Console, go to IAM › Roles and click Create role
- For Trusted entity type, select Custom trust policy
- In the Custom trust policy JSON editor, configure who can assume this role. You can choose from:
- IAM Role:
"AWS": "arn:aws:iam::YOUR_AWS_ACCOUNT_ID:role/YourExistingEC2Role" - AWS Service:
"Service": "ec2.amazonaws.com"(for EC2 instances)
YOUR_AWS_ACCOUNT_ID and YourExistingEC2Role):- Click Next
- Attach AmazonS3ReadOnlyAccess policy or create a custom policy for specific buckets:
- Name it (e.g.,
OnyxS3AccessRole) and click Create role - Copy the Role ARN from the role summary page (e.g.,
arn:aws:iam::YOUR_AWS_ACCOUNT_ID:role/YOUR_CREATED_ROLE_NAME)

2
Grant AssumeRole to EC2 instance role
- Go back to IAM > Roles and find your EC2 instance’s existing role
- Click on the role and go to the Permissions tab
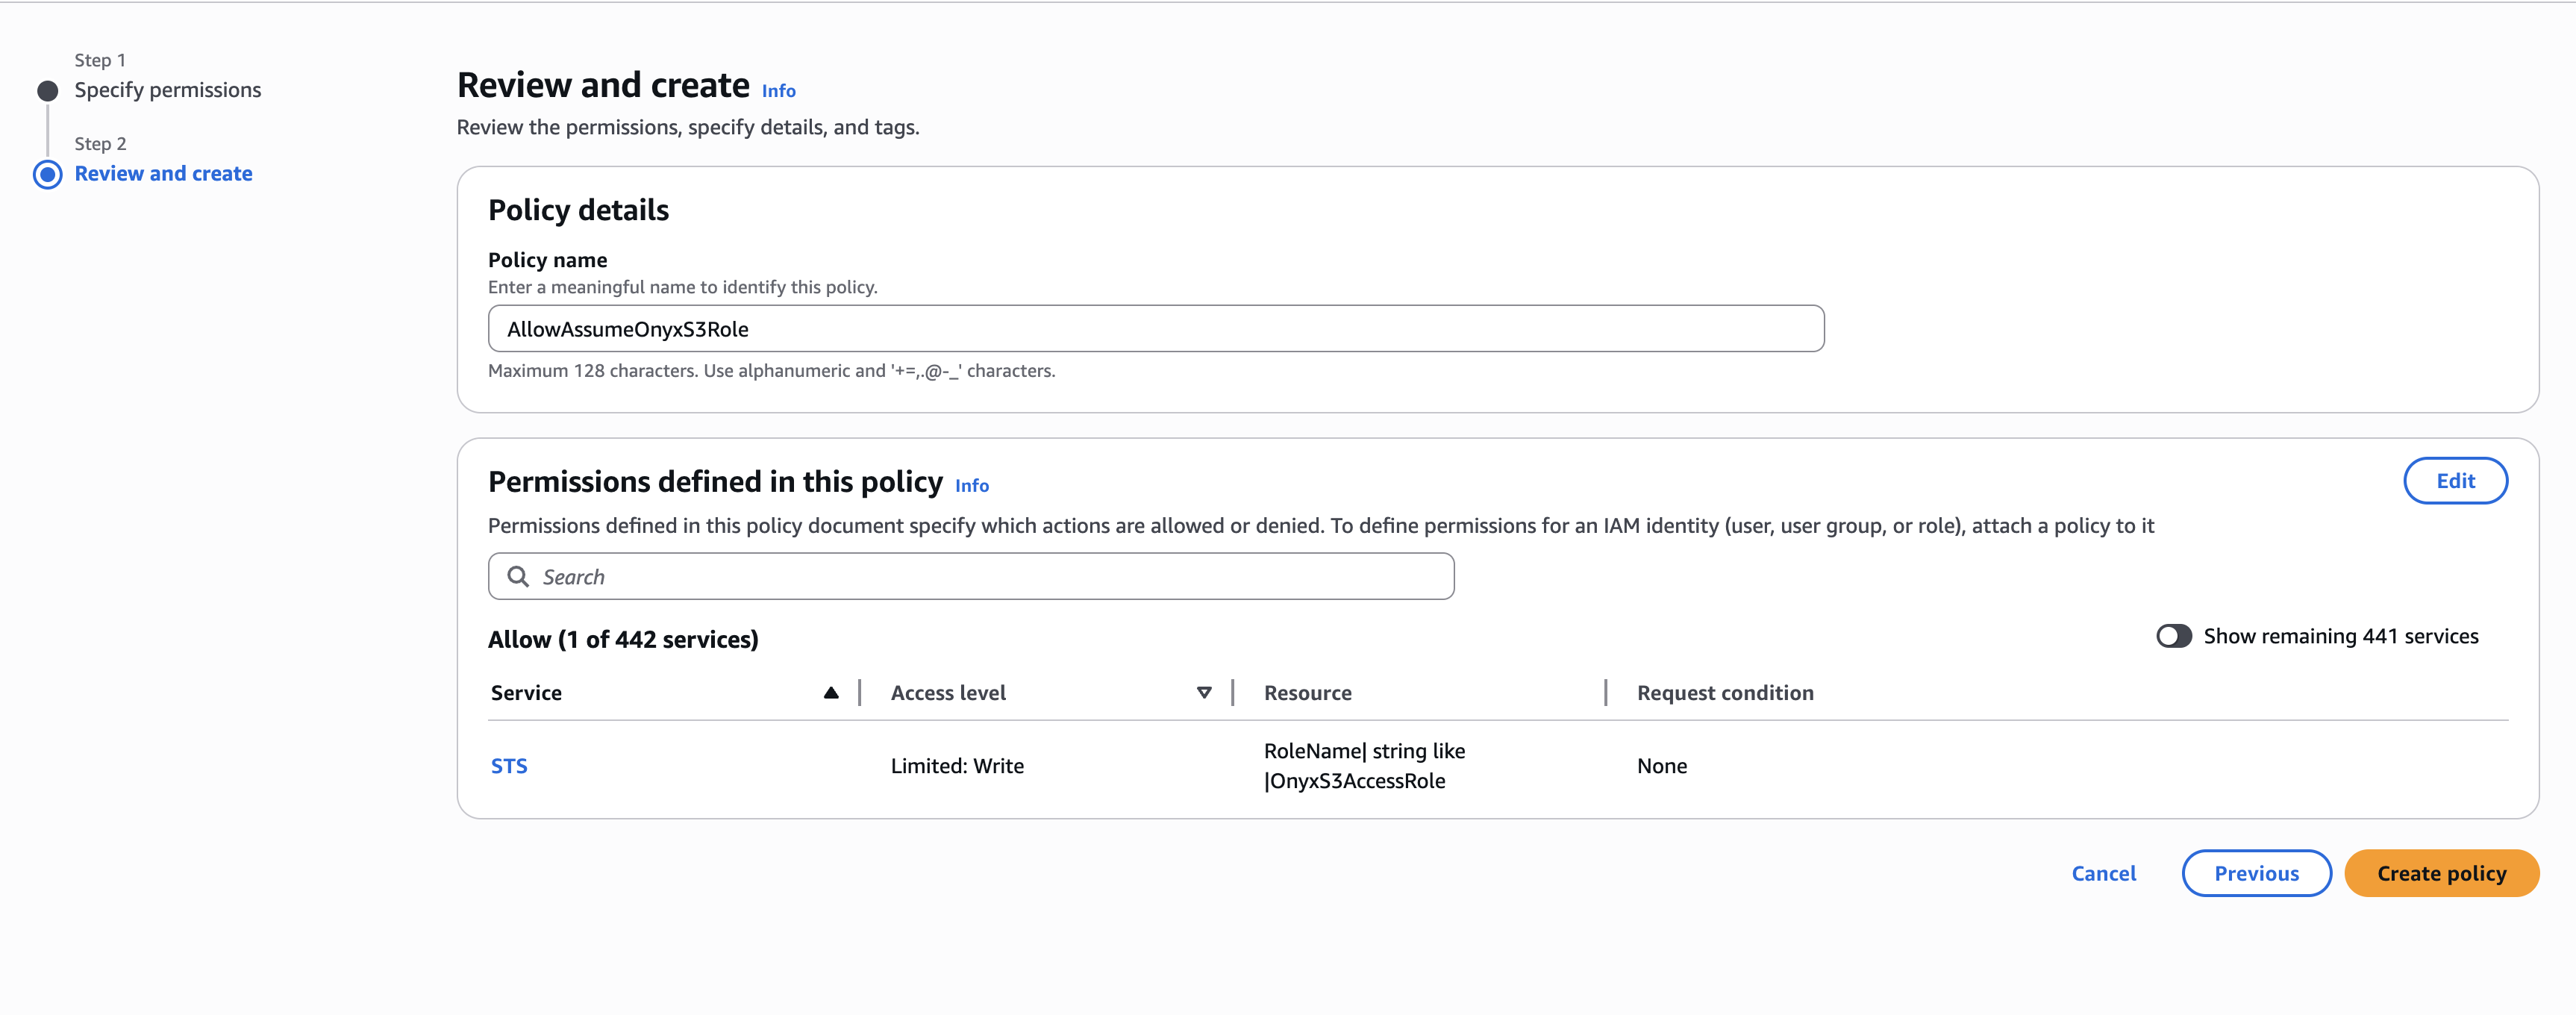
- Click Add permissions > Create inline policy
- Switch to JSON and add this policy (replace with your actual account ID and role name):
- Name the policy (e.g.,
AllowAssumeOnyxS3Role) and click Create policy
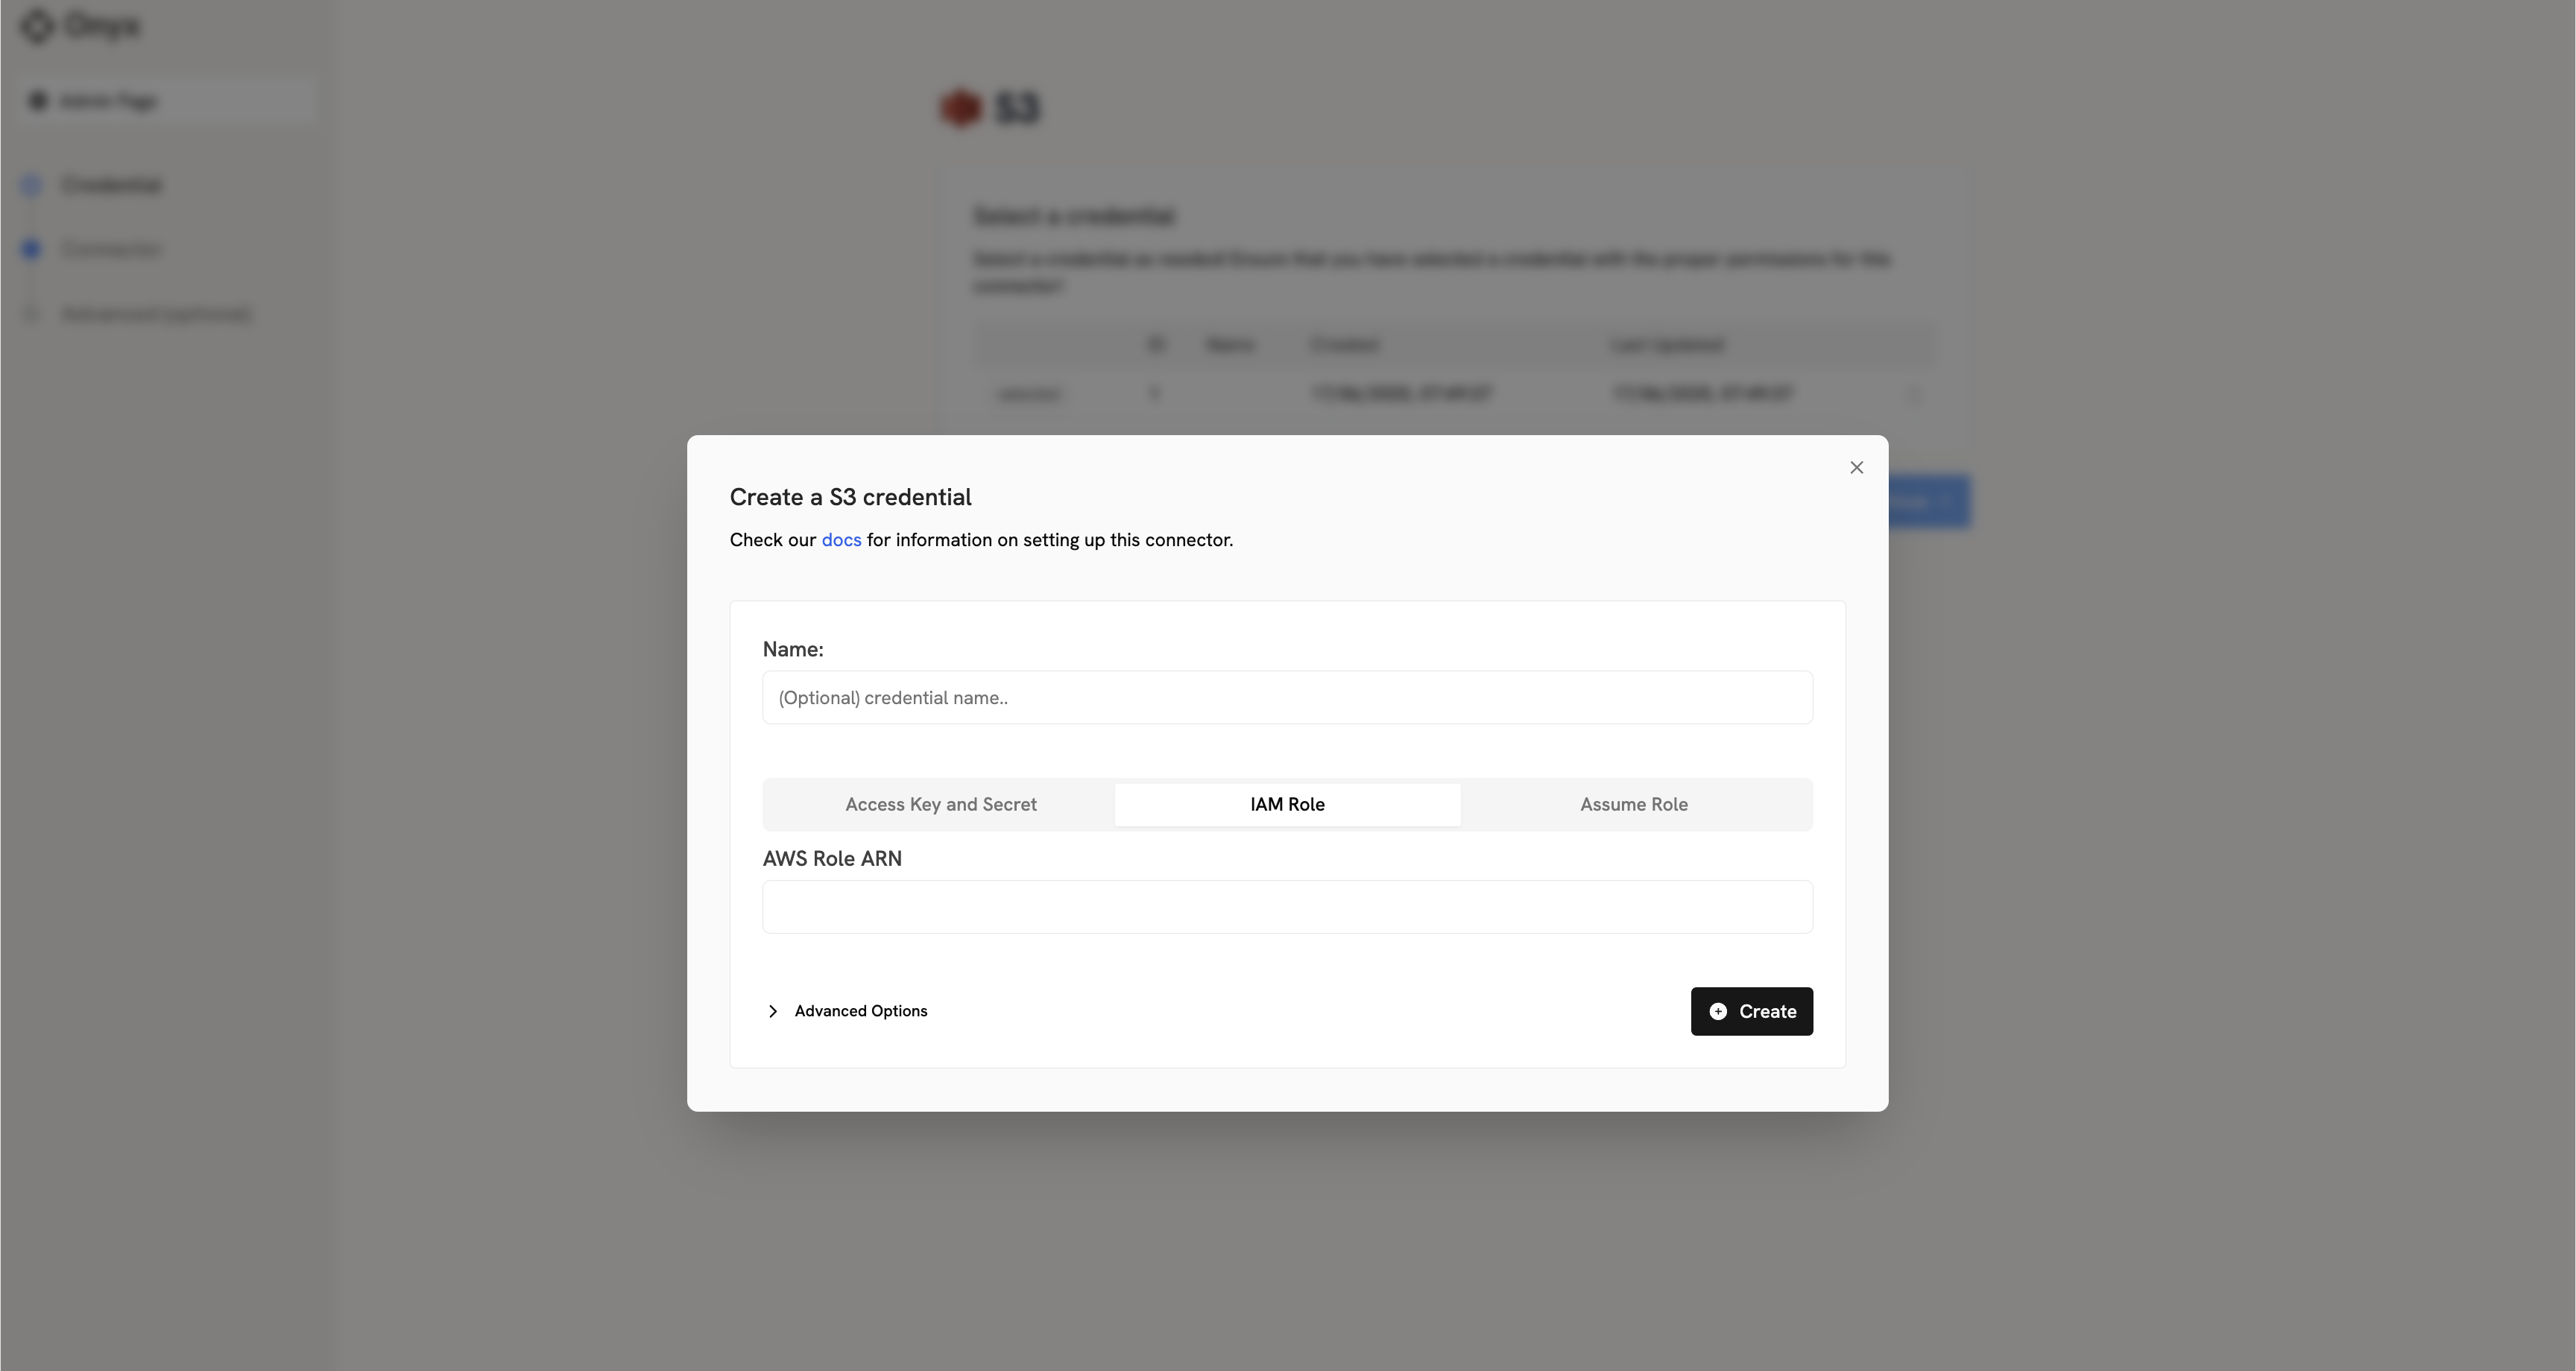
Credential Entry in Onyx
When configuring the S3 connector in Onyx, you’ll need to:1
Open IAM Role tab
Click on the IAM Role tab
2
Enter Role ARN
Enter the Role ARN you copied earlier (e.g.,
arn:aws:iam::YOUR_AWS_ACCOUNT_ID:role/YOUR_CREATED_ROLE_NAME)