

atlassian.net/wiki.
Before you begin
Use a dedicated Atlassian account for the connector. This keeps its access stable when employees change roles or leave. Grant the account product access and view access to every space and restricted page that you want to index. An API token never gives the account more access than it has in Confluence. For details, see Atlassian’s Confluence Cloud permission model and page restriction guide.Choose an authentication method
Onyx Cloud OAuth
If the credential screen shows Authorize with Confluence, select it. Approve the Atlassian consent screen, then choose the Confluence site. Onyx stores a refresh token and renews short-lived access tokens automatically. OAuth is the simplest option on Onyx Cloud. It is not the standard credential path for self-hosted Onyx. Use an API token for self-hosted Onyx or when the authorize button is not available.Atlassian API token
You can create an unscoped token or a scoped token. Atlassian recommends scoped tokens. Onyx supports both, but the Onyx checkbox must match the token type.1
Open Atlassian account security
Sign in as the connector account and open Atlassian account API
tokens.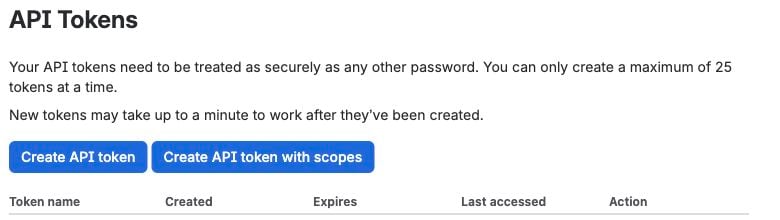
2
Create the token
Choose the button for your token type:
- For a scoped token, select Create API token with scopes. Choose Confluence, set an expiration date, and add the read scopes in the next step.
- For an unscoped token, select Create API token and set a label.
3
Grant scoped-token access
For a scoped token, grant the equivalent Confluence read access used by Onyx: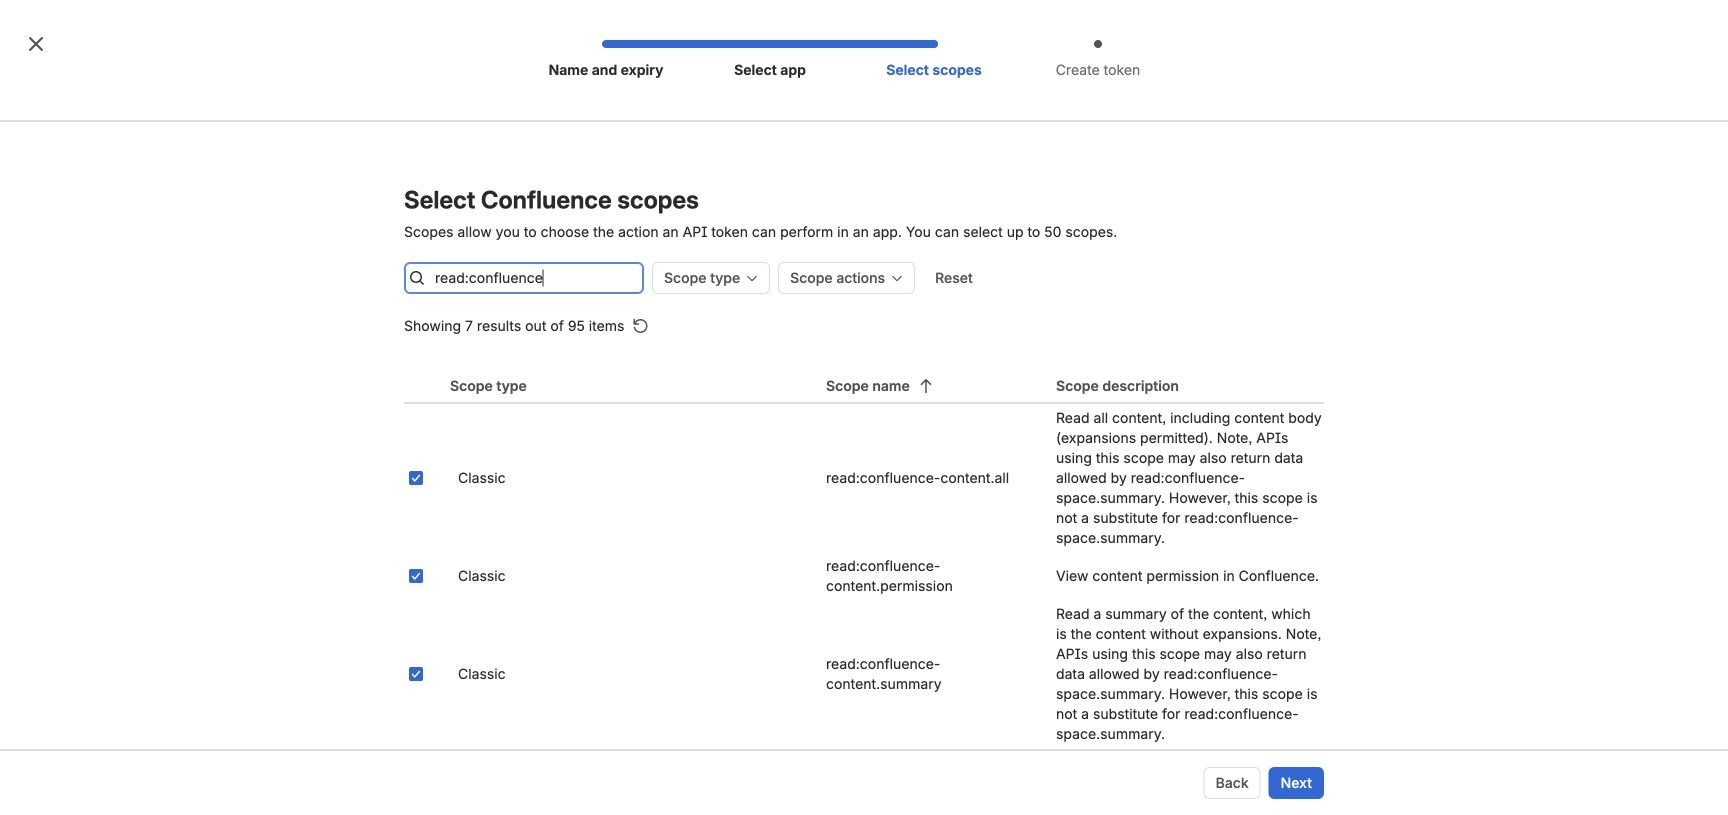
read:confluence-space.summaryread:confluence-propsread:confluence-content.allread:confluence-content.summaryread:confluence-content.permissionread:confluence-userread:confluence-groupsread:space:confluencereadonly:content.attachment:confluencesearch:confluenceread:attachment:confluenceread:content-details:confluence
4
Copy the token
Create and copy the token. Atlassian shows the token value once.
Store it in your secrets manager until you add it to Onyx.
Add the Cloud credential to Onyx
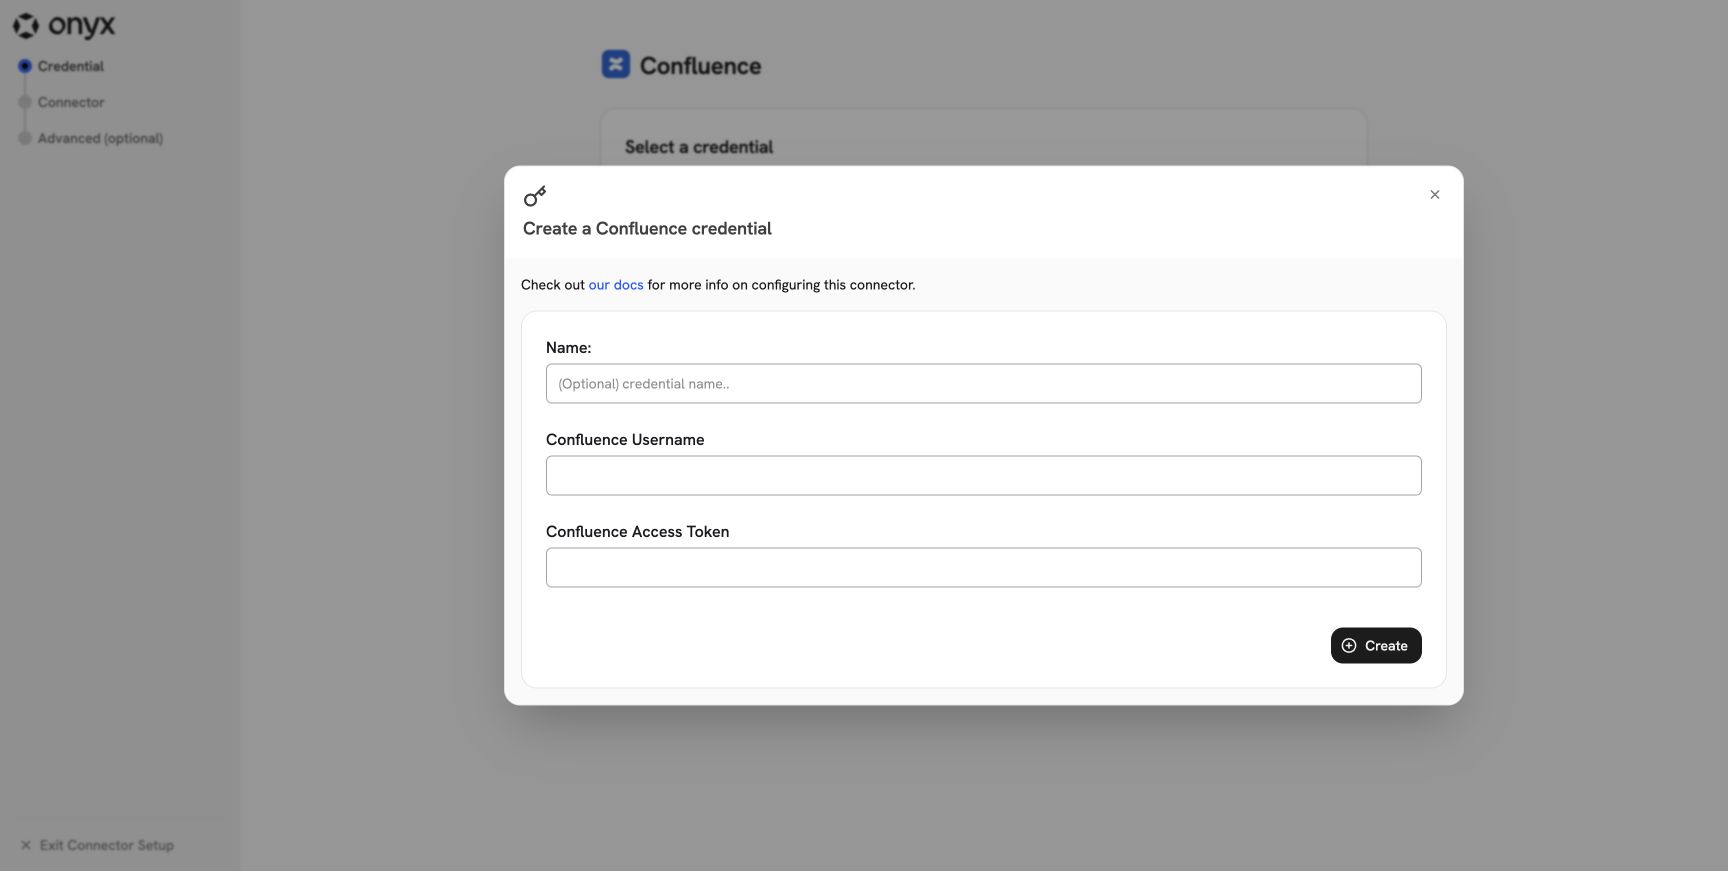
Open Admin Panel > Connectors > Confluence, select Create New, and enter:- Name: A clear name, such as
Confluence Cloud - docs account. - Confluence Username: The connector account’s Atlassian email address.
- Confluence Access Token: The API token.
Configure the Cloud connector
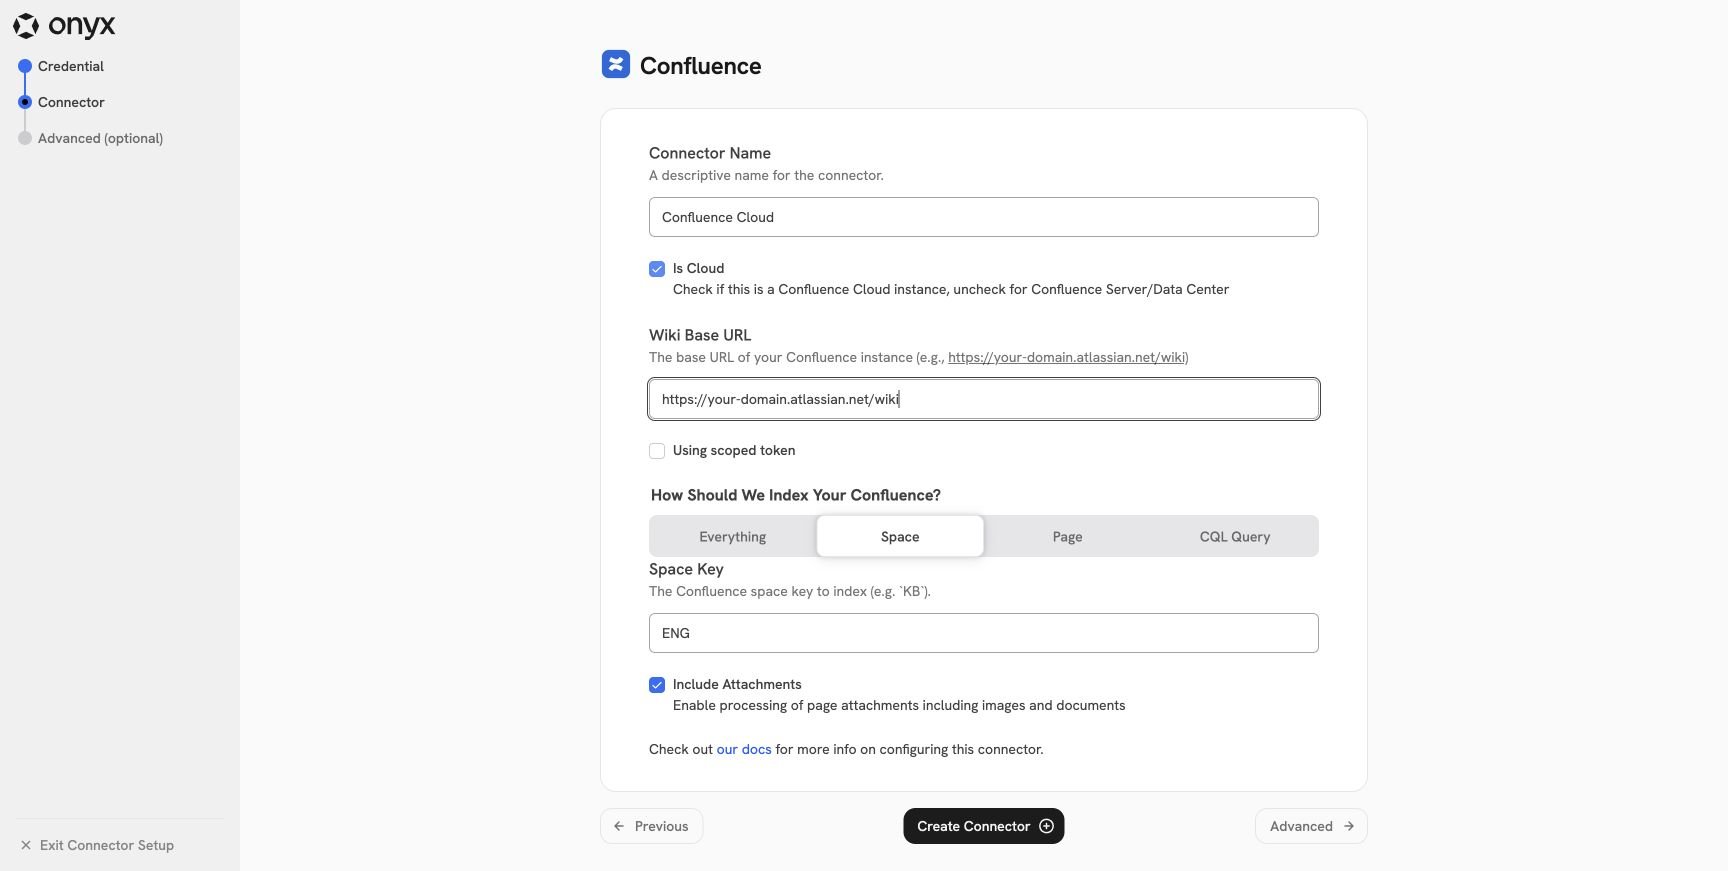
Select the credential, select Continue, and configure these fields:- Enable Is Cloud.
- Set Wiki Base URL to
https://your-domain.atlassian.net/wiki. Keep/wikiin the URL. - Enable Using scoped token only when you created the token with scopes.
- Choose the indexing scope and attachment setting described in the Confluence overview.
Configure Cloud permission sync
Permission sync requires Onyx Enterprise Edition or Onyx Cloud. It reads space permissions, page restrictions, inherited ancestor restrictions, users, groups, and group membership. Before you enable it:- Use a Confluence administrator account, or make the connector account a space administrator for every indexed space.
- Keep the permission-related token scopes from the scoped-token list.
- Confirm that user email addresses are visible to the connector account. Atlassian users control this under Manage account > Profile and visibility > Contact. See Atlassian’s email visibility guide.
- Confirm that each Confluence email matches the user’s Onyx email.